1. Introduction
This manual provides comprehensive instructions for the AT&T TL88102 DECT 6.0 2-Line Cordless Telephone System, including the TL88102 base unit and TL88002 accessory handsets. This system is designed for clear, interference-free communication with extended range, featuring a 2-line answering system with caller ID/call waiting, and intercom capabilities.
The AT&T TL88102 system is ideal for busy households or home offices requiring dual line functionality and multiple cordless handsets for convenience.

Figure 1: The AT&T TL88102 base unit with one cordless handset, and three additional TL88002 accessory handsets.
2. Setup
2.1 Package Contents
- AT&T TL88102 Base Unit with Cordless Handset
- AC Power Adapter for Base Unit
- Telephone Line Cord
- TL88002 Accessory Handsets (quantity may vary based on bundle)
- Chargers for Accessory Handsets
- Rechargeable Batteries for Handsets (AAA batteries required)
2.2 Connecting the Base Unit
- Connect the small end of the AC power adapter to the POWER jack on the back of the TL88102 base unit.
- Plug the large end of the AC power adapter into a standard electrical outlet.
- Connect one end of the telephone line cord to the TEL LINE 1 or TEL LINE 2 jack on the back of the base unit. If using two lines, connect the second line cord to the other TEL LINE jack.
- Plug the other end(s) of the telephone line cord(s) into your telephone wall jack(s).
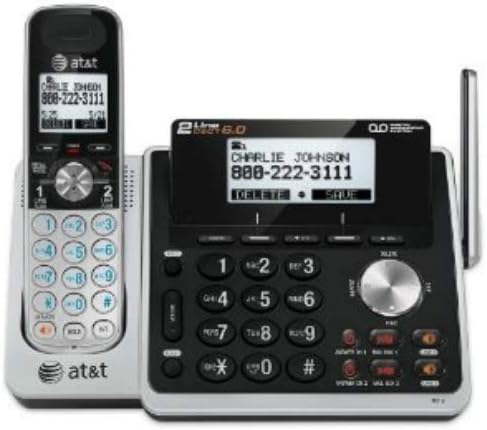
Figure 2: Rear view of the TL88102 base unit, illustrating the connection points for power and telephone lines.
2.3 Installing and Charging Handset Batteries
- Open the battery compartment cover on the back of each cordless handset.
- Insert the supplied rechargeable AAA batteries, observing the correct polarity (+ and - markings).
- Close the battery compartment cover.
- Place each handset in its respective charger (base unit or accessory charger). The CHARGE light on the handset will illuminate, indicating proper charging.
- Allow the handsets to charge for at least 16 hours before initial use to ensure optimal battery performance.
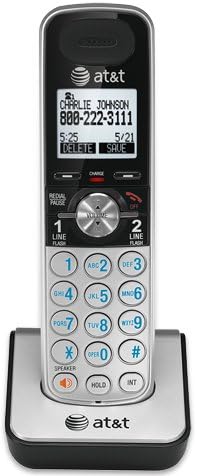
Figure 3: A cordless handset correctly seated in its charging cradle.
2.4 Registering Handsets
All accessory handsets (TL88002) must be registered to the TL88102 base unit before use. The handset included with the base unit is pre-registered.
- Place the handset you wish to register into the base unit's charger cradle.
- On the base unit, press and hold the FIND HANDSET button for approximately 4 seconds until the IN USE light on the base unit begins to flash.
- On the handset, press the # key. The handset will display "Registering..." and then "Handset Registered" upon successful registration.
- If registration fails, remove the handset from the charger and repeat the steps.
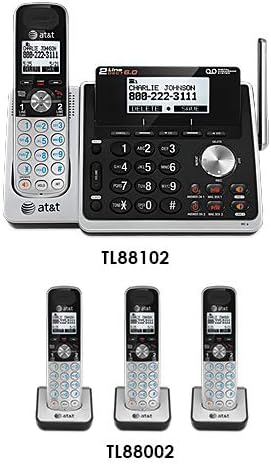
Figure 4: Illustration of the TL88102 base unit and TL88002 accessory handsets, indicating their relationship within the system.
3. Operating Instructions
3.1 Making and Receiving Calls
- To make a call: Press LINE 1 or LINE 2, then dial the number. Alternatively, dial the number first, then press LINE 1 or LINE 2.
- To answer a call: Press LINE 1, LINE 2, or SPEAKER.
- To end a call: Press OFF or place the handset in the charger.

Figure 5: The TL88102 base unit and its cordless handset, highlighting the keypad and display for call management.
3.2 Answering System
The TL88102 features a digital answering system for both lines, capable of storing up to 14 minutes of messages per line.
- Turning On/Off: Press ANS ON/OFF 1 or ANS ON/OFF 2 on the base unit to activate or deactivate the answering system for each line.
- Message Playback: Press PLAY/STOP on the base unit or access the answering system menu from any handset.
- Remote Access: You can retrieve messages remotely by calling your phone number and entering your remote access code.
3.3 Caller ID/Call Waiting
The system supports Caller ID and Call Waiting features. Ensure you subscribe to these services from your telephone service provider.
- Incoming call information (name and number) will display on the handset and base unit screens.
- During a call, if another call comes in, you will hear a tone. Press FLASH to switch between calls.
3.4 Intercom
Use the intercom feature to communicate between the base unit and handsets, or between multiple handsets.
- To initiate intercom: Press INT on the handset, then select the desired handset or base unit to call.
4. Maintenance
4.1 Cleaning the Product
Clean the telephone system with a soft, damp cloth. Do not use cleaning sprays or harsh chemicals, as they may damage the finish or electrical components.
4.2 Battery Care
- Always use the supplied rechargeable AAA batteries.
- For optimal performance, keep handsets in their chargers when not in use.
- If the handset will not be used for an extended period, remove the batteries to prevent leakage.
- Replace batteries when the handset displays "Low Battery" or when talk time significantly decreases.
5. Troubleshooting
| Problem | Solution |
|---|---|
| No dial tone. |
|
| Handset displays "Out of Range" or "No Power at Base". |
|
| Poor call quality or static. |
|
| Answering system not recording messages. |
|
6. Specifications
- Technology: DECT 6.0 Digital Technology
- Lines: 2-Line Operation
- Answering System: Digital, up to 14 minutes recording time per line
- Caller ID/Call Waiting: Yes (subscription required)
- Directory: 50-number phonebook
- Intercom: Handset to Handset, Handset to Base
- Power Source: AC Power Adapter (Base Unit), Rechargeable AAA Batteries (Handsets)
- Product Dimensions (Base Unit): Approximately 12.1 x 10.2 x 8.6 inches
- Item Weight: Approximately 1.8 pounds
- Color: Silver
- Material: Plastic
- Compatible Devices: Hearing Aid Compatible
7. Warranty and Support
For warranty information and technical support, please refer to the documentation included with your product or visit the official AT&T website. You may also contact AT&T customer service directly for assistance with product setup, operation, or troubleshooting.
Keep your purchase receipt as proof of purchase for warranty claims.


