1. Introduction
The ADTRAN NetVanta 6355 is a versatile VoIP Multiservice Access Gateway designed to provide integrated voice and data services for businesses. This device combines the functionality of a router, firewall, and Voice over IP (VoIP) gateway, enabling efficient and reliable communication solutions. This manual provides detailed instructions for the installation, configuration, operation, and maintenance of your NetVanta 6355 gateway.
2. Safety Information
Please read all safety instructions carefully before installing or operating the device. Failure to follow these guidelines may result in injury or damage to the equipment.
- Ensure the power source matches the voltage requirements specified on the device label.
- Do not expose the device to water, moisture, or extreme temperatures.
- Install the device in a well-ventilated area to prevent overheating.
- Only use accessories and cables approved by ADTRAN.
- Do not open the device casing; refer all servicing to qualified personnel.
3. Package Contents
Verify that your package contains the following items:
- ADTRAN NetVanta 6355 VoIP Multiservice Access Gateway
- Power Cord
- Console Cable (RJ-45 to DB-9)
- Rack Mount Ears (optional, may be included)
- Quick Start Guide (this document serves as the full manual)
4. Product Overview
The NetVanta 6355 features a compact design with various ports and indicators for network connectivity and status monitoring.
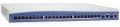
This image displays the front panel of the ADTRAN NetVanta 6355, showing various ports and indicator lights. The device is a rectangular unit, typically rack-mountable, with a series of network ports and status LEDs visible on the front face.
4.1 Front Panel Indicators and Ports
- Power LED: Indicates power status.
- Status LEDs: Provide operational status for various modules and services.
- Ethernet Ports: Multiple RJ-45 ports for LAN and WAN connections.
- Console Port: RJ-45 serial port for local management access.
- Voice Ports: FXS/FXO ports for connecting analog phones or PSTN lines (specific configuration may vary).
4.2 Rear Panel
- Power Input: Connector for the AC power cord.
- Grounding Screw: For optional grounding connection.
5. Setup
5.1 Physical Installation
- Rack Mounting: If rack mounting, attach the provided rack ears to the sides of the NetVanta 6355 using the supplied screws. Secure the device into a standard 19-inch equipment rack.
- Desktop Placement: If not rack mounting, place the device on a flat, stable surface, ensuring adequate ventilation around the unit.
- Power Connection: Connect the power cord to the power input on the rear panel of the device and then to a suitable AC power outlet. Do not power on the device yet.
5.2 Network Connections
- WAN Connection: Connect your Internet Service Provider's (ISP) cable or DSL modem to the designated WAN Ethernet port on the NetVanta 6355.
- LAN Connection: Connect your local network devices (computers, switches) to the LAN Ethernet ports.
- VoIP Connections: If using analog phones, connect them to the FXS ports. If connecting to a PSTN line, use the FXO ports as required by your service provider.
5.3 Initial Configuration Access
- Console Access: Connect a computer to the console port using the provided console cable. Use a terminal emulation program (e.g., PuTTY, Tera Term) with settings: 9600 baud, 8 data bits, no parity, 1 stop bit, no flow control.
- Power On: Once all connections are secure, connect the power cord to the electrical outlet. The device will power on and begin its boot sequence.
- Web Interface Access: After the device boots, you may be able to access the web-based management interface via a default IP address (refer to ADTRAN documentation for the specific default IP, typically 10.10.10.1 or 192.168.1.1).
6. Operating Instructions
6.1 Basic Network Configuration
The NetVanta 6355 can be configured via its Command Line Interface (CLI) through the console port or via its web-based Graphical User Interface (GUI). Refer to the ADTRAN OS documentation for detailed configuration commands and GUI navigation.
- WAN Configuration: Configure the WAN interface for your internet connection (e.g., DHCP, Static IP, PPPoE).
- LAN Configuration: Set up LAN IP addresses, subnet masks, and DHCP server settings for your internal network.
- Firewall Rules: Configure security policies and firewall rules to protect your network.
6.2 VoIP Service Configuration
The NetVanta 6355 supports various VoIP protocols, including SIP and H.323. Configuration involves setting up voice trunks, dial plans, and registering with a VoIP service provider or IP PBX.
- SIP Trunking: Configure SIP server addresses, authentication credentials, and codec preferences.
- Dial Plans: Create rules for routing incoming and outgoing calls.
- Analog Phone Integration: Configure FXS ports for analog phone extensions.
7. Maintenance
7.1 Firmware Updates
Regularly check the ADTRAN support website for the latest firmware updates. Updating the firmware ensures optimal performance, security, and access to new features. Follow the instructions provided with the firmware package for a safe update process.
7.2 Cleaning
Keep the device clean and free from dust. Use a soft, dry cloth to wipe the exterior. Do not use liquid cleaners or aerosols directly on the device.
7.3 Environmental Considerations
Ensure the device operates within its specified temperature and humidity ranges. Avoid blocking ventilation openings.
8. Troubleshooting
8.1 No Power
- Verify the power cord is securely connected to both the device and the power outlet.
- Check if the power outlet is functional by plugging in another device.
- Ensure the power switch (if present) is in the 'ON' position.
8.2 No Network Connectivity
- Check Ethernet cable connections to the WAN and LAN ports.
- Verify the status of the corresponding port LEDs; they should be lit or blinking.
- Confirm IP address settings and subnet masks are correct.
- Restart the NetVanta 6355 and any connected network devices.
8.3 VoIP Call Issues
- Ensure the device is registered with your VoIP service provider or IP PBX. Check registration status in the device's management interface.
- Verify network connectivity to the VoIP server.
- Check dial plan configurations for correct call routing.
- Confirm codec compatibility between the gateway and the VoIP endpoint/server.
8.4 Factory Reset
A factory reset will restore the device to its default settings. This should only be performed as a last resort after backing up your configuration. Refer to the ADTRAN documentation for the specific factory reset procedure for the NetVanta 6355, as it typically involves a specific command via the console or a physical reset button sequence.
9. Specifications
| Model | NetVanta 6355 |
| Part Number | 1200740E1 |
| Device Type | VoIP Multiservice Access Gateway |
| Interfaces | Ethernet (LAN/WAN), Console (RJ-45), Voice (FXS/FXO - configuration dependent) |
| Power Input | AC 100-240V, 50/60Hz (typical for network devices) |
| Dimensions | Standard 1U rack-mountable (approximate, specific dimensions vary) |
| Operating Temperature | 0°C to 40°C (32°F to 104°F) (typical for enterprise equipment) |
10. Warranty and Support
10.1 Product Warranty
ADTRAN products typically come with a limited hardware warranty. For specific warranty terms and conditions applicable to your NetVanta 6355, please refer to the warranty card included with your product or visit the official ADTRAN website.
10.2 Technical Support
For technical assistance, troubleshooting, or further information, please contact ADTRAN Technical Support. You can find contact details, FAQs, and additional resources on the official ADTRAN support website: www.adtran.com/support.
When contacting support, please have your product model (NetVanta 6355) and serial number readily available.


