1. Product Overview
The Walimex Pro Octagon Softbox Plus from the Orange Line series is designed to provide soft and even lighting for photography. Its octagonal shape is particularly beneficial for portrait photography, creating a natural, round catchlight in the subject's eyes. This softbox can be rotated 360 degrees for flexible positioning. It features a gold/silver layer for color tone adjustment and a grid for precise light direction. Constructed from high-quality, heat-resistant materials, it ensures durability and consistent performance.
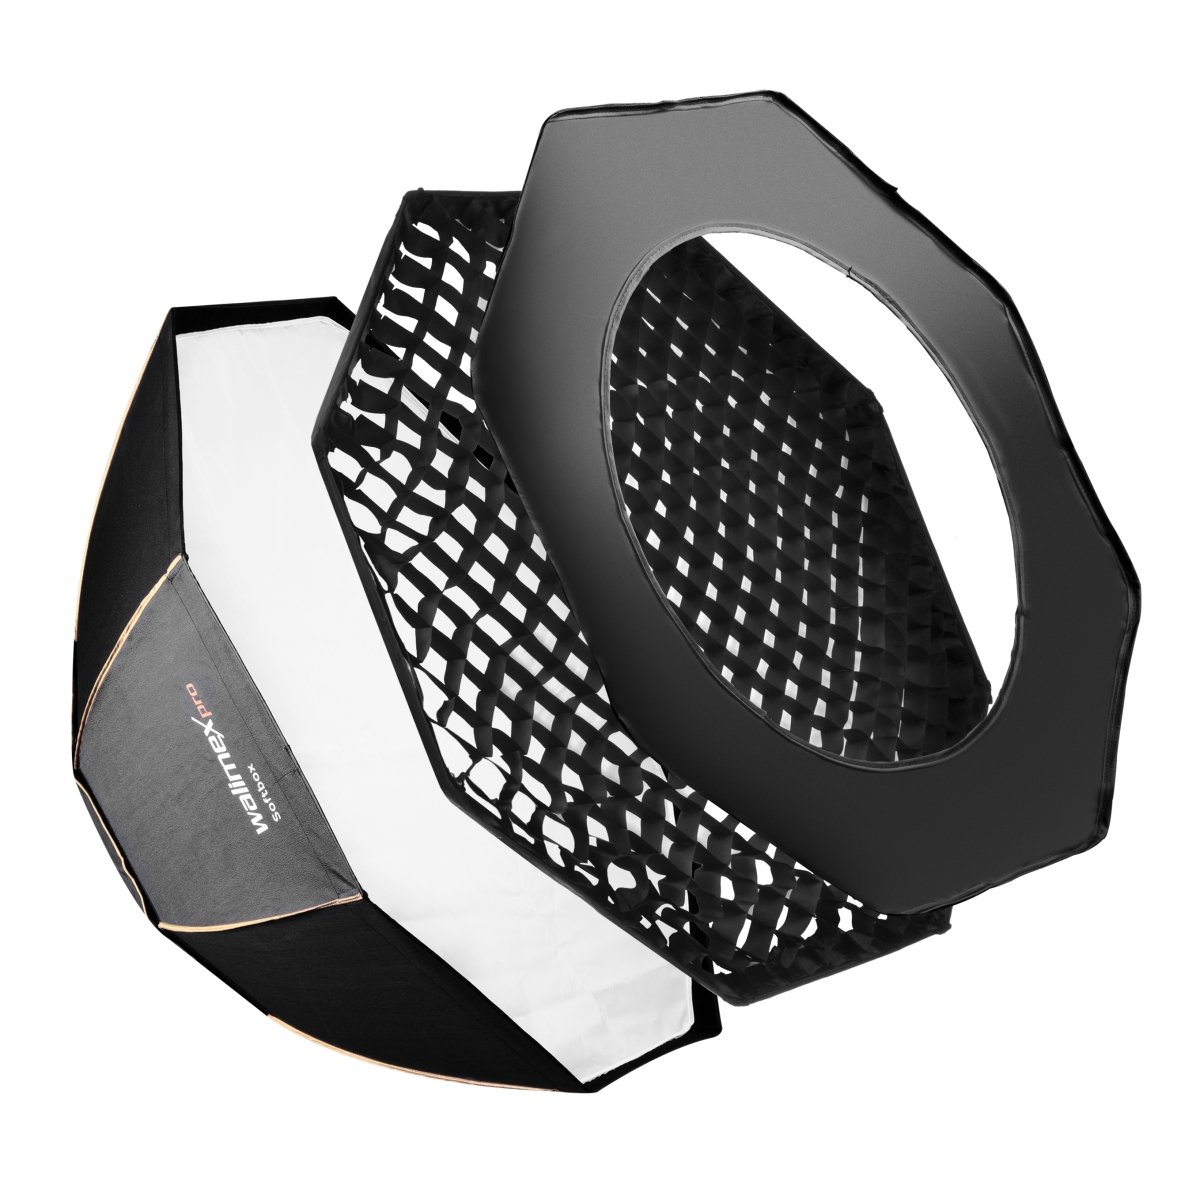
Figure 1: Close-up of the Walimex Pro Octagon Softbox fabric, displaying the brand logo and model name.
2. What's in the Box
Please verify that all components are present before proceeding with assembly:
- 1x Walimex Pro Octagon Softbox PLUS Orange Line 120 (softbox fabric)
- Rods (8 pieces for assembly)
- 1x Back diffuser
- 1x Front diffuser
- 1x Gold/silver layer
- 1x Grid
- 1x Transport bag
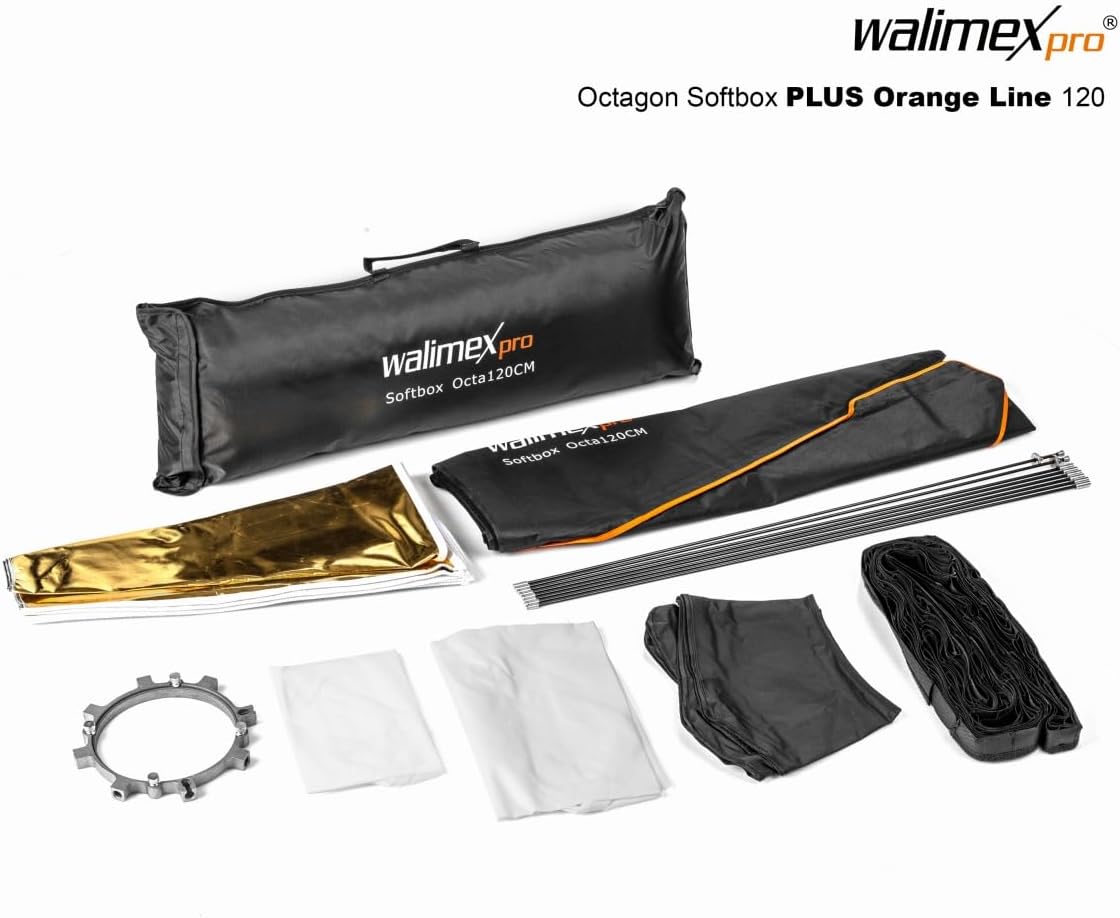
Figure 2: Components of the Walimex Pro Octagon Softbox Plus Orange Line 120cm.
3. Setup Instructions
The Walimex Pro Octagon Softbox Plus requires assembly. This model is supplied without an adapter for your studio flash. A compatible adapter (e.g., for Bowens, Elinchrom, Walimex Pro & K, etc.) must be purchased separately.
- Prepare the Softbox Fabric: Lay the octagonal softbox fabric flat on a clean, open surface with the interior facing up.
- Identify Rods and Speedring: You will find 8 rods. Two of these rods have a unique sliding flange mechanism at one end. The central speedring (adapter mounting ring) has 8 openings for the rods; two of these openings are open-sided to accommodate the special rods.
- Insert Normal Rods: Take the 6 'normal' rods (without the sliding flange). Insert the thinner, longer end of each rod into one of the 8 fabric sleeves located at each corner of the softbox. Ensure the rod passes through the entire sleeve.
- Attach Normal Rods to Speedring: Once the 6 normal rods are in their respective fabric sleeves, insert the thicker, shorter end of each of these 6 rods into one of the regular (closed) openings on the speedring. Gently bend the rods to create the octagonal shape as you insert them.
- Insert Special Rods: Now, take the 2 special rods with the sliding flange. Insert the thinner end into the remaining two fabric sleeves.
- Attach Special Rods to Speedring: Carefully align the thicker end of these 2 special rods with the 2 open-sided slots on the speedring. Apply gentle pressure to bend the rods and slide them into the slots. Once seated, push the sliding flange mechanism to lock the rods securely into place. The softbox structure is now assembled.
- Attach Back Diffuser: Secure the back (inner) diffuser inside the softbox. It typically attaches with small hooks or elastic loops to the internal structure.
- Attach Front Diffuser: Place the front (outer) diffuser over the opening of the softbox. It attaches via Velcro strips around the outer edge of the softbox opening. Ensure it is smooth and taut for even light diffusion.
- Optional: Attach Grid: If a more controlled and directional light is desired, attach the grid to the Velcro strips on the outer edge of the front diffuser.
- Optional: Insert Gold/Silver Layer: For altering the color temperature of the light, the gold or silver reflective layer can be inserted inside the softbox, typically secured with internal Velcro tabs.

Figure 3: Assembled Walimex Pro Octagon Softbox Plus Orange Line 120cm on a stand.
4. Operating Instructions
Once assembled and mounted on your studio flash (via a separately purchased adapter), the Walimex Pro Octagon Softbox Plus is ready for use.
- Mounting: Attach the softbox (with its speedring) to your studio flash unit. Ensure it is securely fastened to prevent accidental detachment.
- Positioning: The softbox can be rotated 360 degrees on its mount. Adjust its angle and height on the light stand to achieve the desired lighting effect.
- Light Diffusion: The included back and front diffusers soften the light output, reducing harsh shadows and creating a more even illumination. Use both for maximum softness.
- Light Direction with Grid: The grid (honeycomb) narrows the beam of light, preventing spill and providing more controlled, directional illumination. This is useful for accentuating specific areas or creating dramatic lighting.
- Color Tone Adjustment: The gold/silver layer can be used to modify the color temperature of the light. The gold side adds warmth, while the silver side provides a neutral, slightly cooler reflection.
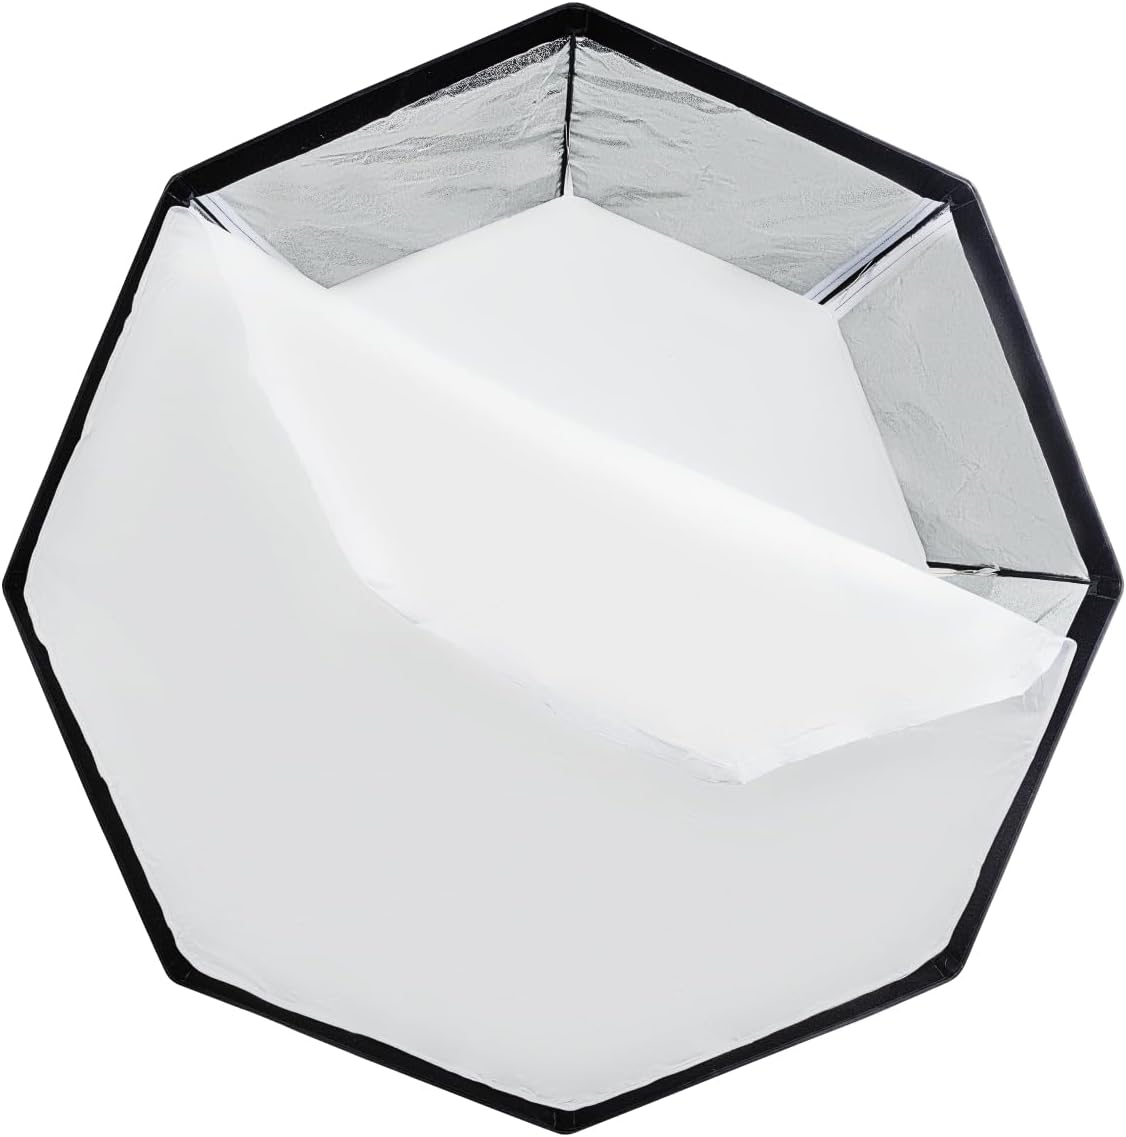
Figure 4: Internal view of the softbox with reflective interior and inner diffuser.
5. Maintenance
Proper maintenance ensures the longevity and performance of your softbox.
- Cleaning: The softbox fabric and diffusers can be gently wiped with a soft, damp cloth if they become dirty. Avoid harsh chemicals or abrasive materials. Ensure all components are completely dry before storage.
- Storage: For long-term storage or transport, disassemble the softbox by reversing the setup steps. Store all components, including rods, diffusers, grid, and gold/silver layer, in the provided transport bag to protect them from dust and damage.
- Handling: Always handle the rods and fabric with care during assembly and disassembly to prevent bending, tearing, or damage to stitching.
6. Troubleshooting
- Difficulty Assembling: The assembly process, especially inserting the last rods, may require some force and patience due to the tension required to form the octagonal shape. Ensure rods are correctly aligned with both the fabric sleeves and the speedring openings. The two special rods with sliding flanges are crucial for easier final assembly.
- Adapter Not Fitting: This softbox model is sold without an adapter. Ensure you have purchased the correct adapter for your specific studio flash unit. Adapters are brand-specific (e.g., Bowens, Elinchrom, Walimex Pro & K).
- Uneven Light: Check that both the back and front diffusers are installed correctly and are taut. Ensure the flash head is centered within the softbox.
- Damaged Stitching/Rods: While the product is designed for durability, excessive force during assembly or improper storage can cause damage. Always handle components carefully. If damage occurs, contact Walimex Pro support for repair or replacement options.
7. Specifications
| Specification | Detail |
|---|---|
| Product Dimensions | 0.39 x 0.39 x 0.39 inches (collapsed/packaged) |
| Item Weight | 5.07 pounds |
| Item Model Number | 18816 |
| ASIN | B009T5A8Z4 |
| Material | Aluminium, cotton, plastic, PVC |
| Color | Black/White |
| Manufacturer | Walimex Pro |
8. Warranty and Support
For specific warranty information, please refer to the documentation provided with your purchase or visit the official Walimex Pro website. For technical support, troubleshooting assistance, or inquiries regarding parts and service, please contact Walimex Pro customer service directly.
When contacting support, please provide the following product details:
- Brand: Walimex Pro
- Model Number: 18816
- ASIN: B009T5A8Z4


