Introduction
This manual provides comprehensive instructions for the safe and effective use of the OTC 4295 Wheel Stud Service Kit. This mechanical tool is designed for the removal and installation of wheel studs by pushing on the head of the stud, eliminating the need for threaded adapters. This method reduces the number of adapters required, minimizes the risk of damage to studs, and increases ease of use for technicians. The kit allows for stud service without removing the hub from the vehicle.
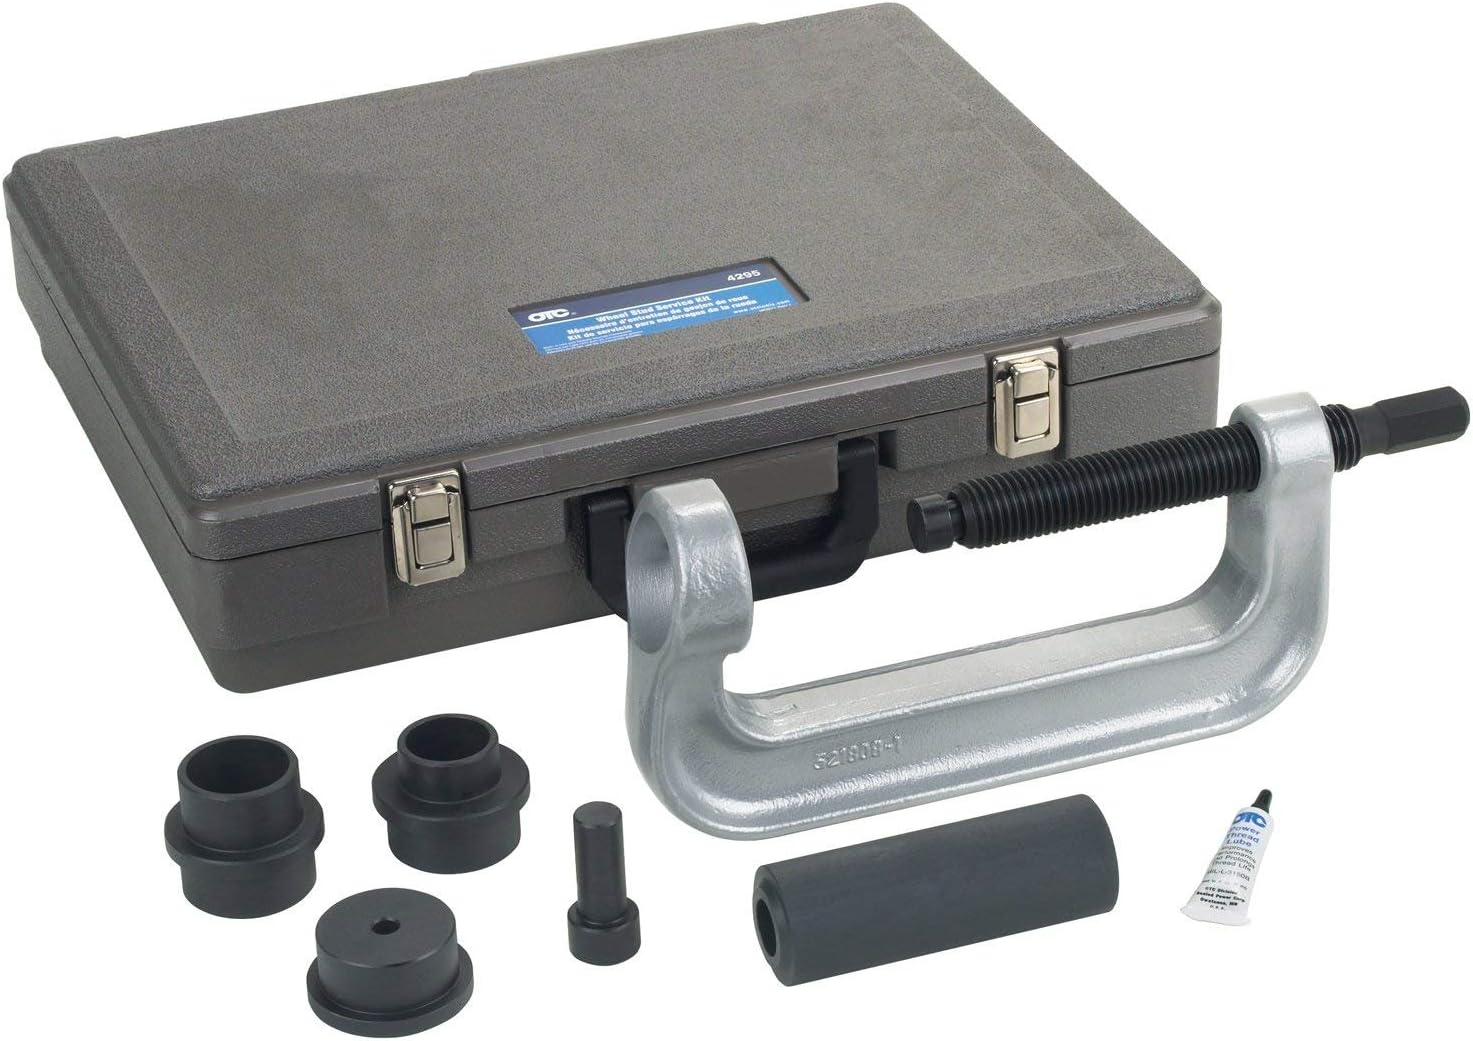
Image: The OTC 4295 Wheel Stud Service Kit, including the C-frame with forcing screw, various adapters, and a durable blow-molded plastic storage case.
Safety Information
Always observe standard shop safety practices when using this tool. Failure to follow safety precautions can result in serious injury or damage to equipment.
- Always wear appropriate personal protective equipment, including safety glasses, gloves, and sturdy footwear.
- Ensure the vehicle is properly supported on a level surface using jack stands before beginning any work.
- Do not exceed the rated capacity of the tool.
- Keep the forcing screw threads properly lubricated to prevent binding and premature wear.
- Inspect the tool for any damage or wear before each use. Do not use damaged equipment.
- Keep hands and clothing clear of moving parts.
Kit Components
The OTC 4295 Wheel Stud Service Kit includes the following components:
- C-frame with forcing screw
- Multiple adapters for various stud sizes
- Durable, blow-molded plastic storage case
The kit is designed to be lightweight, weighing approximately 12 pounds for stud removal assembly and 14 pounds for stud installation assembly, ensuring ease of use at various working heights.
Setup
Proper setup is crucial for efficient and safe operation. The kit is designed to work on most hubs, including those on Class 8 trucks, without requiring hub removal.
- Prepare the Vehicle: Ensure the vehicle is securely lifted and supported. Remove the wheel and tire assembly from the hub where the stud service is required.
- Select Adapters: Identify the appropriate adapter(s) from the kit that match the size and type of wheel stud being serviced. The adapters are designed to fit over the stud head or to provide clearance for installation/removal.
- Lubricate Forcing Screw: Before each use, apply a generous amount of lubricant to the threads of the C-frame forcing screw. This prevents galling and ensures smooth operation, especially when using an impact wrench.
- Assemble the Tool: Depending on whether you are removing or installing a stud, assemble the C-frame with the selected adapters. The tool is designed to push directly on the head of the stud.
Operating Instructions
Stud Removal
The OTC 4295 kit facilitates quick removal of wheel studs without hub disassembly.
- Position the Tool: Place the C-frame assembly over the wheel stud to be removed, ensuring the forcing screw is aligned with the stud head and the C-frame is securely seated against the hub or rotor.
- Apply Force: Use an impact wrench (recommended for efficiency) or a hand wrench to turn the forcing screw. The screw will push the stud out from the hub.
- Monitor Progress: Continue turning the screw until the stud is completely dislodged from the hub.
- Repeat: The kit can remove approximately 10 studs in 10 to 15 minutes.
Stud Installation
Install new wheel studs efficiently and safely using the kit.
- Insert New Stud: Place the new wheel stud into the hub bore from the back side.
- Position the Tool: Position the C-frame assembly over the new stud, ensuring the forcing screw is aligned to pull the stud into place. An appropriate adapter should be used on the opposite side of the C-frame to provide a stable surface for the stud head to seat against.
- Apply Force: Use an impact wrench or hand wrench to turn the forcing screw, drawing the new stud into its seated position in the hub.
- Verify Seating: Ensure the stud is fully seated and flush against the hub flange.
- Repeat: The kit can install approximately 10 studs in 10 to 15 minutes.
Maintenance
Regular maintenance ensures the longevity and optimal performance of your OTC 4295 Wheel Stud Service Kit.
- Lubrication: Always lubricate the forcing screw threads before each use, especially when using an impact wrench. This is critical to prevent wear and seizing.
- Cleaning: After each use, clean all components of the kit to remove dirt, grease, and metal shavings.
- Inspection: Regularly inspect the C-frame, forcing screw, and adapters for signs of wear, cracks, or deformation. Pay close attention to the threads of the forcing screw.
- Storage: Store the kit in its original blow-molded plastic case in a clean, dry environment to protect it from corrosion and damage.
- Replacement Parts: If any component shows significant wear or damage, replace it with genuine OTC parts to maintain tool integrity and safety.
Troubleshooting
| Problem | Possible Cause | Solution |
|---|---|---|
| Forcing screw binds or is difficult to turn. | Insufficient lubrication; threads are galled or damaged. | Apply more lubricant. If threads are damaged, replace the forcing screw. |
| Stud not fully seating during installation. | Incorrect adapter used; obstruction in hub bore; insufficient force applied. | Verify correct adapter. Inspect hub bore for debris. Ensure adequate force is applied, potentially using a more powerful impact wrench. |
| Tool slips during operation. | Improper positioning; worn adapters. | Re-position the tool to ensure stable contact. Inspect and replace worn adapters. |
Specifications
| Attribute | Detail |
|---|---|
| Brand | OTC |
| Model Number | 4295 |
| Item Weight (assembled for removal) | Approximately 12 pounds |
| Item Weight (assembled for installation) | Approximately 14 pounds |
| Product Dimensions | 19.75 x 16.35 x 5.75 inches (case dimensions) |
| Country of Origin | USA |
| Application | Wheel stud removal and installation on most hubs, including Class 8 trucks, without hub removal. |
Warranty and Support
OTC tools are manufactured with a commitment to quality. For specific warranty information and support, please refer to the official OTC website or contact OTC customer service directly. OTC has been inventing, manufacturing, and perfecting specialty tools and equipment for over 90 years, demonstrating a long-standing commitment to quality and innovation.
For further assistance, visit the OTC Store on Amazon or consult your local authorized OTC dealer.


