1. Introduction
Thank you for choosing the ROWI HPO Easy 9 kW Pellet Stove. This manual provides essential information for the safe and efficient installation, operation, and maintenance of your new pellet stove. Please read this manual thoroughly before using the appliance and keep it for future reference. Proper use and maintenance will ensure optimal performance and longevity of your stove.
2. Important Safety Instructions
Failure to follow these safety instructions could result in fire, electric shock, serious injury, or death. Always prioritize safety when operating any heating appliance.
- Installation: The stove must be installed by a qualified professional in accordance with all local and national building and fire codes. Ensure adequate clearances to combustible materials.
- Ventilation: Ensure proper ventilation and a sufficient supply of combustion air. Do not obstruct air inlets or outlets.
- Fuel: Only use certified wood pellets (ENplus A1, DINplus) as fuel. Do not use any other materials, such as trash, gasoline, or flammable liquids, as this can cause a fire or explosion.
- Hot Surfaces: The stove surfaces become extremely hot during operation. Keep children, pets, and combustible materials away from the appliance. Use heat-resistant gloves when handling hot components.
- Ash Disposal: Dispose of ashes in a metal container with a tight-fitting lid, away from combustible materials.
- Maintenance: Regular cleaning and maintenance are crucial for safe operation. Refer to the maintenance section for detailed instructions.
- Power Supply: Ensure the stove is connected to a properly grounded electrical outlet. Do not use extension cords.
- Carbon Monoxide: Install carbon monoxide detectors in your home. Carbon monoxide is an odorless, colorless gas that can be fatal.
3. Product Overview
The ROWI HPO Easy 9 kW Pellet Stove is designed for efficient and convenient heating. Familiarize yourself with its main components.

Figure 3.1: Front view of the ROWI HPO Easy 9 kW Pellet Stove. This image shows the stove's main body in bordeaux red and black, with the glass door revealing a burning flame. The control panel is visible on top.

Figure 3.2: Detailed view of the digital control panel. The display shows the current temperature setting (20°C) and an 'ON-OFF' indicator, surrounded by control buttons for navigation and adjustment.

Figure 3.3: Rear view of the pellet stove. This image highlights the exhaust gas connection (80mm diameter), the electrical power inlet, and various regulatory labels and wiring for the control unit.
Key Components:
- Pellet Hopper: Located at the top, holds up to 17 kg of pellets.
- Control Panel: Digital display for setting temperature, power levels, and programming.
- Combustion Chamber: Where pellets are burned. Accessible via the front door.
- Ash Pan: Collects ash from combustion, located below the combustion chamber.
- Exhaust Outlet: Connects to the flue system (80 mm diameter).
- Air Intakes: For combustion and convection air.
4. Setup and Installation
Proper installation is critical for the safe and efficient operation of your pellet stove. It is highly recommended that installation be performed by a certified technician.
4.1 Unpacking
- Carefully remove the stove from its packaging.
- Inspect the stove for any signs of damage. Contact your dealer immediately if damage is found.
- Retain all packaging materials for potential future transport or warranty claims.
4.2 Placement and Clearances
- Position the stove on a non-combustible floor or a suitable floor protector.
- Maintain minimum clearances to combustible walls and materials as specified in local building codes and the stove's rating plate.
- Ensure the room has adequate ventilation to support combustion and prevent negative pressure.

Figure 4.1: Example of the pellet stove installed in a living space. This image demonstrates a typical placement, emphasizing the need for clear space around the unit.
4.3 Flue Gas Connection
- Connect the stove's 80 mm exhaust outlet to a suitable and properly sized flue system.
- All flue components must be approved for pellet stove use and installed according to manufacturer instructions and local codes.
- Ensure all connections are sealed to prevent smoke leakage.
4.4 Electrical Connection
- Plug the stove into a grounded 230 V ~ 50 Hz electrical outlet.
- Do not overload the circuit. Avoid using extension cords or adapters.
4.5 Initial Pellet Loading
- Open the pellet hopper lid.
- Fill the hopper with certified wood pellets (ENplus A1, DINplus). Do not overfill.
- Close the hopper lid securely.
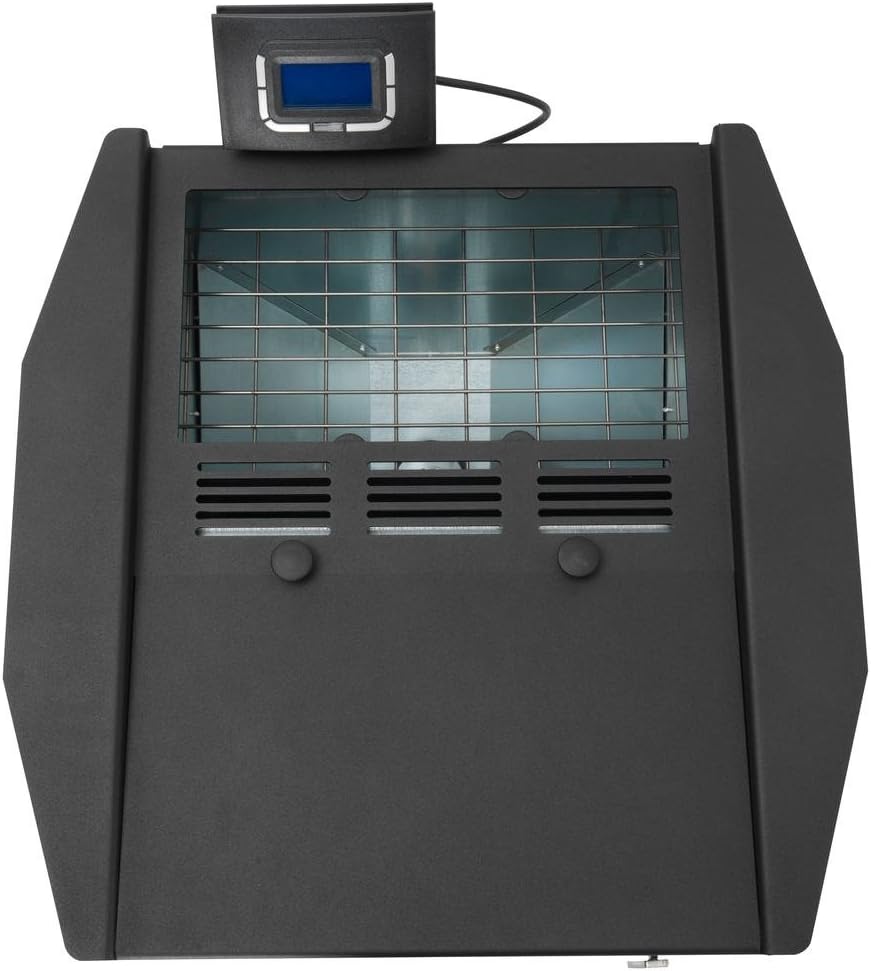
Figure 4.2: Top view of the stove with the pellet hopper open, revealing the internal grate where pellets are loaded.
5. Operating Instructions
This section guides you through the basic operation of your ROWI HPO Easy 9 kW Pellet Stove.
5.1 Control Panel Overview
The digital control panel (refer to Figure 3.2) allows you to manage all stove functions. It typically includes:
- Display Screen: Shows current temperature, operating mode, and error messages.
- ON/OFF Button: To start and stop the stove.
- Up/Down Arrows: To adjust temperature settings or navigate menus.
- Menu/Set Button: To access settings and confirm selections.
5.2 Starting the Stove
- Ensure the pellet hopper is filled and the ash pan is empty.
- Press the ON/OFF button. The stove will initiate its ignition sequence. This process typically takes several minutes, during which the igniter heats up and pellets are fed into the burn pot.
- Once a stable flame is established, the stove will transition to normal operating mode.
5.3 Adjusting Heat Settings
- Use the Up/Down arrows to set your desired room temperature. The stove will automatically adjust its pellet feed rate and fan speed to maintain this temperature.
- The stove offers a power adjustment range of 2.07 kW to 8.14 kW.
5.4 Programming Features
The HPO Easy model includes programmable features such as a timer function and automatic adjustment. Consult the full digital manual (if provided separately) for detailed instructions on setting these advanced features.
- Timer Function: Allows you to schedule the stove to turn on and off at specific times.
- Automatic Adjustment: The stove can automatically regulate its output based on the ambient temperature sensor.
5.5 Shutting Down the Stove
- Press the ON/OFF button. The stove will enter a shutdown cycle, which involves stopping the pellet feed and running the fans to cool down the combustion chamber.
- Do not unplug the stove during the shutdown cycle, as this can damage components.
- Wait until the stove has completely cooled down before performing any maintenance.
6. Maintenance
Regular maintenance ensures the safe, efficient, and long-lasting operation of your pellet stove. Always ensure the stove is completely cool and unplugged before performing any maintenance.
6.1 Daily/Weekly Cleaning
- Ash Removal: Empty the ash pan regularly (daily or every 1-3 days depending on usage). Use a metal container for ash disposal.
- Burn Pot Cleaning: Ensure the burn pot is free of clinkers and ash buildup. A clean burn pot is essential for proper ignition and combustion.
- Glass Cleaning: Clean the inside of the glass door with a specialized stove glass cleaner when the stove is cold.

Figure 6.1: View of the stove with the front door open, illustrating access to the combustion chamber and ash pan for cleaning.
6.2 Monthly/Seasonal Cleaning
- Flue Pipe Cleaning: Inspect and clean the flue pipes to prevent creosote buildup.
- Heat Exchanger Cleaning: Clean the heat exchanger tubes to maintain efficiency.
- Hopper Inspection: Check the pellet hopper for any dust or debris buildup.
6.3 Annual Service
It is recommended to have your pellet stove professionally serviced annually by a qualified technician. This service typically includes a thorough cleaning, inspection of all components, and verification of proper operation.
6.4 Pellet Quality
Always use high-quality, certified wood pellets. Poor quality pellets can lead to:
- Reduced heating efficiency.
- Increased ash and clinker production.
- Frequent cleaning requirements.
- Potential damage to stove components.
7. Troubleshooting
This section addresses common issues you might encounter with your pellet stove. For problems not listed here, or if solutions do not resolve the issue, contact a qualified service technician.
| Problem | Possible Cause | Solution |
|---|---|---|
| Stove does not ignite. | No pellets in hopper; igniter failure; clogged burn pot; power interruption. | Check pellet level; clean burn pot; verify power supply; contact service if igniter is faulty. |
| Low heat output. | Low heat setting; poor pellet quality; clogged flue pipes or heat exchanger; insufficient air supply. | Increase heat setting; use certified pellets; clean flue and heat exchanger; check air intakes. |
| Excessive smoke or soot. | Poor combustion; clogged flue; incorrect air settings; wet pellets. | Ensure proper air flow; clean flue; use dry, quality pellets; consult manual for air settings. |
| Stove shuts down unexpectedly. | Overheating sensor triggered; no pellets; power outage; safety switch activated. | Check pellet level; allow stove to cool; reset safety switch (if applicable); check power supply. |
| Error code on display. | Specific system malfunction. | Refer to the detailed error code list in the complete product manual or contact customer support with the specific code. |
8. Technical Specifications
Below are the key technical specifications for the ROWI HPO Easy 9 kW Pellet Stove:
| Feature | Specification |
|---|---|
| Model | HPO Easy 9 kW |
| Brand | ROWI |
| Nominal Heat Output | 8.14 kW |
| Heat Output Range | 2.07 – 8.14 kW |
| Heating Capacity | Approx. 200 m³ |
| Efficiency Rating | 90.3 – 95.3% |
| Power Supply | 230 V ~ 50 Hz |
| Fuel Type | Certified Wood Pellets (ENplus A1, DINplus) |
| Hopper Capacity | 17 kg |
| Fuel Consumption | 0.44 – 1.84 kg/h |
| Operating Time (Full Hopper) | 9 – 38 hours |
| Exhaust Connection Diameter | 80 mm |
| Electrical Power Consumption (Ignition) | 330 W |
| Electrical Power Consumption (Operation) | 55 – 90 W |
| Compliance | DIN EN 14785, 1st and 2nd BImSchV levels |
| Dimensions (approx.) | 105 x 70 x 60 cm (H x W x D) (derived from package dimensions) |
| Weight | 89.1 kg (196.43 lbs) |
| Special Features | Automatic adjustment, remote control, programmable timer function |
9. Warranty and Support
9.1 Warranty Information
Your ROWI HPO Easy 9 kW Pellet Stove comes with a manufacturer's warranty covering defects in materials and workmanship under normal use. The specific terms and duration of the warranty may vary by region. Please retain your proof of purchase for warranty claims. The warranty does not cover damage resulting from improper installation, misuse, lack of maintenance, or the use of unapproved fuels.
9.2 Customer Support
For technical assistance, spare parts, or warranty inquiries, please contact your authorized ROWI dealer or customer service. When contacting support, please have your model number (HPO Easy 9 kW) and serial number (located on the rating plate) readily available.
Contact Information:
ROWI Customer Service
[Please refer to your purchase documentation or the official ROWI website for current contact details.]
Website: www.rowi-gmbh.com


