1. Important Safety Instructions
Always observe basic safety precautions when using this circular saw to reduce the risk of fire, electric shock, and serious personal injury. Read and understand all instructions before operating the tool.

Image 1.1: Warning label on the Ryobi P506 circular saw, highlighting critical safety information regarding blade guarding, two-hand operation, and battery removal for adjustments.
- Work Area Safety: Keep the work area clean and well-lit. Cluttered or dark areas invite accidents. Do not operate power tools in explosive atmospheres, such as in the presence of flammable liquids, gases, or dust.
- Electrical Safety: This tool is battery-powered. Ensure the battery pack is compatible with the tool. Do not expose power tools to rain or wet conditions.
- Personal Safety: Always wear eye protection. Use hearing protection when operating power tools. Dress properly; avoid loose clothing or jewelry. Secure long hair.
- Tool Use and Care: Do not force the power tool. Use the correct power tool for your application. Disconnect the battery pack from the power tool before making any adjustments, changing accessories, or storing power tools.
- Circular Saw Specific Safety:
- Always hold the saw firmly with both hands.
- Ensure the blade guard operates freely and closes instantly.
- Avoid kickback by maintaining proper grip, body position, and using a sharp blade.
- Never reach underneath the workpiece when the blade is rotating.
2. Product Overview
The Ryobi P506 18V ONE+ Cordless 5-1/2 Inch Circular Saw is designed for efficient cutting of wood and similar materials. It features an integrated laser guide for enhanced precision and a 50-degree bevel capacity for angled cuts.

Image 2.1: Front view of the Ryobi P506 circular saw, showing the blade, handle, and motor housing.
Key Components:
- Main Handle: For primary grip and control.
- Auxiliary Handle: For two-hand operation and stability.
- Trigger Switch: Activates the saw.
- Lock-Off Button: Prevents accidental starting.
- Blade Guard (Upper & Lower): Protects the blade.
- Blade: 5-1/2 inch carbide-tipped blade.
- Base Plate (Shoe): Supports the saw on the workpiece.
- Depth Adjustment Lever: Adjusts cutting depth.
- Bevel Adjustment Lever: Adjusts cutting angle.
- Laser Guide: Projects a line for accurate cuts.
- Battery Port: For 18V ONE+ battery pack.
3. Setup
3.1 Battery Installation
The Ryobi P506 operates with any Ryobi 18V ONE+ battery pack (sold separately).
- Ensure the saw is turned off and the lock-off button is engaged.
- Align the ribs on the battery pack with the grooves in the saw's battery port.
- Slide the battery pack into the port until it clicks securely into place.
- To remove, press the release latches on the battery pack and pull it out.

Image 3.1: Side view of the Ryobi P506, showing the battery port where the 18V ONE+ battery pack is inserted.
3.2 Blade Installation and Removal
Always disconnect the battery pack before installing or removing the blade.
- Place the saw on a flat surface with the blade side up.
- Press and hold the spindle lock button to prevent the blade from rotating.
- Using the provided blade wrench, loosen the blade nut by turning it counter-clockwise.
- Remove the blade nut, outer washer, and the old blade.
- Install the new 5-1/2 inch blade with the teeth pointing in the direction of the arrow on the blade guard.
- Replace the outer washer and blade nut. Tighten the blade nut securely by turning it clockwise while holding the spindle lock button. Do not overtighten.
3.3 Depth Adjustment
Adjust the cutting depth to be approximately 1/8 inch (3 mm) deeper than the material being cut. This ensures a clean cut and reduces kickback risk.
- Disconnect the battery pack.
- Loosen the depth adjustment lever.
- Raise or lower the base plate to achieve the desired cutting depth.
- Tighten the depth adjustment lever securely.

Image 3.2: View of the depth adjustment lever on the Ryobi P506 circular saw, used to set the cutting depth.
3.4 Bevel Adjustment
The saw can make bevel cuts up to 50 degrees.
- Disconnect the battery pack.
- Loosen the bevel adjustment lever.
- Tilt the base plate to the desired angle, aligning the indicator with the angle scale.
- Tighten the bevel adjustment lever securely.
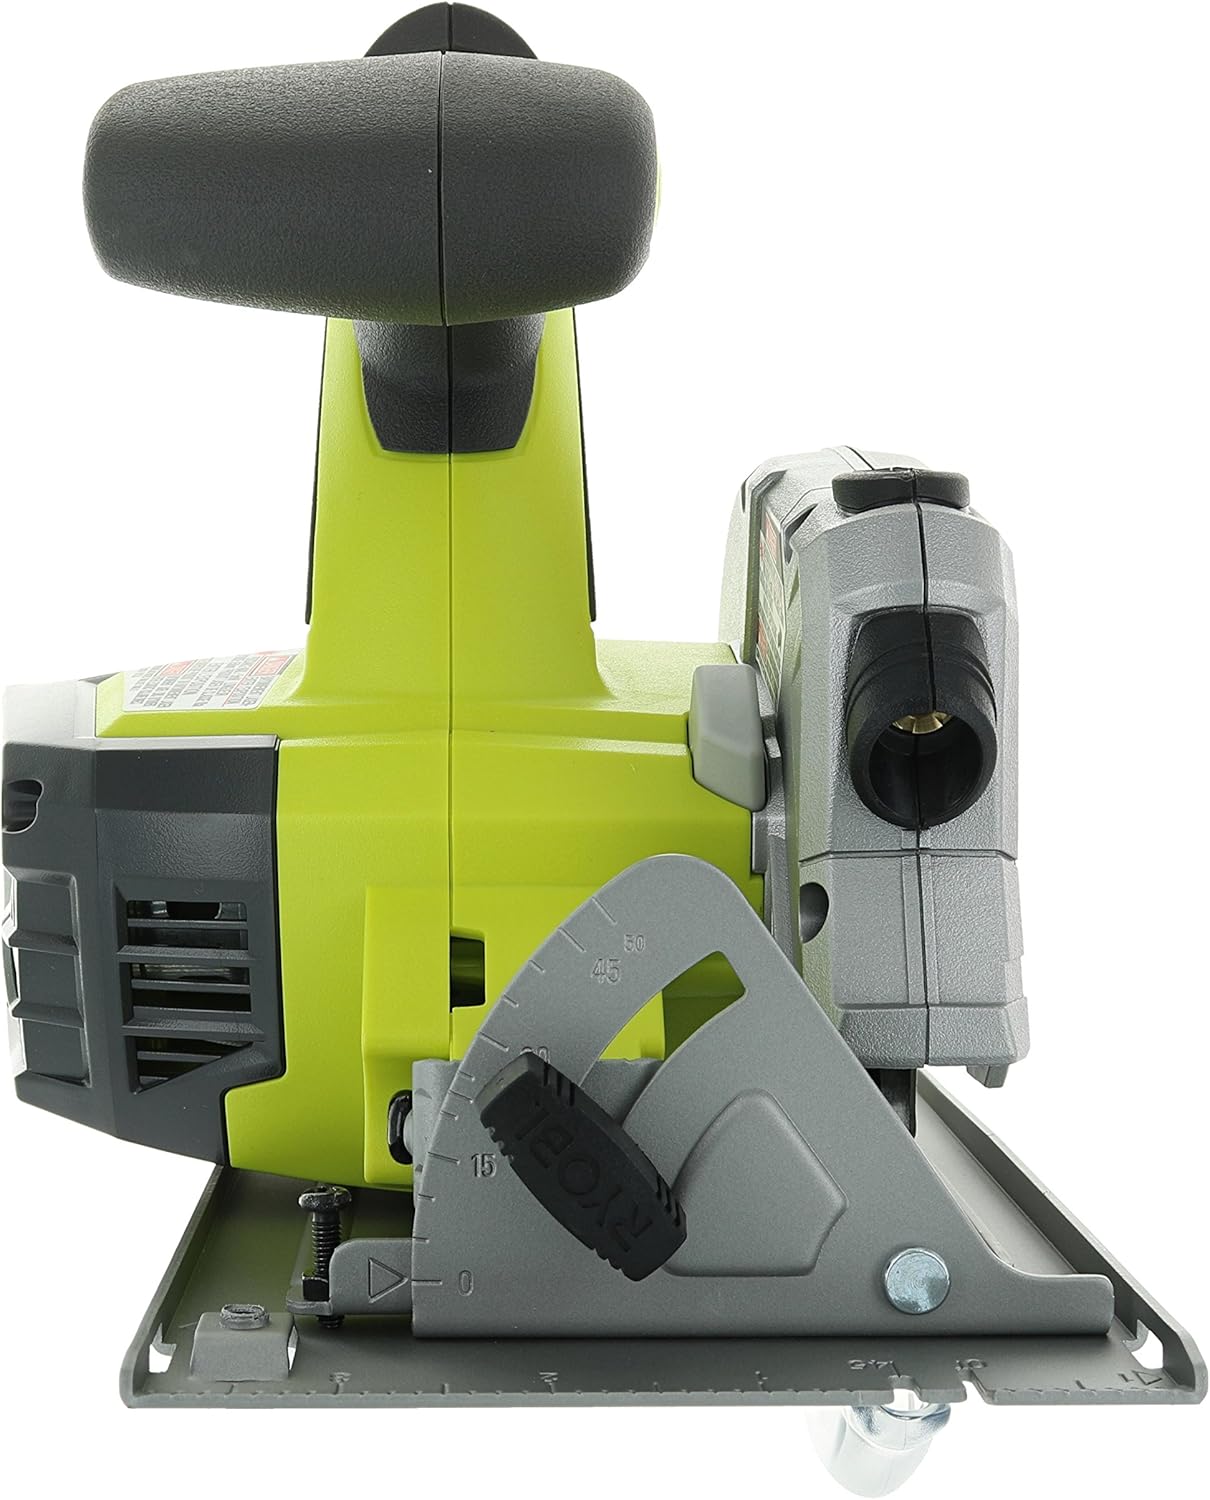
Image 3.3: View of the bevel adjustment mechanism on the Ryobi P506 circular saw, allowing for angled cuts.
4. Operation
4.1 Starting and Stopping the Saw
- To start the saw, depress the lock-off button with your thumb, then squeeze the trigger switch.
- To stop the saw, release the trigger switch. The blade will stop rotating.
4.2 Making Cuts
Before cutting, ensure the workpiece is securely clamped and the cutting line is clearly marked.
- Hold the saw firmly with both hands, one on the main handle and one on the auxiliary handle.
- Position the front edge of the base plate on the workpiece, ensuring the blade is not touching the material.
- Start the saw and allow the blade to reach full speed before entering the material.
- Slowly push the saw forward along the cutting line, maintaining a steady, even pressure. Do not force the saw.
- Once the cut is complete, release the trigger switch and allow the blade to stop completely before lifting the saw from the workpiece.
4.3 Laser Guide Use
The integrated laser guide projects a red line onto the workpiece, indicating the cutting path for improved accuracy. The laser activates automatically when the trigger is pressed.
- Align the projected laser line with your marked cutting line on the workpiece.
- Maintain alignment throughout the cut for precise results.
- Periodically check the laser's alignment for accuracy.
5. Maintenance
Regular maintenance ensures optimal performance and extends the life of your circular saw. Always disconnect the battery pack before performing any maintenance.
5.1 Cleaning
- Keep the tool's air vents clean and free of debris to prevent overheating.
- Wipe the tool housing with a soft, damp cloth. Do not use harsh chemicals or abrasive cleaners.
- Regularly clean the base plate and blade guard to ensure smooth operation.
5.2 Blade Care
- Use only sharp, undamaged blades. Dull or damaged blades can cause kickback and reduce cutting efficiency.
- Clean resin and sawdust buildup from the blade regularly using a suitable blade cleaner.
- Replace blades when they become dull or show signs of damage.
5.3 General Inspection
- Check all screws and fasteners for tightness.
- Inspect the power tool for any damaged parts. If any part is damaged, have it repaired by a qualified service technician before further use.
- Ensure the lower blade guard moves freely and retracts properly.
6. Troubleshooting
This section addresses common issues you might encounter with your Ryobi P506 circular saw.
| Problem | Possible Cause | Solution |
|---|---|---|
| Saw does not start | Battery not installed correctly or discharged; Lock-off button not depressed; Faulty switch. | Ensure battery is fully charged and properly seated. Depress lock-off button before squeezing trigger. If issue persists, seek professional service. |
| Poor cutting performance / Blade binds | Dull or dirty blade; Incorrect cutting depth; Forcing the saw; Workpiece not properly supported. | Replace or clean blade. Adjust cutting depth. Allow saw to work at its own pace. Securely clamp workpiece. |
| Excessive vibration | Damaged blade; Loose blade nut; Damaged tool components. | Inspect and replace damaged blade. Tighten blade nut. If vibration continues, discontinue use and seek service. |
| Laser guide not visible or inaccurate | Dirty laser lens; Strong ambient light; Misalignment. | Clean laser lens. Use in appropriate lighting conditions. Refer to the full operator's manual for laser alignment procedures if necessary. |
7. Specifications
| Feature | Specification |
|---|---|
| Model Number | P506 |
| Power Source | Battery Powered (18V ONE+ Lithium Ion) |
| Blade Diameter | 5-1/2 inches |
| No-Load Speed | 4700 RPM |
| Max Cutting Angle | 50 Degrees |
| Item Weight | 2.2 pounds (without battery) |
| Product Dimensions | 12"L x 5.5"W x 12"H |
| Special Feature | Integrated Laser Guide, Brushless Motor |
| Included Components | 5-1/2 in. blade, blade wrench, operator's manuals (Battery not included) |
8. Warranty and Support
This Ryobi P506 circular saw comes with a limited warranty. For specific warranty details, including duration and coverage, please refer to the official warranty documentation included with your product or visit the official Ryobi website.
For technical support, replacement parts, or service inquiries, please contact Ryobi customer service. Contact information can typically be found in your product's operator's manual or on the Ryobi official website.
Always use genuine Ryobi replacement parts to ensure compatibility and maintain product safety and warranty validity.


