1. Product Overview
The ASUS M5A97 R2.0 is an ATX AMD motherboard designed to support the latest AMD Socket AM3+ processors, including 8-core CPUs. It features the AMD 970/SB950 chipset, offering robust performance and connectivity options.
Key Features
- ASUS Exclusive Design: Integrates EPU (Energy Processing Unit) and TPU (TurboV Processing Unit) for optimized energy efficiency and performance scaling.
- Network iControl: Provides real-time bandwidth allocation control for efficient network usage.
- DirectKey: Enables easy BIOS access from standby mode with a dedicated button.
- Windows 8 Ready: Meets hardware requirements for Windows 8 support.
- Remote GO!: Offers one-stop PC remote control and home entertainment capabilities.
2. Safety Information
Always observe the following safety precautions when handling and installing your motherboard:
- Disconnect the power cord from the wall outlet before touching any components.
- Wear an anti-static wrist strap or frequently touch a grounded metal object (like the computer case) to discharge static electricity.
- Handle the motherboard by its edges to avoid touching sensitive components.
- Ensure proper ventilation within your computer case to prevent overheating.
- Keep liquids and moisture away from the motherboard and other electronic components.
3. Package Contents
Verify that all items are present in your motherboard package:
- ASUS M5A97 R2.0 Motherboard
- User Guide / Manual
- I/O Shield
- SATA 6Gb/s Cables (typically 2)
- Support DVD (with drivers and utilities)
- Q-Connector (optional, for front panel connections)

Image: The ASUS M5A97 R2.0 motherboard, its user guide, and the I/O shield as typically found in the product packaging.
4. Motherboard Component Overview
Familiarize yourself with the key components and connectors on your ASUS M5A97 R2.0 motherboard.

Image: A comprehensive view of the ASUS M5A97 R2.0 motherboard, showing the CPU socket, RAM slots, PCIe slots, and various headers.

Image: A detailed view of the AM3+ CPU socket, where the processor is installed.
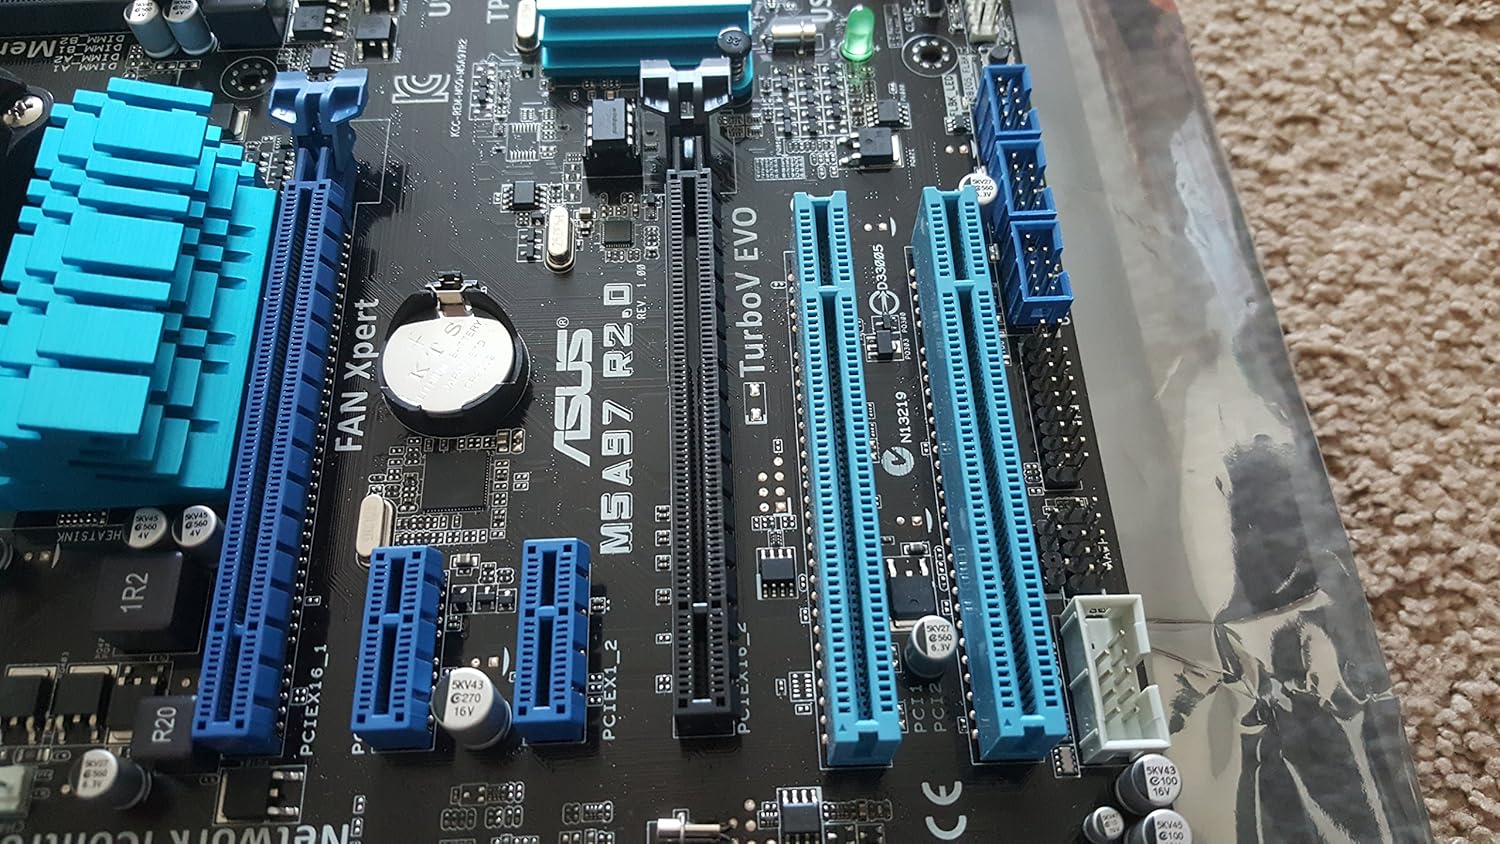
Image: A close-up of the expansion slots, including PCIe x16, PCIe x1, and PCI slots for graphics cards and other expansion cards.

Image: The rear I/O panel, featuring USB 2.0, USB 3.0, LAN, audio, and PS/2 ports.
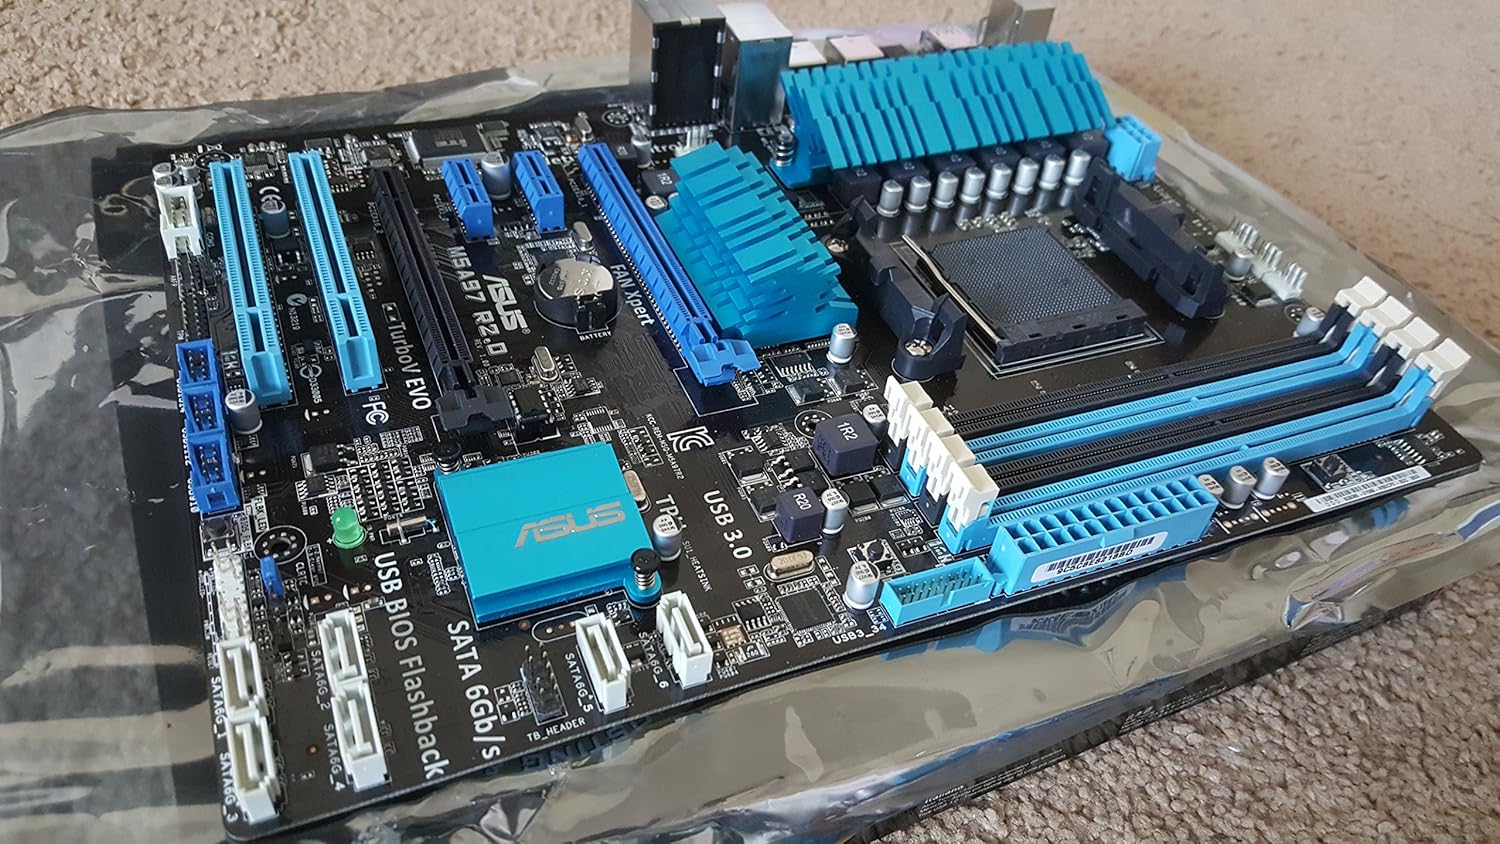
Image: An angled view highlighting the SATA 6Gb/s ports and various internal headers for front panel connections.

Image: A close-up of the four DDR3 DIMM slots, supporting up to 32GB of RAM.
5. Setup and Installation
This section provides a general guide for installing your ASUS M5A97 R2.0 motherboard into a compatible computer chassis. Always refer to your chassis manual for specific installation instructions.
5.1. Preparing the Chassis
- Ensure your computer chassis is powered off and disconnected from the power outlet.
- Remove the side panel(s) of your chassis to access the interior.
- Install the I/O shield provided with your motherboard into the corresponding opening at the rear of the chassis. Ensure it snaps securely into place.
- Identify the motherboard standoffs on the chassis tray. These raised points provide support and prevent short circuits. Most motherboards require 8 or 9 standoffs. Ensure that only the necessary standoffs are present and aligned with the screw holes on your motherboard.
5.2. Installing the Motherboard
- Carefully align the screw holes on your motherboard with the standoffs in the chassis. Also, ensure the rear I/O ports align with the I/O shield.
- Gently lower the motherboard onto the standoffs. It should sit flush against the I/O shield and the standoffs.
- Secure the motherboard using the screws provided with your chassis or motherboard. Start by securing a central screw to hold the board in place, then proceed to screw in the remaining screws in a diagonal pattern to ensure even pressure. Avoid overtightening the screws to prevent damage to the motherboard.
5.3. Connecting Components
After the motherboard is securely installed, connect the following essential components:
- CPU: Install your AMD AM3+ processor into the CPU socket. Ensure proper alignment and secure the retention lever.
- CPU Cooler: Install the CPU cooler according to its manufacturer's instructions.
- RAM: Insert DDR3 memory modules into the DIMM slots. Ensure the clips on both ends of the slot lock the module in place.
- Power Supply: Connect the 24-pin ATX power connector and the 8-pin (or 4-pin) CPU power connector from your power supply to the motherboard.
- Storage Devices: Connect SATA data cables from your storage drives (HDD/SSD) to the SATA 6Gb/s ports on the motherboard. Connect power cables from the power supply to the drives.
- Graphics Card: Insert your graphics card into the primary PCIe x16 slot. Secure it with a screw or retention clip on the chassis. Connect any necessary PCIe power cables from the power supply to the graphics card.
- Front Panel Connectors: Connect the front panel cables (Power LED, HDD LED, Power Switch, Reset Switch, USB, Audio) from your chassis to the corresponding headers on the motherboard. Refer to your motherboard manual for exact pin layouts.
- Case Fans: Connect case fans to the available fan headers on the motherboard.
6. Operating
Once all components are installed and connected, you can proceed with the initial boot-up and operating system installation.
6.1. Initial Boot-Up
- Connect your monitor, keyboard, and mouse to the appropriate ports on the rear I/O panel.
- Connect the power cord to your power supply and turn on the power supply switch.
- Press the power button on your computer case.
- The system should power on, and you should see the ASUS logo or BIOS screen on your monitor.
6.2. BIOS Setup
The BIOS (Basic Input/Output System) is firmware that initializes hardware during the booting process.
- To enter BIOS Setup, press the DEL or F2 key repeatedly during the boot process when the ASUS logo appears.
- In the BIOS, you can configure system settings, boot order, and monitor hardware status.
- For optimal performance, ensure your RAM is running at its rated speed and that the boot order is set correctly for your operating system installation media.
6.3. Driver Installation
After installing your operating system, install the necessary drivers for your motherboard components.
- Use the provided Support DVD to install chipset, audio, LAN, and USB 3.0 drivers.
- Alternatively, download the latest drivers from the official ASUS support website for your specific motherboard model (M5A97 R2.0).
- Install graphics card drivers from the graphics card manufacturer's website.
6.4. Operating System Installation
Follow the instructions provided with your chosen operating system (e.g., Windows, Linux) to complete the installation process. Ensure all drivers are installed for full functionality.
7. Maintenance
Regular maintenance helps ensure the longevity and optimal performance of your motherboard and PC.
- Dust Removal: Periodically clean dust from inside your computer case, especially from fans, heatsinks, and the motherboard surface, using compressed air. Ensure the system is powered off and unplugged.
- BIOS Updates: Check the ASUS support website for BIOS updates. BIOS updates can improve compatibility, stability, and performance. Follow the update instructions carefully to avoid damaging the motherboard.
- Driver Updates: Keep your drivers updated to ensure compatibility with new software and to benefit from performance improvements and bug fixes.
- Cable Management: Ensure cables are neatly routed to improve airflow and prevent interference.
8. Troubleshooting
If you encounter issues with your motherboard, consider the following common troubleshooting steps:
- No Power/No Boot:
- Check all power connections (24-pin ATX, 8-pin CPU, GPU power).
- Ensure the power supply is switched on and functioning.
- Verify front panel power switch connections to the motherboard.
- Try booting with minimal components (CPU, one RAM stick, GPU) to isolate the issue.
- No Display:
- Ensure the monitor is connected and powered on.
- Reseat the graphics card and RAM modules.
- Test with a different monitor or graphics card if possible.
- System Instability/Crashes:
- Check CPU and GPU temperatures.
- Verify RAM is properly seated and compatible. Run memory diagnostic tools.
- Ensure all drivers are correctly installed and up to date.
- Reset BIOS settings to default.
- Peripheral Issues (USB, Audio, LAN):
- Ensure relevant drivers are installed.
- Check physical connections.
- Verify settings in BIOS.
For more detailed troubleshooting, consult the comprehensive user manual on the ASUS support website or contact ASUS customer support.
9. Specifications
| Feature | Specification |
|---|---|
| Brand | ASUS |
| Model | M5A97 R2.0 |
| CPU Socket | Socket AM3+ |
| Compatible Processors | Socket AM3+ |
| Chipset Type | AMD 970/SB950 |
| RAM Memory Technology | DDR3 1800 |
| RAM Memory Maximum Size | 32 GB |
| Memory Clock Speed | 1333 MHz |
| Number of USB 2.0 Ports | 6 |
| Product Dimensions (LxWxH) | 10.35 x 2.09 x 12.91 inches |
| Item Weight | 3.26 pounds |
| Batteries Required | 1 CR2 battery |
10. Warranty and Support
For detailed warranty information, technical support, and the latest drivers and utilities, please visit the official ASUS support website. You can typically find support resources by searching for your product model (M5A97 R2.0) on their site.
Keep your proof of purchase for warranty claims.