1. Introduction and Overview
The Jensen JHD910BT is a heavy-duty, waterproof AM/FM/WB radio designed for demanding environments, such as off-highway and marine applications. This compact unit features Bluetooth connectivity for transmitting audio to compatible Bluetooth headphones, a front panel auxiliary input, and a 7-channel NOAA Weatherband tuner with Weather Alert functionality.
Its robust design ensures durability, while its comprehensive features provide versatile audio entertainment and critical weather information.
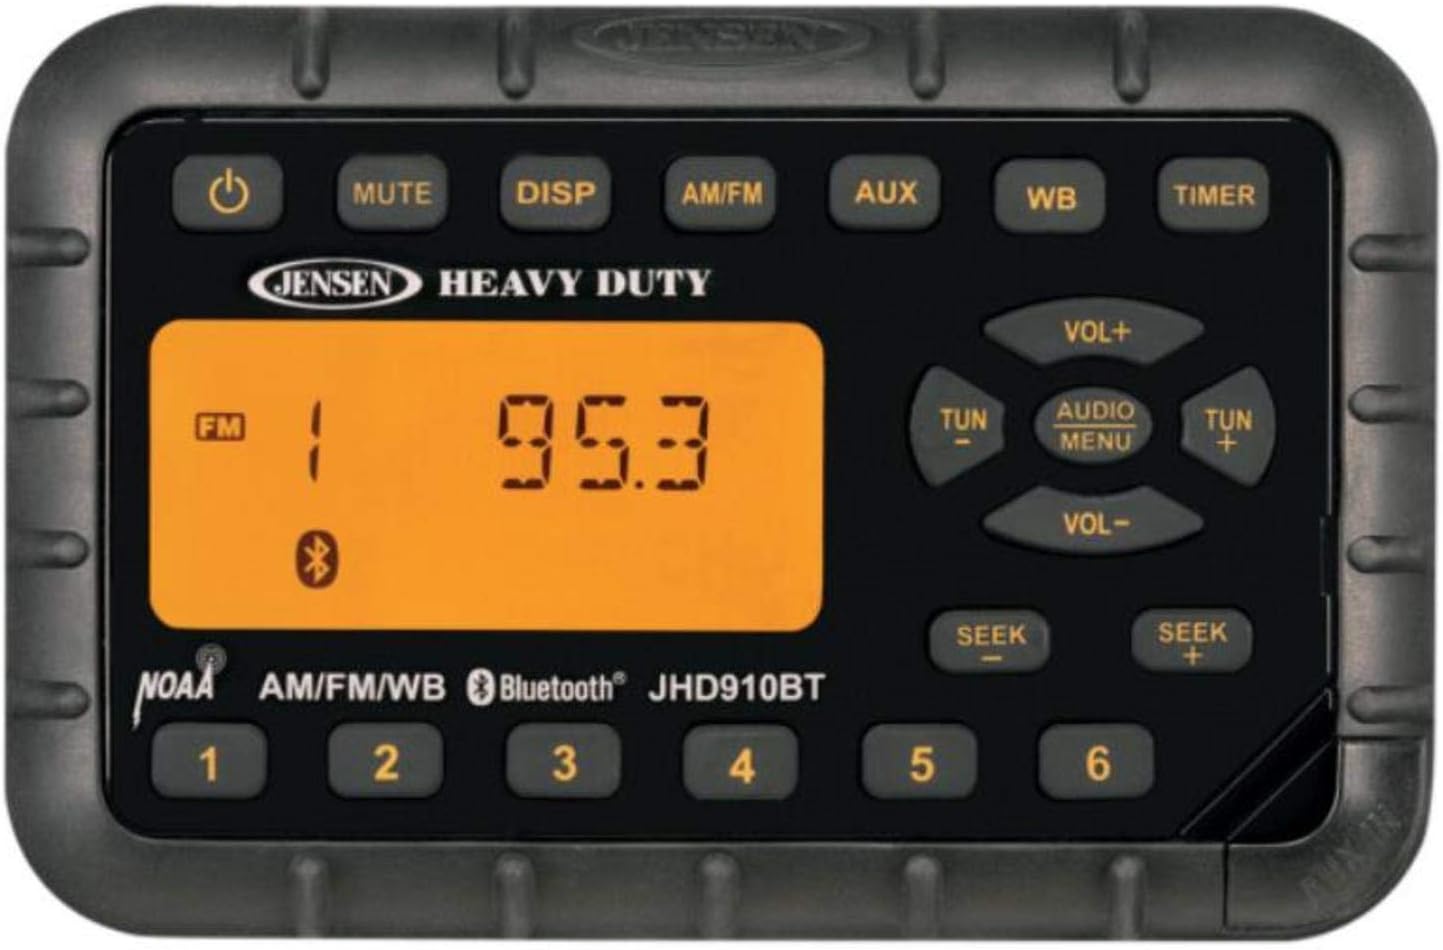
Figure 1: Front Panel of the Jensen JHD910BT Radio
2. Safety Information
Please read all safety instructions carefully before operating the JHD910BT radio. Failure to follow these instructions may result in injury or damage to the unit.
- Power Supply: Ensure the unit is connected to a 12V DC power source only. Incorrect voltage can cause damage.
- Wiring: All wiring should be performed by a qualified professional to prevent electrical shorts or fire hazards.
- Water Resistance: While waterproof, avoid submerging the unit. Ensure all connections are properly sealed to maintain water resistance.
- Temperature: Do not expose the unit to extreme temperatures or direct sunlight for extended periods.
- Proposition 65 Warning: This product can expose you to chemicals including DEHP, which is known to the State of California to cause cancer and birth defects or other reproductive harm. For more information go to www.P65Warnings.ca.gov.
3. Package Contents
Verify that all items are present in the package before installation:
- Jensen JHD910BT Bluetooth Mini Radio Unit
- Auxiliary Cable
- Mounting Hardware (if applicable, not explicitly listed but standard for installation)
- Instruction Manual (this document)
Note: Bluetooth headphones and AM/FM antenna are sold separately and are not included with the unit.
4. Installation and Setup
Proper installation is crucial for optimal performance and longevity of your JHD910BT radio. It is recommended to have the unit installed by a professional.
4.1 Mounting
The JHD910BT is designed for flush mounting. Ensure there is sufficient space behind the mounting surface for wiring and ventilation. The unit's dimensions are approximately 5.2"W x 3.4"H x 1.8"D (12 x 9 x 3 inches).
4.2 Wiring Connections
Connect the radio to your vehicle's 12V DC power system. The unit features a 2-wire connection that allows it to maintain station presets even when the vehicle battery is disconnected (for up to 30 days).
- Power (Red/Yellow Wire): Connect to a switched 12V DC power source.
- Ground (Black Wire): Connect to a good chassis ground.
- Speaker Outputs: Connect your speakers to the appropriate speaker wires. The unit provides 2-channel amplified audio output (15W).
- Antenna Input: Connect your AM/FM antenna (sold separately) to the antenna jack.
- Auxiliary Input: The front panel features an audio AUX-in for connecting external devices like iPods, MP3 players, or portable CD players using the supplied auxiliary cable.
Always ensure proper polarity and secure all connections to prevent short circuits and ensure reliable operation.
5. Operating Instructions
Familiarize yourself with the control buttons on the front panel (refer to Figure 1).
5.1 Power On/Off
- Press the POWER (⏻) button to turn the unit ON or OFF.
5.2 Volume Control
- Press VOL+ to increase the volume.
- Press VOL- to decrease the volume.
5.3 Mode Selection
- Press AM/FM to switch between AM and FM radio bands.
- Press AUX to select the Auxiliary Input mode.
- Press WB to select the NOAA Weatherband mode.
5.4 Radio Tuning (AM/FM)
- Manual Tuning: Press TUN+ or TUN- to manually tune the frequency up or down.
- Seek Tuning: Press SEEK+ or SEEK- to automatically seek the next strong station.
- Preset Stations: The unit supports 30 programmable station presets (18 FM, 12 AM).
- To Save a preset: Tune to the desired station, then press and hold one of the numbered preset buttons (1-6) until the display confirms storage.
- To Recall a preset: Briefly press the corresponding numbered preset button (1-6).
5.5 Bluetooth Operation
Important Note: The JHD910BT radio only TRANSMITS Bluetooth signals to Bluetooth-enabled headphones. It will NOT pair with smartphones or other devices to receive audio. You cannot stream music from a smartphone to this radio via Bluetooth.
- To connect Bluetooth headphones: Ensure your Bluetooth headphones are in pairing mode. The radio will automatically attempt to connect to discoverable Bluetooth headphones. Refer to your headphone's manual for pairing instructions.
- Once connected, audio from the radio (AM/FM, WB, AUX) will be transmitted to your headphones.
5.6 NOAA Weatherband (WB)
- Press the WB button to enter Weatherband mode. The unit will tune to one of the 7 NOAA Weatherband channels.
- Weather Alert: The radio features a Weather Alert function that automatically switches to WB mode and broadcasts the NOAA warning when a broadcast is received, even if the radio is in another mode.
5.7 Display and Audio Settings
- DISP (Display): Press the DISP button to cycle through display information (e.g., time, frequency).
- Backlight Color: The controls feature backlit illumination with selectable amber or green color. Consult the full manual for changing this setting (not detailed in provided data).
- AUDIO MENU: Press the AUDIO MENU button to access audio settings such as Bass, Treble, and Balance. Use VOL+ and VOL- to adjust these settings.
- MUTE: Press the MUTE button for one-touch audio muting. Press again to restore audio.
- TIMER: Press the TIMER button to access timer functions (e.g., clock display, sleep timer). The clock runs up to 30 days when the vehicle battery is disconnected.
6. Maintenance
To ensure the longevity and optimal performance of your JHD910BT radio, follow these maintenance guidelines:
- Cleaning: Use a soft, damp cloth to clean the exterior of the unit. Do not use abrasive cleaners or solvents.
- Water Resistance: Regularly inspect the unit for any signs of damage to the casing or seals that could compromise its waterproof integrity.
- Connections: Periodically check all wiring connections to ensure they are secure and free from corrosion.
7. Troubleshooting
If you experience issues with your JHD910BT radio, refer to the following common problems and solutions:
| Problem | Possible Cause | Solution |
|---|---|---|
| No Power | Incorrect wiring; Blown fuse; Vehicle battery disconnected. | Check power and ground connections; Replace fuse; Ensure vehicle battery is connected and charged. |
| No Sound | Volume too low; Mute function active; Speaker wires disconnected. | Increase volume; Press MUTE button; Check speaker connections. |
| Poor Radio Reception | Antenna not connected; Damaged antenna; Weak signal area. | Ensure antenna is securely connected; Inspect antenna for damage; Try tuning to a stronger station. |
| Bluetooth Not Connecting to Phone | Unit only transmits Bluetooth signals. | This unit is designed to transmit audio to Bluetooth headphones only. It cannot receive audio from smartphones or other devices. |
| Presets Lost | Improper 2-wire connection; Extended power disconnection. | Verify the 2-wire connection is correctly installed; Note that presets are maintained for up to 30 days without vehicle power. |
8. Specifications
| Feature | Detail |
|---|---|
| Manufacturer | ASA Electronics |
| Model | JHD910BT |
| Power Source | 12V DC |
| Output Power | 6W x 2 Max (2-channel amplified audio output 15W) |
| Tuner Type | AM/FM Electronic Tuner (US/Euro selectable) |
| Weatherband | 7-Channel NOAA Weatherband Tuner with Weather Alert |
| Connectivity | Bluetooth (Transmit only to headphones), Front Panel Audio AUX-in |
| Presets | 30 programmable station presets (18 FM, 12 AM) |
| Display | LCD with Backlit controls (selectable amber or green) |
| Dimensions (W x H x D) | 5.2" x 3.4" x 1.8" (12 x 9 x 3 inches) |
| Weight | 1.6 pounds (0.73 kg) |
| UV Exposure Standard | ASTM D4329 Compliant |
9. Warranty and Support
Jensen products are manufactured to high quality standards. For information regarding warranty coverage, please refer to the warranty card included with your product or visit the official Jensen website. For technical support or service inquiries, please contact Jensen customer service.
Keep your purchase receipt as proof of purchase for warranty claims.