1. Introduction
The Outback Power FM80 is an advanced Maximum Power Point Tracking (MPPT) charge controller designed for use with photovoltaic (PV) arrays in off-grid and grid-tied battery-based solar systems. It efficiently converts higher voltage solar power into the correct voltage for charging batteries, maximizing energy harvest from your solar panels. This manual provides essential information for the safe installation, operation, and maintenance of your FM80 charge controller.
2. Safety Information
Please read and understand all safety instructions before installing or operating the FM80 charge controller. Failure to follow these instructions may result in electric shock, fire, or severe injury.
- Installation and maintenance must be performed by qualified personnel familiar with solar power systems and electrical safety procedures.
- Always disconnect all power sources (PV array and battery bank) before performing any wiring or maintenance on the controller.
- Ensure proper grounding of the charge controller as per local electrical codes.
- Do not operate the controller if it appears damaged or has been exposed to moisture.
- Wear appropriate personal protective equipment (PPE), including insulated gloves and eye protection, when working with batteries and electrical systems.
3. Product Overview
The Outback Power FM80 charge controller features a robust design with an integrated LCD display for monitoring system performance and configuring settings. The front panel provides access to the display and control buttons.
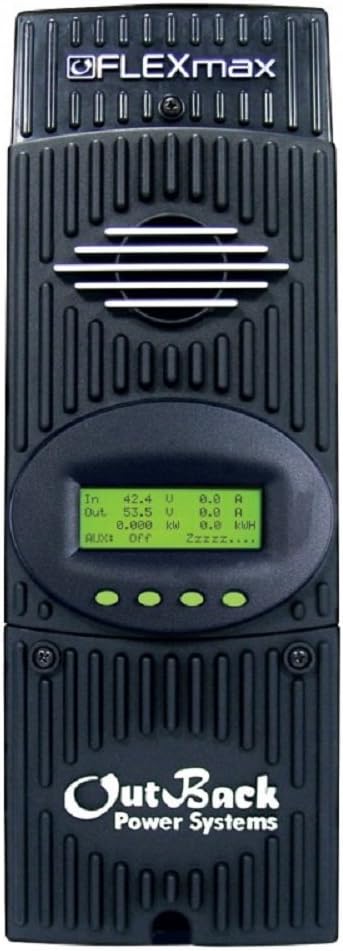
Figure 3.1: Front view of the Outback Power FM80 Charge Controller, showing the display and ventilation fins.
3.1. Display and Controls
The LCD screen provides real-time data on PV input, battery status, and power output. Navigation buttons allow users to scroll through menus, adjust settings, and view historical data. The display typically shows input voltage, output voltage, current, power, and kilowatt-hours generated.
4. Specifications
The following table outlines the key technical specifications for the Outback Power FM80 MPPT Charge Controller.
| Feature | Specification |
|---|---|
| Model Number | FM80 |
| Nominal Battery Voltages | 12, 24, 36, 48, or 60V (configurable) |
| Maximum Output Current | 80A @ 104°F (40°C) with adjustable current limit |
| Maximum PV Open Circuit Voltage | 150V |
| Product Dimensions (L x W x H) | 16.25 x 5.75 x 4.5 inches (41.3 x 14.6 x 11.4 cm) |
| Item Weight | 14 pounds (6.35 kg) |
| Display Type | LED (3.1" backlit LCD screen, 4 lines with 80 alphanumeric characters total) |
| Operating Temperature Range | -40 to 60°C (power automatically derated above 40°C) |
| Environmental Rating | Indoor Type 1 |
| Included Components | Controller |
| Batteries Required | No (requires external battery bank) |
Figure 4.1: Outback Power FM80 Specifications Summary.

Figure 4.2: Detailed specifications for FlexMax series, including FM80.
5. Setup and Installation
Proper installation is critical for the safe and efficient operation of your FM80 charge controller. Refer to the wiring diagram and follow these steps carefully.
5.1. Mounting
- Mount the FM80 vertically on a non-combustible surface in a well-ventilated area, away from direct sunlight and moisture.
- Ensure adequate clearance around the unit for proper airflow and heat dissipation.
- Use appropriate mounting hardware to secure the controller firmly.
5.2. Wiring Connections
Follow the wiring sequence below to prevent damage to the controller or other system components. Always connect the battery first and disconnect the PV array last.
- Battery Connection: Connect the battery bank to the BATTERY terminals on the FM80. Ensure correct polarity (positive to positive, negative to negative).
- Ground Connection: Connect the system ground to the designated ground terminal on the FM80.
- PV Array Connection: Connect the PV array to the PV INPUT terminals on the FM80. Verify correct polarity. Ensure the PV array open-circuit voltage (Voc) does not exceed 150V.

Figure 5.1: Quick Start Guide illustrating wiring connections for PV array, battery bank, and ground.
6. Operating Instructions
Once installed, the FM80 will automatically begin charging. Use the integrated LCD display and buttons to monitor performance and adjust settings.
6.1. Initial Power-Up
After connecting the battery and PV array, the FM80 will power on and display initial system information. The default settings are suitable for many systems, but it is recommended to verify and adjust them as needed for your specific battery type and system requirements.
6.2. Navigating the LCD Screen
The FM80 features a backlit LCD screen and four navigation buttons (Up, Down, Left, Right/Enter). Use these buttons to scroll through various status screens, access the main menu, and configure settings.
- Status Screens: Display real-time data such as PV input voltage, current, power, battery voltage, and charge status.
- Main Menu: Provides access to advanced settings, charger setup, AUX output control, logging data, and system statistics.

Figure 6.1: Overview of startup, charger configuration, and status menus on the FM80 display.
6.3. Basic Configuration
From the Main Menu, navigate to 'Charger Setup' to configure essential parameters:
- Battery Type: Select the appropriate battery type (e.g., Flooded, AGM, Gel) to ensure correct charging algorithms.
- Battery Voltage: Confirm the nominal battery voltage (12V, 24V, 48V, etc.).
- Charge Setpoints: Adjust Bulk, Absorption, Float, and Equalization voltages as recommended by your battery manufacturer.
7. Maintenance
Regular maintenance ensures optimal performance and longevity of your FM80 charge controller.
- Cleaning: Periodically clean the exterior of the controller with a dry cloth to remove dust and debris. Ensure ventilation openings are clear.
- Connection Inspection: Annually inspect all electrical connections for tightness and corrosion. Re-tighten as necessary.
- Firmware Updates: Check the Outback Power website for available firmware updates. Follow the instructions provided by the manufacturer for any updates.
- Battery Maintenance: Follow your battery manufacturer's recommendations for battery maintenance, as this directly impacts system performance and controller operation.
8. Troubleshooting
This section provides solutions to common issues you might encounter with your FM80 charge controller.
- No Display/No Power:
- Check battery connections and ensure they are secure and correctly polarized.
- Verify battery voltage is within the operating range of the controller.
- Check for blown fuses or tripped circuit breakers in the battery circuit.
- Low Charging Current/No Charging:
- Ensure PV array is receiving adequate sunlight and is not shaded.
- Check PV array connections for proper polarity and tightness.
- Verify PV array open-circuit voltage (Voc) and short-circuit current (Isc) are within specifications.
- Check for any error messages on the FM80 display.
- Overcharging/Undercharging:
- Verify that the battery type and charge setpoints are correctly configured in the controller settings.
- Ensure the battery temperature sensor (if used) is properly installed and functioning.
For persistent issues or error codes not listed, consult the full Outback Power FM80 owner's manual or contact technical support.
9. Warranty and Support
9.1. Warranty Information
The Outback Power FM80 Charge Controller typically comes with a standard 5-year warranty, with an option for an extended 10-year warranty. Please refer to your product documentation or the official Outback Power website for the most current and detailed warranty terms and conditions.
9.2. Technical Support
For technical assistance, troubleshooting guidance, or warranty claims, please contact Outback Power customer service. Contact information can typically be found on the manufacturer's website or in the original product packaging.
Outback Power Systems
Website: www.outbackpower.com (Example link, verify actual URL)


