Instruction Manual
Baby Lock, Simplicity Serger Lower Looper
Model: 405-6101-02B
1. Product Overview
This manual provides essential information for the installation, use, and maintenance of your Baby Lock, Simplicity Serger Lower Looper. This component is crucial for the proper functioning of compatible serger machines, ensuring consistent and high-quality overlock stitches.
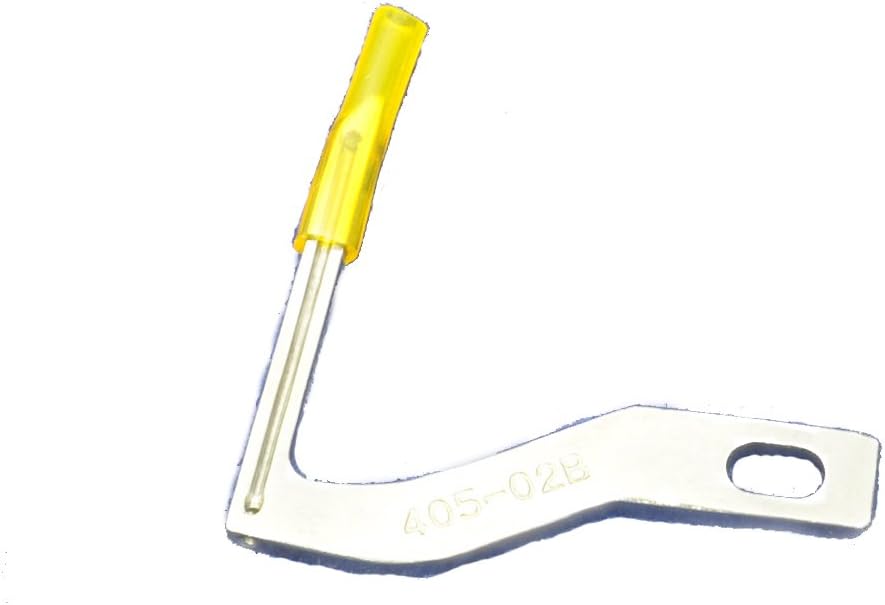
Image 1.1: The Baby Lock, Simplicity Serger Lower Looper. This metallic component features a distinct L-shape with a small eyelet at one end and a yellow protective cap covering the needle-like tip. The model number "405-02B" is visible on its surface.
2. Setup and Installation
Before attempting installation, ensure your serger machine is turned off and unplugged from the power source to prevent accidental injury.
- Identify the Lower Looper Area: Locate the lower looper mechanism within your serger machine. Refer to your serger's specific instruction manual for detailed diagrams if needed.
- Remove the Old Looper (if applicable): Carefully unthread any existing threads from the old lower looper. Loosen the screw(s) that secure the old looper in place and gently remove it. Keep track of any washers or small parts.
- Prepare the New Looper: Handle the new lower looper by its main body, avoiding touching the delicate tip. Ensure the yellow protective cap is removed before installation.
- Insert the New Looper: Position the new lower looper into its designated slot. Align the screw hole(s) on the looper with the corresponding holes on the serger.
- Secure the Looper: Insert and gently tighten the screw(s) to secure the lower looper. Do not overtighten, as this can damage the looper or the machine. The looper should be firmly in place but not rigidly clamped.
- Verify Movement: Manually turn the handwheel of your serger to ensure the newly installed lower looper moves freely and correctly in conjunction with the upper looper and needles. There should be no obstruction or binding.
- Thread the Machine: Once installed, re-thread your serger machine according to its specific threading path, paying close attention to the lower looper's threading points.
If you encounter difficulty, consult a qualified sewing machine technician or your serger's comprehensive manual.
3. Functionality and Usage
The lower looper works in conjunction with the upper looper and needles to form the overlock stitch. Its precise movement is critical for creating balanced and secure seams.
- Stitch Formation: During operation, the lower looper catches the lower thread and carries it around the needle thread, forming the characteristic loop of an overlock stitch.
- Thread Tension: Proper tension settings for the lower looper thread are essential for a balanced stitch. Refer to your serger's manual for recommended tension adjustments.
- Thread Compatibility: Use high-quality serger threads that are compatible with your machine and the looper to ensure smooth operation and prevent thread breakage.
4. Maintenance
Regular maintenance of your serger, including the lower looper, will extend its lifespan and ensure optimal performance.
- Cleaning: Periodically clean lint and thread debris from around the lower looper area using a small brush or vacuum. Accumulation of lint can impede looper movement and affect stitch quality.
- Oiling: Apply a small drop of high-quality sewing machine oil to the moving parts of the lower looper mechanism as recommended by your serger's manual. Do not over-oil.
- Inspection: Regularly inspect the looper for any signs of wear, bending, or damage. A damaged looper can cause skipped stitches, thread breakage, or uneven seams.
- Storage: When not in use, store your serger in a clean, dry environment, preferably covered, to protect the looper and other components from dust and moisture.
5. Troubleshooting
If you experience issues after installing or while using the lower looper, consider the following common problems and solutions:
| Problem | Possible Cause | Solution |
|---|---|---|
| Skipped Stitches | Incorrect looper installation, bent looper, improper threading, incorrect tension. | Re-install looper correctly, check for damage, re-thread machine, adjust tension. |
| Thread Breakage (Lower Looper) | Burr on looper, incorrect threading, too much tension, poor quality thread. | Inspect looper for rough spots, re-thread, reduce tension, use quality thread. |
| Uneven Stitches | Incorrect tension, looper not seated properly. | Adjust tension settings, ensure looper is securely installed. |
For persistent issues, it is recommended to seek assistance from a certified serger technician.
6. Specifications
- Product Name: Baby Lock, Simplicity Serger Lower Looper
- Model Number: 405-6101-02B
- Part Number: 405-6101-02B
- Compatibility: Designed for Baby Lock and Simplicity serger models requiring part 405-6101-02B. (Always verify compatibility with your specific serger model before purchase and installation.)
- Material: Durable metal alloy
- Weight: Approximately 1 pound (as per product specifications)
7. Warranty and Support
This lower looper is a replacement part. Warranty coverage, if any, is typically provided by the retailer or the original manufacturer of the part. Please retain your proof of purchase for any warranty claims.
For technical support regarding the installation or function of this part within your serger, it is recommended to consult your serger machine's official manual or contact the manufacturer of your serger directly. For inquiries related to the purchase of this specific looper, please contact your retailer.
Note: This manual provides general guidance. Always refer to your specific serger machine's instruction manual for detailed, model-specific information and safety precautions.


