
1. Introduction
Thank you for purchasing the Westek ATW-P24 Programmable Plug-in Timer. This device allows you to automate the operation of electrical appliances by setting specific ON/OFF times over a 7-day period. It is designed for indoor use and offers convenience and energy savings.
2. Important Safety Information
- For indoor use only. Do not expose to moisture or extreme temperatures.
- Do not exceed the electrical ratings: 120 VAC, 15 Amps, 1875 Watts. Overloading the timer can cause damage or fire.
- Ensure the timer is securely plugged into a grounded outlet.
- Do not disassemble or attempt to repair the unit. Refer servicing to qualified personnel.
- Keep out of reach of children.
3. Product Overview
Familiarize yourself with the components of your Westek ATW-P24 timer:
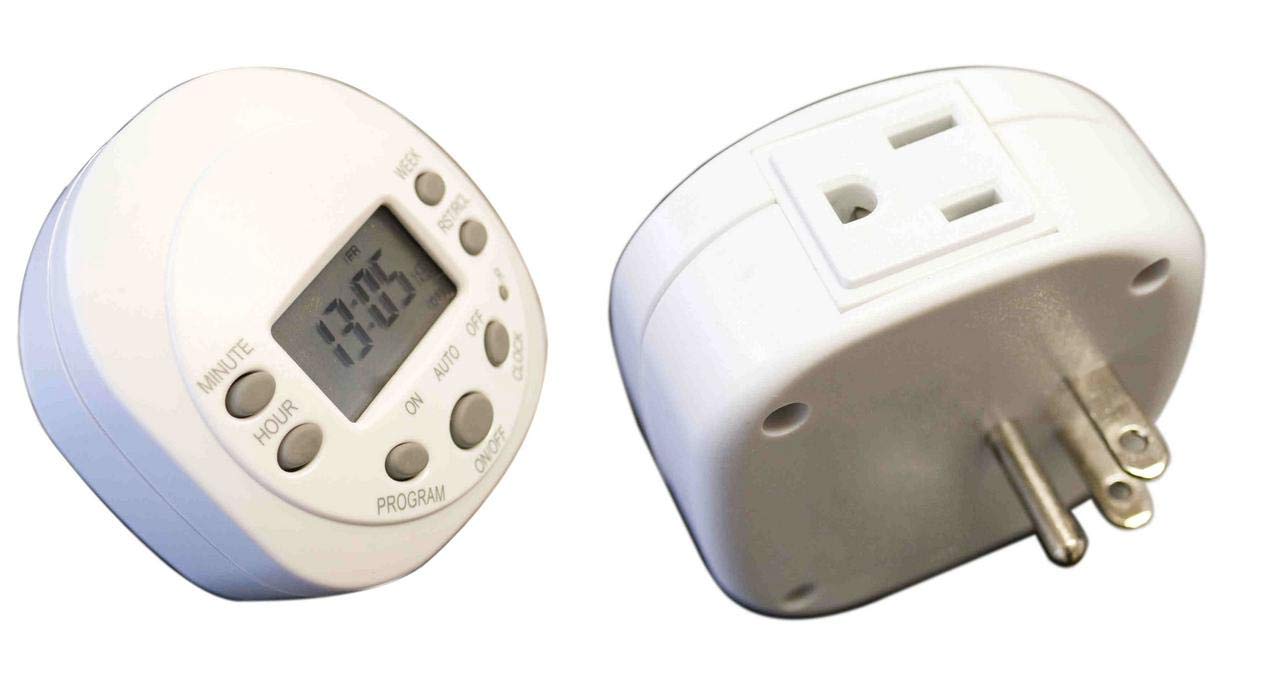
This image shows the front view of the Westek ATW-P24 Programmable Plug-in Timer. It features a digital LCD screen displaying the time and day, surrounded by control buttons labeled SET, TIME, RND, RESET, MANUAL, CTD, and plus/minus buttons. An electrical outlet is visible on the side.
Controls and Display:
- LCD Display: Shows current time, day, and program status.
- SET Button: Used to enter programming mode for time and programs.
- TIME Button: Used to set the current time and day.
- RND (Random) Button: Activates or deactivates the random ON/OFF feature.
- RESET Button: Resets all settings to factory defaults. Use a pointed object (e.g., pen tip) to press.
- MANUAL Button: Overrides current program to turn the connected device ON or OFF instantly.
- CTD (Countdown) Button: Activates or deactivates the countdown timer function.
- + / - Buttons: Used to adjust time, day, and program settings.
4. Setup
4.1 Initial Power-Up and Reset
- Plug the timer into a standard 120V AC wall outlet. The display should illuminate.
- Using a small, pointed object (like a pen or paperclip), press the RESET button located in the center of the control panel. This clears all previous settings and ensures proper operation. The display will show 12:00 AM and Monday.
4.2 Setting Current Time and Day
- Press the TIME button once. The hour digit will flash.
- Use the + or - buttons to adjust the hour. Pay attention to AM/PM indicators.
- Press the TIME button again. The minute digit will flash.
- Use the + or - buttons to adjust the minutes.
- Press the TIME button a third time. The day of the week will flash.
- Use the + or - buttons to select the current day (MO, TU, WE, TH, FR, SA, SU).
- Press the TIME button one last time to confirm and exit time setting mode. The display will show the current time and day.
5. Operating Instructions
5.1 Programming ON/OFF Times
The timer allows for multiple ON/OFF programs. Follow these steps to set a program:
- Press the SET button once. The display will show '1 ON' and the hour will flash. This is for the first ON program.
- Use the + or - buttons to set the desired ON hour.
- Press SET again. The minute will flash. Use + or - to set the desired ON minute.
- Press SET again. The day(s) of the week will flash. Use + or - to cycle through various day combinations (e.g., MO-SU, MO-FR, SA-SU, individual days, etc.) until you find the desired setting for this ON program.
- Press SET again. The display will show '1 OFF' and the hour will flash. This is for the first OFF program, corresponding to the '1 ON' program you just set.
- Repeat steps 2-4 to set the desired OFF time and day(s) for this program.
- To set additional programs (2 ON/OFF, 3 ON/OFF, etc.), continue pressing the SET button and repeat the process. The timer typically supports several programs.
- Once all desired programs are set, press the TIME button to exit programming mode and return to the current time display.
5.2 Manual Override
To temporarily turn the connected appliance ON or OFF without affecting the programmed settings:
- Press the MANUAL button. Each press will cycle through ON, OFF, and AUTO modes.
- In ON mode, the appliance will stay on until the next programmed OFF time or until manually changed.
- In OFF mode, the appliance will stay off until the next programmed ON time or until manually changed.
- In AUTO mode, the timer will follow the programmed ON/OFF settings.
5.3 Random Function (RND)
The random function is useful for security, making it appear as if someone is home. It will randomly turn the connected appliance ON and OFF within a certain time window.
- Press the RND button to activate the random function. 'RND' will appear on the display.
- Press the RND button again to deactivate it. 'RND' will disappear.
5.4 Countdown Function (CTD)
The countdown function allows you to turn an appliance ON or OFF after a specified duration.
- Press the CTD button. The display will show 'CTD' and the hour will flash.
- Use the + or - buttons to set the desired countdown hour.
- Press CTD again. The minute will flash. Use + or - to set the desired countdown minute.
- Press CTD again to start the countdown. The display will show the remaining time.
- Once the countdown reaches zero, the connected appliance will switch its state (if it was ON, it turns OFF; if it was OFF, it turns ON).
- To cancel the countdown, press the CTD button again during the countdown.
6. Maintenance
The Westek ATW-P24 timer requires minimal maintenance.
- Clean the unit with a soft, dry cloth. Do not use abrasive cleaners or solvents.
- Ensure the timer is unplugged before cleaning.
- There are no user-serviceable parts inside.
7. Troubleshooting
- Timer display is blank: Ensure the timer is securely plugged into a live 120V AC outlet. If the display remains blank after plugging in, the unit may be faulty.
- Appliance does not turn ON/OFF at programmed times:
- Check if the timer is in AUTO mode (not ON or OFF from manual override).
- Verify that the current time and day are set correctly.
- Review your programmed ON/OFF times and ensure they are set for the correct days.
- Ensure the appliance connected to the timer is working correctly when plugged directly into the wall outlet.
- Confirm the appliance's power switch is in the ON position if it has one.
- Programs are lost after power outage: The timer has an internal battery to retain settings during brief power interruptions. If programs are lost, press the RESET button and reprogram the timer.
- Buttons are unresponsive: Try pressing the RESET button with a pointed object. If the issue persists, the unit may be faulty.
8. Specifications
- Model: ATW-P24
- Electrical Rating: 120 VAC, 15 Amps, 1875 Watts
- Programming: 7 day/24 hour programmable
- Functions: Programmable ON/OFF, Manual Override, Random, Countdown
- Dimensions: Approximately 1.25 x 2.75 x 3 inches
- Weight: Approximately 2.4 ounces
- Material: Brass (internal components), Plastic (housing)
- Color: White
9. Warranty and Support
This Westek ATW-P24 Programmable Plug-in Timer comes with a 3-year manufacturer's warranty from the date of purchase. This warranty covers defects in materials and workmanship under normal use.
For warranty claims, technical support, or further assistance, please contact Westek customer service. Keep your proof of purchase for warranty validation.
Please note: The warranty does not cover damage caused by misuse, accident, unauthorized modification, or exceeding the specified electrical ratings.