1. Introduction
The HP 1910-8G-PoE+ 180W Switch (Model JG350A) is an advanced smart-managed, fixed-configuration Gigabit Ethernet Layer 3 switch. Designed for small businesses, it offers enhanced features in an easy-to-administer solution, providing reliable network connectivity and Power over Ethernet Plus (PoE+) capabilities.
2. Key Features
- Gigabit Ethernet Ports: Provides 8 Gigabit Ethernet ports for high-speed network connections.
- PoE+ Capability: Supports Power over Ethernet Plus (802.3at) to power compatible devices such as IP phones, wireless access points, and IP cameras directly through the network cable.
- SFP Ports: Includes additional true Gigabit SFP ports for fiber connectivity, extending network reach.
- Flexible Deployment: Supports both rack mounting and desktop operation.
- Quiet Operation: Utilizes variable-speed fans to minimize noise.
- IPv6 Support: Operates at full wire-speed IPv6.
- Quality of Service (QoS): Supports traffic prioritization for optimal performance of critical applications.
- Security Features: Includes 802.1X network login, access control lists (ACLs), and denial-of-service (DoS) prevention.
- Advanced Layer 3 Features: Customizable features such as VLANs, link aggregation trunking, static routing, and Spanning Tree Protocols (STP, RSTP, MSTP).
3. Package Contents
Verify that your package contains the following items:
- HP 1910-8G-PoE+ 180W Switch (JG350A)
- Power Cord
- Rack-mount Kit (if applicable)
- Quick Start Guide and Warranty Information
If any items are missing or damaged, contact your vendor immediately.
4. Physical Description
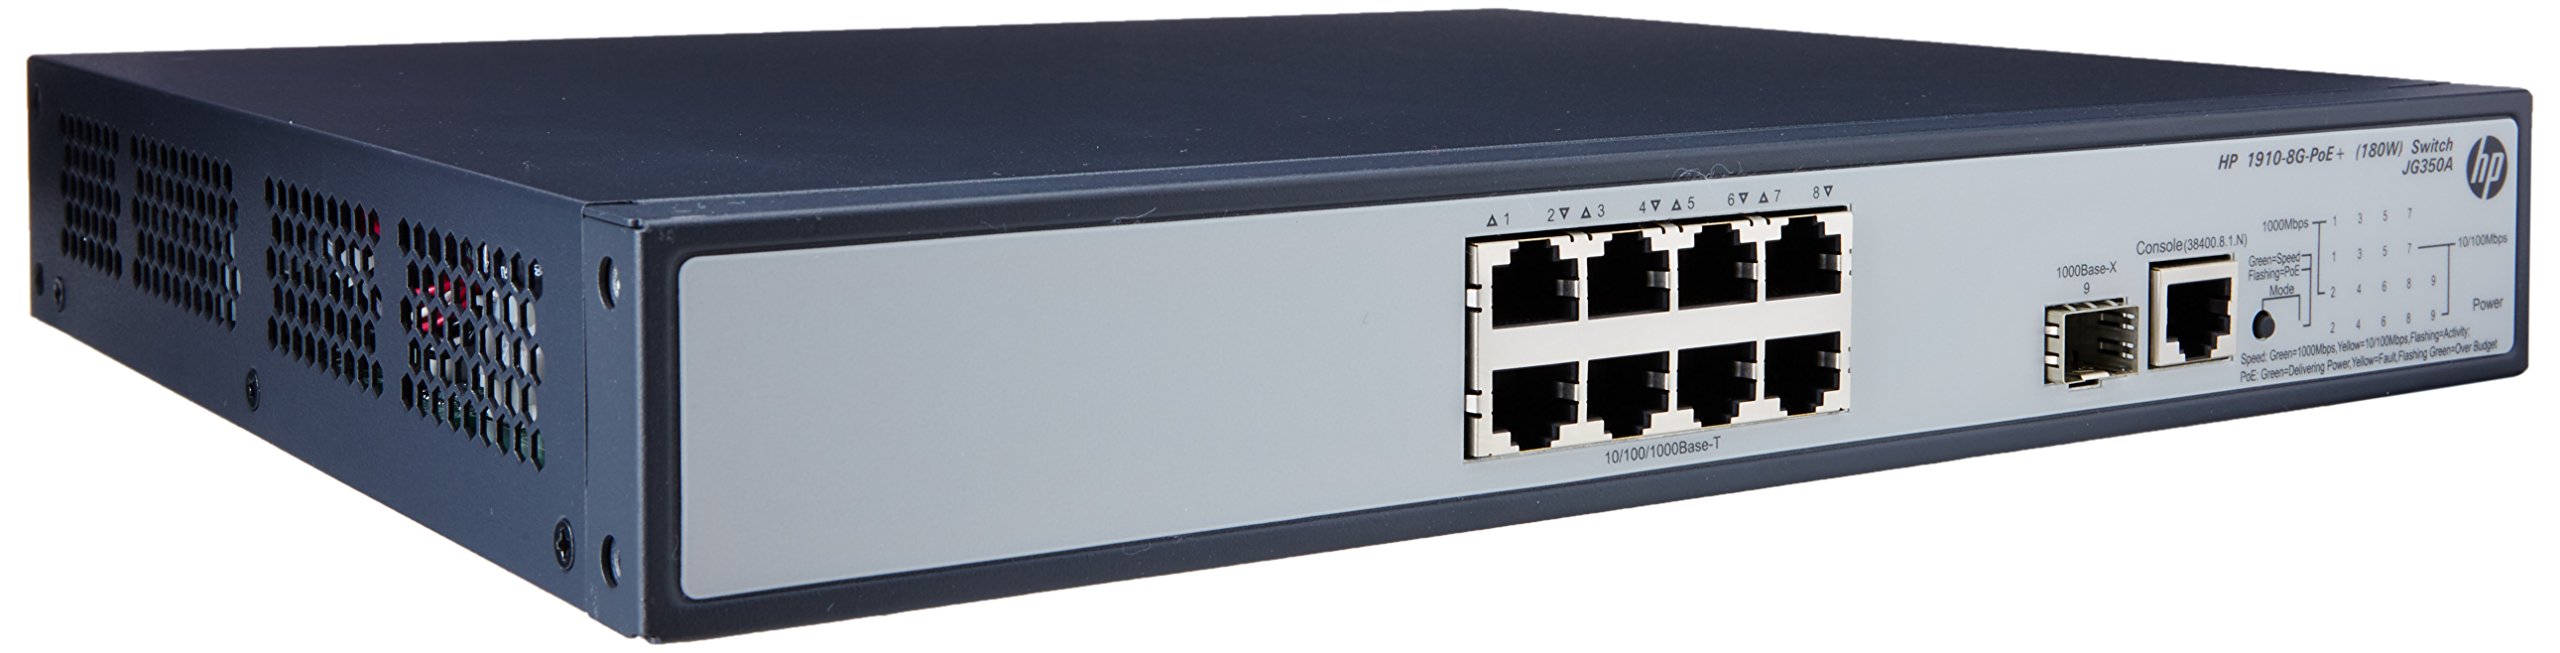

4.1 Front Panel
The front panel of the switch includes:
- 8 x RJ45 Gigabit Ethernet Ports: These ports support 10/100/1000 Mbps connections and are PoE+ enabled, providing power to connected devices.
- 2 x SFP Ports: Dedicated slots for Gigabit fiber optic transceivers, allowing for long-distance connections.
- LED Indicators: Status lights for power, system, and individual port activity/PoE status.
4.2 Rear Panel
The rear panel typically contains the AC power input connector and ventilation openings.
5. Setup
5.1 Safety Precautions
- Ensure proper ventilation around the switch to prevent overheating.
- Do not block any ventilation openings.
- Use only the power cord provided with the device.
- Avoid placing the switch in direct sunlight or near heat sources.
5.2 Mounting the Switch
The HP 1910-8G-PoE+ 180W Switch can be deployed in two ways:
- Desktop Placement: Place the switch on a flat, stable surface, ensuring adequate space for ventilation.
- Rack Mounting: Use the provided rack-mount kit to install the switch into a standard 19-inch equipment rack. Follow the instructions included with the rack-mount kit for proper installation.
5.3 Connecting Power
- Connect one end of the power cord to the AC power input on the rear panel of the switch.
- Connect the other end of the power cord to a grounded electrical outlet.
- The power LED on the front panel should illuminate, indicating the switch is receiving power.
5.4 Connecting Network Devices
- RJ45 Ports: Connect your network devices (computers, servers, IP phones, wireless access points) to the RJ45 ports using standard Ethernet cables. For PoE-powered devices, ensure they are PoE+ compatible.
- SFP Ports: Insert compatible SFP transceivers into the SFP slots, then connect fiber optic cables to the transceivers for fiber uplinks or long-distance connections.
5.5 Initial Configuration
The HP 1910 switch is a smart-managed device, typically configured via a web-based graphical user interface (GUI). Refer to the Quick Start Guide for the default IP address, username, and password to access the management interface. It is recommended to change default credentials immediately after initial access for security purposes.
6. Operating the Switch
6.1 Power On
Once connected to power, the switch will automatically power on. Observe the system LED for boot-up status. A steady green light typically indicates normal operation.
6.2 Network Connectivity
When a device is connected to an RJ45 port, the corresponding port LED will illuminate. A blinking LED indicates network activity. Ensure the link LED is solid green for a stable connection.
6.3 PoE+ Functionality
For devices requiring Power over Ethernet, connect them to the PoE+ enabled RJ45 ports. The switch will automatically detect and provide power to compatible devices. The PoE status LED for the port will indicate power delivery.
7. Maintenance
7.1 Cleaning
Periodically clean the exterior of the switch with a soft, dry cloth. Do not use liquid or aerosol cleaners. Ensure ventilation openings are free from dust and debris to maintain proper airflow.
7.2 Firmware Updates
Regularly check the HP support website for firmware updates. Keeping the switch firmware up-to-date ensures optimal performance, security, and access to new features. Follow the instructions provided with the firmware update package carefully.
7.3 Environmental Considerations
Operate the switch within its specified temperature and humidity ranges to ensure longevity and stable performance. Avoid extreme conditions.
8. Troubleshooting
8.1 No Power
- Verify the power cord is securely connected to both the switch and the electrical outlet.
- Check if the electrical outlet is functional by plugging in another device.
- Ensure the power switch (if present) is in the ON position.
8.2 No Network Connectivity
- Check the Ethernet cable connections between the switch and the device.
- Verify that the port LED on the switch is illuminated for the connected device.
- Ensure the device's network adapter is enabled and configured correctly.
- Try connecting the device to a different port on the switch or using a different Ethernet cable.
8.3 PoE Not Working
- Confirm that the connected device is PoE+ compatible.
- Check the PoE status LED for the specific port.
- Ensure the total power budget of the switch is not exceeded.
- Try connecting the PoE device to a different PoE+ port.
8.4 Resetting the Switch
If the switch is unresponsive or experiencing persistent issues, a factory reset may be necessary. Refer to the device's management interface or the full user guide for instructions on performing a factory reset. Warning: A factory reset will erase all custom configurations and restore the switch to its default settings.
9. Specifications
| Feature | Specification |
|---|---|
| Model Number | JG350A |
| Interface Type | PoE+, SFP |
| Number of Ports | 8 (Gigabit Ethernet PoE+) |
| Data Transfer Rate | 1000 Megabits Per Second |
| RAM | 128 MB |
| Item Weight | 8.35 pounds (3.79 kg) |
| Product Dimensions (LxWxH) | 17.5 x 13.12 x 3.5 inches (44.45 x 33.32 x 8.89 cm) |
| Compatible Devices | Camera, Desktop, Laptop, Printer |
| Manufacturer | HP |
10. Warranty and Support
For detailed warranty information and technical support, please refer to the documentation included with your product or visit the official HP support website. The website provides access to drivers, firmware updates, troubleshooting guides, and contact information for customer service.