1. Product Overview
The Zacuto Z-Finder Pro 3x is an optical viewfinder designed to enhance video recording with DSLR cameras featuring 3.2-inch LCD screens. It magnifies the LCD display by 3x, providing a clear and stable viewing experience. The integrated diopter allows for precise focus adjustment to match individual eyesight. This device effectively blocks extraneous light, improving visibility in bright conditions, and offers an additional point of contact for camera stability.
The Z-Finder Pro 3x includes a 40mm diameter Zacuto optical lens, anti-fog coated protective covers, and a dedicated mounting system for 3.2-inch LCD screens. For users with farsightedness, Z-Finder Extender Frames are provided. These stackable frames attach to the Z-Finder Pro body, increasing the distance between the Z-Finder glass and the LCD screen to achieve optimal focus.
2. Package Contents
Verify that all the following items are included in your package:
- Zacuto Z-Finder Pro 3x Viewfinder
- 40mm Diameter Zacuto Optical Designed Lens (pre-installed)
- Anti-fog Coated Protective Covers
- Mounting System for 3.2-inch LCD Screens (Gorilla Plate V2)
- Z-Finder Extender Frames (set of stackable frames)
- Large Eyecup
3. Setup
3.1. Attaching the Mounting System (Gorilla Plate V2)
The Z-Finder Pro utilizes a mounting system, typically the Gorilla Plate V2, to securely attach to your DSLR camera. This plate provides a stable base for the Z-Finder.
- Locate the tripod mounting screw on the Gorilla Plate V2.
- Align the Gorilla Plate V2 with the tripod mount on the bottom of your DSLR camera.
- Securely fasten the plate to your camera using the provided screw. Ensure it is tight to prevent movement.
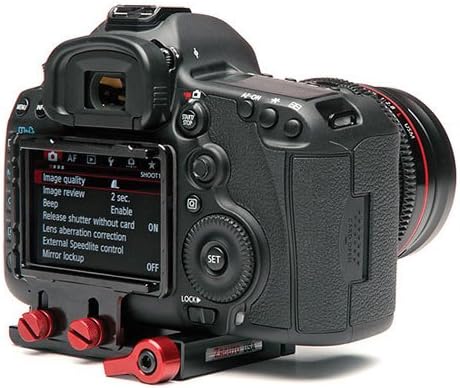
Figure 3.1: DSLR camera with the Gorilla Plate V2 mounting system attached.
3.2. Attaching the Z-Finder Pro to the Mounting System
Once the Gorilla Plate V2 is attached to your camera, you can mount the Z-Finder Pro.
- Slide the Z-Finder Pro onto the rails of the Gorilla Plate V2.
- Adjust the position of the Z-Finder so that the eyecup is centered over your camera's 3.2-inch LCD screen.
- Tighten the locking mechanism on the Gorilla Plate V2 to secure the Z-Finder in place.
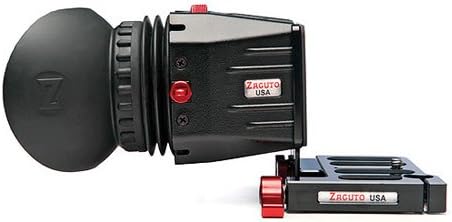
Figure 3.2: Zacuto Z-Finder Pro 3x mounted on its base plate.
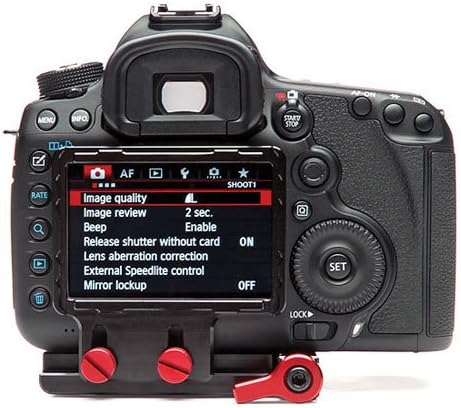
Figure 3.3: Z-Finder Pro 3x attached to a DSLR camera, covering the LCD screen.
3.3. Adjusting the Diopter
The Z-Finder Pro features a diopter for fine-tuning the focus to your individual eyesight.
- Look through the Z-Finder's eyecup at your camera's LCD screen.
- Rotate the diopter adjustment ring (usually located near the eyecup) until the image on the LCD screen appears sharp and clear to your eye.
3.4. Using Z-Finder Extender Frames
If you are farsighted and find it difficult to achieve a clear focus with the diopter alone, you can use the included Z-Finder Extender Frames.
- Carefully detach the eyecup from the Z-Finder Pro body.
- Stack one or more extender frames onto the body of the Z-Finder Pro. These frames are designed to fit snugly.
- Reattach the eyecup to the Z-Finder Pro, ensuring it is secure.
- Re-adjust the diopter as needed for optimal clarity.
4. Operating the Z-Finder Pro 3x
4.1. General Use
The Z-Finder Pro is designed to provide a magnified, glare-free view of your DSLR's LCD screen, which is particularly beneficial for video recording.
- Press your eye firmly against the large eyecup to block out ambient light and gain a stable viewing point.
- Utilize the magnified view for critical focus assessment during video capture.
- The Z-Finder provides an additional point of contact with your body, contributing to increased camera stability during handheld shooting.
4.2. Focusing
The 3x magnification aids in achieving precise manual focus. While viewing through the Z-Finder, carefully adjust your lens's focus ring until your subject appears sharp on the magnified LCD.
5. Maintenance
5.1. Cleaning the Lens and Eyecup
- Use a soft, lint-free microfiber cloth specifically designed for optical surfaces to clean the Z-Finder lens.
- For stubborn smudges, apply a small amount of optical lens cleaning solution to the cloth, not directly to the lens.
- The eyecup can be cleaned with a damp cloth and mild soap, then allowed to air dry completely before reattachment.
5.2. Storage
When not in use, store the Z-Finder Pro in a clean, dry environment, away from direct sunlight and extreme temperatures. Use the protective covers for the lens to prevent dust and scratches.
Important: Direct sun exposure to the Z-Finder lens can damage your camera's LCD screen. Always use the protective cover when the Z-Finder is not in use or when the camera is exposed to direct sunlight.
6. Troubleshooting
- Image appears blurry:
- Adjust the diopter ring until the image is sharp.
- If still blurry, consider adding Z-Finder Extender Frames (see Section 3.4) if you are farsighted.
- Ensure the Z-Finder lens is clean (see Section 5.1).
- Light leakage around the eyecup:
- Ensure the eyecup is properly seated and pressed firmly against your eye.
- Check for any damage to the eyecup that might prevent a tight seal.
- Z-Finder feels loose on the camera:
- Verify that the Gorilla Plate V2 is securely attached to your camera's tripod mount.
- Ensure the locking mechanism on the Gorilla Plate V2 is fully tightened to hold the Z-Finder in place.
7. Specifications
| Model Name | Z Finder Pro |
| Model Number | Z-FIND-PRO332 |
| Optical Zoom | 3x Magnification |
| Screen Size Compatibility | 3.2 Inches |
| Lens Diameter | 40mm |
| Diopter Adjustment | Included |
| Anti-fog Covers | Yes |
| Extender Frames | Included |
| Compatible Mountings | DSLR (with 3.2" LCD), Micro Four Thirds |
| Item Weight | Approximately 1 Pound (0.45 kg) |
| Brand | Zacuto |
| UPC | 741459185855 |
8. Warranty and Support
For warranty information, technical support, or service inquiries, please visit the official Zacuto website or contact their customer service department. Keep your purchase receipt as proof of purchase.
Official Zacuto Website: www.zacuto.com


