1. Introduction
Welcome to the Illy Y1.1 Touch Espresso Machine user manual. This guide provides essential information for the safe and efficient operation, maintenance, and troubleshooting of your new espresso machine. The Illy Y1.1 is designed to deliver high-quality espresso using Illy iperEspresso capsules, featuring a sleek design, programmable cup volume, and energy-saving functions.
2. Important Safety Instructions
Please read all safety instructions carefully before using the appliance. Keep this manual for future reference.
- Ensure the machine is placed on a stable, level surface away from heat sources.
- Do not immerse the appliance, power cord, or plug in water or other liquids.
- Unplug the machine from the outlet when not in use and before cleaning.
- Do not operate the machine with a damaged cord or plug.
- Keep children away from the appliance during operation due to hot surfaces and liquids.
- Use only Illy iperEspresso capsules with this machine.
- Do not open the capsule compartment during brewing.
- Always fill the water tank with fresh, cold water.
3. Product Components
Familiarize yourself with the main parts of your Illy Y1.1 Touch Espresso Machine.
- Water Tank: Removable reservoir for fresh water.
- Capsule Insertion Compartment: Area where iperEspresso capsules are placed.
- Brewing Unit: Mechanism that brews the coffee from the capsule.
- Coffee Dispenser: Spout from which espresso is dispensed.
- Drip Tray: Removable tray to collect excess liquid.
- Used Capsule Container: Internal container for discarded capsules.
- Control Panel: Touch-sensitive buttons for operation (Espresso, Lungo).
- Cup-warming Plate: Tempered glass surface on top.

Image 3.1: The Illy Y1.1 Touch Espresso Machine with the capsule compartment open, showing where the iperEspresso capsule is inserted. The "FRANCISFRANCIS FOR illy" branding is visible.

Image 3.2: A full view of the Illy Y1.1 Touch Espresso Machine, showcasing its compact design and red and silver finish. The water tank and used capsule container are visible on the side.
4. Initial Setup and First Use
4.1 Unpacking
Carefully remove all packaging materials from the machine. Ensure all components are present and undamaged. Retain packaging for future transport if needed.
4.2 Rinsing the System
- Remove the water tank, rinse it with fresh water, and fill it to the MAX level with fresh, cold drinking water.
- Place the water tank back into its position on the machine.
- Place a large container (at least 200ml) under the coffee dispenser.
- Plug the machine into a grounded electrical outlet.
- Press the power button (if available, otherwise the machine may power on automatically). The machine will heat up.
- Once heated, press either the Espresso or Lungo button without a capsule inserted. The machine will dispense hot water, rinsing the internal system. Repeat this process 2-3 times.
- Empty the container and the drip tray.
4.3 Power-Saver Mode
The machine features a power-saver mode to conserve energy. After a period of inactivity, the machine will automatically enter this mode. To reactivate, simply touch any button.
5. Operating Instructions
5.1 Preparing Espresso or Lungo
- Ensure the water tank is filled with fresh water.
- Place a cup on the drip tray under the coffee dispenser.
- Lift the capsule insertion lever to open the compartment.
- Insert one Illy iperEspresso capsule into the compartment.
- Close the capsule insertion lever firmly.
- Wait for the machine to heat up (indicator light will signal readiness).
- Press the Espresso button for a standard espresso shot or the Lungo button for a longer coffee.
- The machine will automatically stop dispensing when the programmed volume is reached.
- After brewing, lift the capsule insertion lever to eject the used capsule into the internal container.
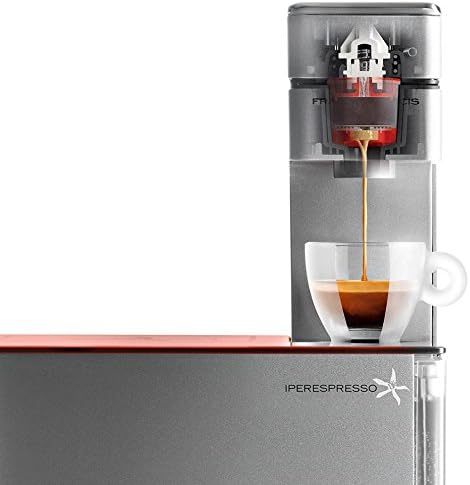
Image 5.1: The Illy Y1.1 Touch Espresso Machine actively brewing espresso into a clear glass cup, showcasing the coffee stream and crema.

Image 5.2: A hand pressing one of the touch-sensitive buttons on the red tempered glass top of the Illy Y1.1 Touch Espresso Machine, indicating the start of the brewing process.

Image 5.3: A freshly brewed cup of espresso with crema, placed on the drip tray of the Illy Y1.1 Touch Espresso Machine, ready for consumption.
5.2 Programming Cup Volume
The machine allows you to customize the volume for both Espresso and Lungo buttons.
- Place a cup under the coffee dispenser.
- Insert an Illy iperEspresso capsule.
- Press and hold the desired button (Espresso or Lungo).
- Release the button when the desired amount of coffee has been dispensed into your cup. The machine will remember this volume for future brews using that button.
6. Cleaning and Maintenance
Regular cleaning ensures optimal performance and extends the life of your machine.
6.1 Daily Cleaning
- Drip Tray and Used Capsule Container: Empty and rinse the drip tray and used capsule container daily. These parts are not dishwasher safe.
- Water Tank: Rinse the water tank daily and refill with fresh water.
- Exterior: Wipe the exterior of the machine with a soft, damp cloth. Do not use abrasive cleaners or solvents.
6.2 Descaling
The Illy Y1.1 Touch Espresso Machine features an auto-decalcification program. The machine will indicate when descaling is required (refer to the machine's indicator lights for specific signals). Follow the instructions provided with your Illy descaling solution. Generally, the process involves:
- Emptying the water tank and filling it with the descaling solution mixed with water as per the descaler's instructions.
- Placing a large container under the coffee dispenser.
- Initiating the descaling cycle (specific steps may vary, consult the descaler's instructions or machine's indicator sequence).
- Rinsing the machine thoroughly by running several cycles with fresh water after the descaling solution has been used.
Note: Do not use vinegar or other non-approved descaling agents, as they may damage the machine.
7. Troubleshooting
If you encounter issues with your machine, refer to the table below for common problems and solutions.
| Problem | Possible Cause | Solution |
|---|---|---|
| No coffee dispensed. | Water tank empty; machine not heated; capsule not inserted correctly. | Fill water tank; wait for machine to heat up; ensure capsule is properly seated. |
| Coffee is cold or lukewarm. | Machine not fully heated; cold cup. | Allow machine to fully heat; pre-warm cup using the cup-warming plate or hot water rinse. |
| Machine leaks water. | Water tank not seated correctly; drip tray full. | Ensure water tank is firmly in place; empty and clean drip tray. |
| Used capsule not ejecting. | Lever not fully lifted; container full. | Lift lever completely; empty used capsule container. |
| Machine not turning on. | Not plugged in; power outlet issue. | Check power cord connection; test outlet with another appliance. |
If the problem persists after attempting these solutions, please contact customer support.
8. Technical Specifications
- Brand: illy
- Model: Y1.1 216623
- Color: Red
- Product Dimensions: 4"D x 5"W x 6"H
- Special Feature: Programmable cup volume, Auto-decalcification program, Power-saver mode
- Coffee Maker Type: Espresso Machine
- Operation Mode: Fully Automatic
- Coffee Input Type: Illy iperEspresso Capsules
- Power Source: Internal Battery (Note: This might be an error in the source data, typically espresso machines are mains powered. Assume mains power for operation.)
- Item Weight: 11.02 pounds
- Capacity: 7 Liters (Note: This capacity seems unusually high for an espresso machine water tank. It might refer to a total system capacity or be an error. For a water tank, it's usually much smaller. Assuming it refers to a general capacity metric from the source.)
- Manufacturer: Illy Caffe North America, Inc.
9. Warranty and Customer Support
For warranty information, please refer to the warranty card included with your product or visit the official Illy website. If you require assistance, have questions, or need to report a problem, please contact Illy customer support. Keep your purchase receipt and product model number (Y1.1 216623) readily available when contacting support.
Note: The manufacturer's warranty typically covers defects in materials and workmanship under normal use. Damage resulting from improper use, lack of maintenance, or unauthorized repairs is usually not covered.


