
1. Important Safety Information
Please read and understand all safety information before operating this battery charger. Failure to follow these instructions may result in electric shock, fire, or serious injury.
- Always wear eye protection and protective clothing when working with batteries.
- Ensure the work area is well-ventilated. Batteries can produce explosive gases.
- Do not smoke or allow sparks or flames in the vicinity of the battery or charger.
- Connect and disconnect DC output clamps only after setting the charger switch to the "OFF" position and unplugging the AC cord from the electrical outlet.
- Never charge a frozen battery.
- Keep out of reach of children.
- This charger is designed for lead-acid batteries only. Do not use with other battery types.
2. Product Overview
The ABSAAR SH250 is a professional battery charger and jump starter designed for 12V and 24V lead-acid batteries. It features adjustable charging modes and a powerful jump start function.
2.1. Components and Controls

Figure 2.1: Front panel of the ABSAAR SH250, showing the 30 AMP display, 12V and 24V indicators, 250 AMP Jump Start switch, rotary selector for charging modes (tortoise for slow, hare for fast), and an analog ampere meter. The ABSAAR logo is visible on the right.
- 30 AMP Display: Indicates the maximum charging current.
- 12V / 24V Indicators: Lights up to show the selected charging voltage.
- 250 AMP Jump Start Switch: Activates the jump start function.
- Rotary Selector: Used to select charging voltage (12V/24V) and charging speed (standard/fast). The tortoise icon indicates standard charging (30-120 Ah), and the hare icon indicates fast charging (50-350 Ah).
- Ampere Meter: Displays the current charging amperage.
- Power Switch: (Not visible in image, but implied) Turns the unit on/off.
2.2. Package Contents
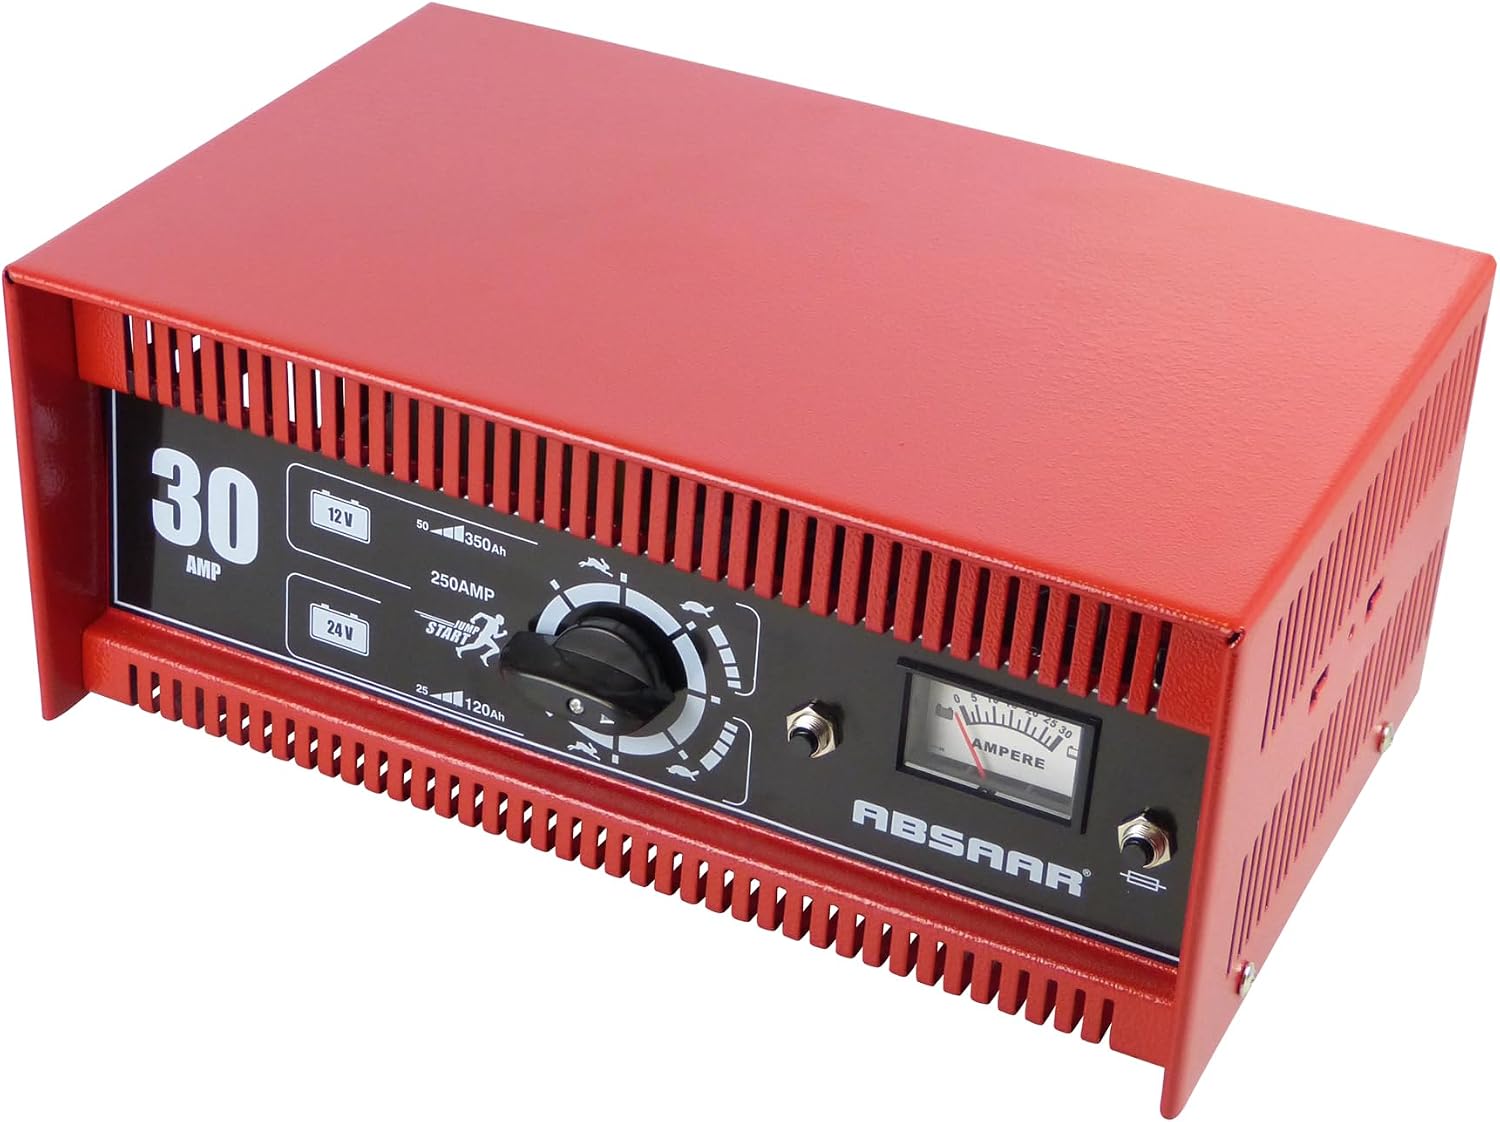
Figure 2.2: The ABSAAR SH250 battery charger, showcasing its robust red metal casing and black front panel with controls.

Figure 2.3: The included heavy-duty battery clamps, one red (positive) and one black (negative), attached to their respective cables.
Your package should contain:
- ABSAAR SH250 Battery Charger and Jump Starter Unit
- Integrated Battery Clamps (Red for positive, Black for negative)
- Power Cord
- User Manual (This document)
3. Setup
Before connecting the charger, ensure the battery terminals are clean and free of corrosion. Always work in a well-ventilated area.
- Initial Inspection: Unpack the charger and inspect it for any damage that may have occurred during shipping. Do not operate if damaged.
- Positioning: Place the charger on a stable, flat surface, away from direct sunlight, heat sources, and moisture. Ensure there is adequate ventilation around the unit.
- Battery Preparation: If necessary, clean the battery terminals. For batteries with removable caps, check the electrolyte level and top up with distilled water if needed, ensuring the plates are covered.
4. Operating Instructions
4.1. Charging a Battery
Follow these steps to charge a 12V or 24V lead-acid battery:
- Connect to Battery:
- Connect the RED (+) clamp to the positive (+) terminal of the battery.
- Connect the BLACK (-) clamp to the negative (-) terminal of the battery. If charging a battery installed in a vehicle, connect the BLACK (-) clamp to a metal part of the vehicle chassis away from the battery and fuel line.
- Select Voltage: Turn the rotary selector to either 12V or 24V, depending on your battery's voltage. The corresponding indicator light will illuminate.
- Select Charging Mode:
- For standard charging (30-120 Ah batteries), select the setting indicated by the tortoise icon.
- For fast charging (50-350 Ah batteries), select the setting indicated by the hare icon.
- Connect to Power: Plug the charger's power cord into a suitable electrical outlet.
- Monitor Charging: The ampere meter will show the charging current. As the battery charges, the current will gradually decrease. Charging is complete when the ampere meter reads near zero.
- Disconnect: First, unplug the charger from the electrical outlet. Then, disconnect the BLACK (-) clamp, followed by the RED (+) clamp.
4.2. Using the Jump Starter (250 Ampere)
The jump start function provides a quick burst of power to start vehicles with a discharged battery. This function is for short-term use only.
- Connect to Battery: Ensure the charger is unplugged from the AC outlet. Connect the RED (+) clamp to the positive (+) terminal of the vehicle's battery. Connect the BLACK (-) clamp to a clean, unpainted metal part of the vehicle's engine block or chassis, away from the battery and fuel lines.
- Select Voltage: Set the rotary selector to the correct voltage (12V or 24V) for the vehicle's battery.
- Activate Jump Start: Plug the charger's power cord into a suitable electrical outlet. Immediately press and hold the "250 AMP Jump Start" switch.
- Start Vehicle: While holding the jump start switch, attempt to start the vehicle. Do not crank for more than 5 seconds. If the vehicle does not start, wait at least 1 minute before trying again.
- Disconnect: Once the vehicle starts, release the jump start switch. Immediately unplug the charger from the electrical outlet. Then, disconnect the BLACK (-) clamp, followed by the RED (+) clamp.
CAUTION: Do not use the jump start function for prolonged periods. This can damage the charger or the vehicle's electrical system.
5. Maintenance
5.1. Cleaning
- Always unplug the charger before cleaning.
- Wipe the casing with a soft, damp cloth. Do not use harsh chemicals or abrasive cleaners.
- Ensure the ventilation slots are free from dust and debris to prevent overheating.
5.2. Storage
- Store the charger in a cool, dry place, away from direct sunlight and moisture.
- Keep the cables neatly coiled to prevent damage.
- Store out of reach of children.
6. Troubleshooting
| Problem | Possible Cause | Solution |
|---|---|---|
| Charger does not turn on. | No power from outlet; faulty power cord; internal fuse blown. | Check outlet with another appliance. Inspect power cord for damage. If fuse is accessible and replaceable, check and replace (refer to qualified technician). |
| Battery not charging. | Incorrect voltage selection; poor clamp connection; battery is severely discharged or faulty. | Ensure correct 12V/24V setting. Check clamps for secure connection to battery terminals. Have battery tested by a professional. |
| Ampere meter shows low or no current. | Battery is fully charged; poor connection; internal issue. | This is normal if battery is fully charged. Check connections. If problem persists with a discharged battery, contact support. |
| Jump start function not working. | Incorrect connection; insufficient power; vehicle issue. | Ensure clamps are correctly and securely connected. Check power outlet. Ensure vehicle's battery is not completely dead. |
If you encounter issues not listed here or if the problem persists after attempting the solutions, please contact Absaar customer support.
7. Specifications

Figure 7.1: Approximate height dimension of the ABSAAR SH250 unit.
| Feature | Detail |
|---|---|
| Model | N/E AmpM SH250 |
| Manufacturer | Absaar |
| Input Voltage | 230V AC, 50/60Hz (Standard European mains) |
| Output Voltage | 12V / 24V DC |
| Max Charging Current | 30 Ampere |
| Jump Start Current | 250 Ampere |
| Battery Capacity (Standard Charge) | 30-120 Ah |
| Battery Capacity (Fast Charge) | 50-350 Ah |
| Product Dimensions (D x W x H) | 23D x 37B x 17H centimeter |
| Item Weight | 8.75 kg |
| Color | Red |
| Compliance | CE |
| GTIN | 04002031300209 |
8. Warranty and Support
For warranty information and technical support, please refer to the documentation provided with your purchase or visit the official Absaar website. Keep your proof of purchase for any warranty claims.
For further assistance, please contact Absaar customer service.


