
1. Introduction
This manual provides essential information for the proper installation, operation, and maintenance of your Dayton Audio DS90-8 3-inch Designer Series Full-Range Driver. Please read this manual thoroughly before use to ensure optimal performance and longevity of your product.
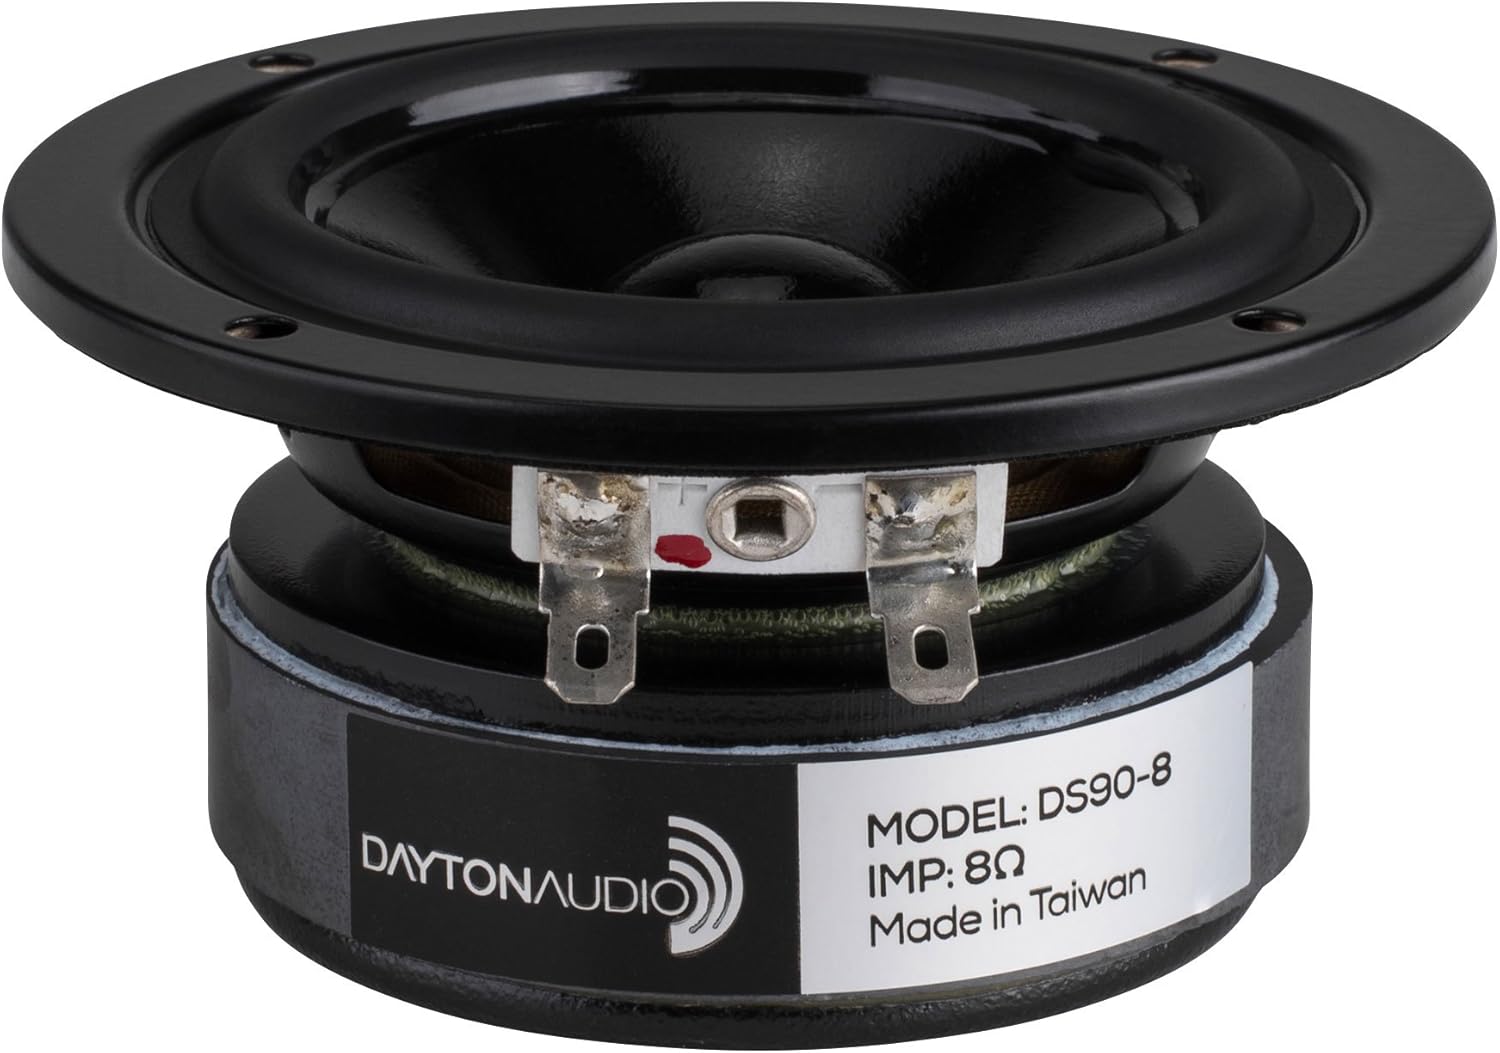
Image 1.1: Front view of the Dayton Audio DS90-8 Full-Range Driver. This image displays the speaker cone and the cosmetic frame designed for easy front mounting.
2. Product Features
The Dayton Audio DS90-8 Full-Range Driver incorporates several design elements for enhanced audio performance and ease of integration:
- Cosmetic frame with low profile lip, designed for front mounting, eliminating the need for countersinking.
- Coated paper cone and a half-roll rubber surround for durability and accurate sound reproduction.
- Optimized to achieve a low 3 dB down point and high potential output within a reasonably sized enclosure.
- Smooth frequency response and linear roll-off simplify filter design, ensuring compatibility with off-the-shelf crossovers.
- Vented pole piece for minimized power compression and maximized reliability during extended use.
3. Safety Information
Observe the following safety guidelines to prevent damage to the driver or associated equipment, and to ensure personal safety:
- Always disconnect power from audio equipment before making or changing connections.
- Ensure proper impedance matching between the driver and your amplifier to prevent overheating or damage. The DS90-8 has an 8 Ohm impedance.
- Avoid over-driving the speaker with excessive power, which can lead to distortion and permanent damage.
- Handle the driver carefully. Do not touch the cone or surround with sharp objects.
- Keep the driver away from moisture and extreme temperatures.
4. Setup and Installation
Proper installation is crucial for the performance of your full-range driver. This section outlines the general steps for mounting and connecting the DS90-8.
4.1 Mounting
The DS90-8 features a cosmetic frame with a low-profile lip, designed for front mounting. This design eliminates the need for countersinking the driver into the enclosure. Secure the driver using appropriate screws through the mounting holes on the frame. Ensure the mounting surface is flat and provides a good seal to prevent air leaks, which can negatively impact sound quality.
4.2 Wiring Connections
Connect the driver to your amplifier or crossover network using appropriate speaker wire. Observe correct polarity: the positive (+) terminal on the driver should connect to the positive output of your amplifier/crossover, and the negative (-) terminal to the negative output. Incorrect polarity can lead to phase issues and degraded sound quality.

Image 4.1: Rear view of the Dayton Audio DS90-8, showing the speaker terminals. The red dot indicates the positive terminal.
4.3 Enclosure Design
As a raw driver, the DS90-8 requires integration into a suitable speaker enclosure. The design of this enclosure (e.g., sealed, ported, transmission line) will significantly impact the driver's acoustic performance. Consult speaker design resources or professional advice to select an enclosure type and volume appropriate for your desired sound characteristics.
5. Operating Instructions
Once installed, the Dayton Audio DS90-8 driver operates as part of your audio system. Follow these general guidelines for operation:
- Power Handling: The driver has a maximum output power of 100 Watts. Ensure your amplifier's output power does not consistently exceed this rating to prevent damage.
- Volume Control: Adjust the volume gradually. If you hear distortion, reduce the volume immediately to prevent damage to the driver.
- Break-in Period: Like many new drivers, the DS90-8 may benefit from a break-in period of several hours of moderate use. This allows the suspension components to loosen and reach their optimal performance characteristics.
6. Maintenance
The Dayton Audio DS90-8 driver requires minimal maintenance to ensure long-term performance.
- Cleaning: Gently wipe the frame and cone with a soft, dry cloth. Avoid using harsh chemicals or excessive moisture. Do not press on the cone.
- Inspection: Periodically inspect the driver for any signs of damage to the cone, surround, or terminals. Ensure all mounting screws remain secure.
- Environment: Keep the driver in a clean, dry environment, away from direct sunlight and extreme temperature fluctuations.
7. Troubleshooting
If you encounter issues with your Dayton Audio DS90-8 driver, consider the following common troubleshooting steps:
- No Sound:
- Check all wiring connections from the amplifier to the driver for proper seating and polarity.
- Verify that the amplifier is powered on and functioning correctly.
- Ensure the audio source is active and sending a signal.
- Distorted Sound:
- Reduce the volume level. Distortion often occurs when the amplifier or driver is over-driven.
- Check for loose connections or damaged speaker wire.
- Inspect the driver cone and surround for any physical damage.
- Ensure the enclosure is sealed properly, if applicable, and free from rattles.
- Intermittent Sound:
- Examine all connections for intermittent contact.
- Test with a different audio source or amplifier if possible to isolate the issue.
If these steps do not resolve the issue, contact Dayton Audio customer support for further assistance.
8. Specifications
Key technical specifications for the Dayton Audio DS90-8 3-inch Designer Series Full-Range Driver:
| Specification | Value |
|---|---|
| Model Name | DS90-8 |
| Speaker Type | Full-Range |
| Woofer Diameter | 3 Inches |
| Impedance | 8 Ohm |
| Speaker Maximum Output Power | 100 Watts |
| Material | Aluminum (frame) / Coated Paper (cone) |
| Product Dimensions | 3.94 x 3.94 x 2.83 inches |
| Item Weight | 1.1 Pounds |
| Manufacturer | Dayton Audio |

Image 8.1: Top view of the Dayton Audio DS90-8, showcasing the coated paper cone and rubber surround.
9. Warranty and Support
The Dayton Audio DS90-8 Full-Range Driver comes with an Extended or Limited Warranty. For specific details regarding your warranty coverage, please refer to the documentation included with your purchase or visit the official Dayton Audio website.
For technical support, troubleshooting assistance beyond what is provided in this manual, or warranty claims, please contact Dayton Audio customer service. Contact information can typically be found on the manufacturer's website or product packaging.