
Introduction
This manual provides essential instructions for the installation, operation, and maintenance of the Briggs & Stratton 799868 Small Engine Carburetor. This genuine OEM replacement part is designed for select 12 cubic inch vertical shaft L-Head engines and replaces older Briggs & Stratton part numbers 498254, 497347, 497314, and 498170. Proper installation and maintenance ensure optimal performance and longevity of your engine.

Figure 1: Briggs & Stratton 799868 Carburetor in its original packaging, confirming authenticity.
Safety Information
Always prioritize safety when working with small engines and fuel systems. Failure to follow safety precautions can result in serious injury or property damage.
- Read the Engine Manual: Always consult your engine's original instruction manual for specific safety guidelines and procedures.
- Fuel Handling: Gasoline is highly flammable. Work in a well-ventilated area, away from open flames or sparks. Store fuel in approved containers.
- Eye Protection: Wear safety glasses or goggles to protect your eyes from debris and fuel splashes.
- Hand Protection: Wear appropriate gloves to protect your hands.
- Engine Temperature: Allow the engine to cool completely before performing any maintenance or installation. Hot engine components can cause severe burns.
- Ventilation: Ensure adequate ventilation when working with fuel or cleaning agents.
- Disconnect Spark Plug: Before beginning any work, disconnect the spark plug wire to prevent accidental engine starting.
Installation Guide
This section outlines the general steps for replacing your carburetor. Specific engine configurations may vary. Refer to your engine's service manual for detailed instructions.
Tools Required:
- Phillips head screwdriver
- 5/16 inch wrench or socket
- 3/8 inch wrench or socket
- Pliers
- Golf tee or small bolt (for fuel line)
- Carburetor cleaner (optional, for cleaning air filter housing)
Step-by-Step Installation:
- Prepare the Engine: Ensure the engine is cool and disconnect the spark plug wire.
- Remove Top Shroud: Remove the plastic top shroud from the engine. This is typically secured by three Phillips head screws.
- Remove Air Cleaner: Remove the plastic air cleaner cover (usually one 5/16 inch bolt) and then remove the air cleaner element.
- Remove Air Cleaner Housing: Detach the plastic air cleaner housing assembly. It is usually held by three 5/16 inch bolts to the carburetor. This is a good opportunity to clean the housing with soapy water or carburetor cleaner.
- Disconnect Fuel Line: Locate the fuel line connected to the carburetor fuel inlet. Use pliers to squeeze the clamp and slide it down the fuel line. Carefully pull the fuel line off the carburetor. Insert a golf tee or small bolt into the fuel line to prevent fuel leakage.
- Remove Old Carburetor: Remove the two 3/8 inch bolts securing the carburetor to the engine. The carburetor will then come off. You may need to twist it 90 degrees to disengage the throttle linkage from the top of the carburetor.
- Replace O-Ring: Remove the old rubber O-ring from the engine intake. Replace it with the new O-ring supplied with the new carburetor.
- Install New Carburetor: Attach the new carburetor to the throttle linkage by rotating it 90 degrees. Secure it to the engine using the two 3/8 inch bolts. Reattach the fuel line and slide the clamp back into position at the base of the carburetor.
- Install Gasket and Air Cleaner Housing: Use the new gasket provided with the carburetor and attach it to the back of the air cleaner housing assembly. Then, attach the plastic air cleaner assembly to the carburetor with the three 5/16 inch bolts.
- Replace Air Filter: If the old air filter is dirty, replace it with a new one (Briggs & Stratton part number 491588S or equivalent).
- Reassemble: Attach the air cleaner cover with the 5/16 inch bolt. Replace the plastic shroud on top of the engine with the three Phillips head screws.
- Final Check: Ensure the engine has fuel. Reconnect the spark plug wire.

Figure 2: The Briggs & Stratton 799868 Carburetor shown with its accompanying gasket and O-ring, essential for a proper seal during installation.
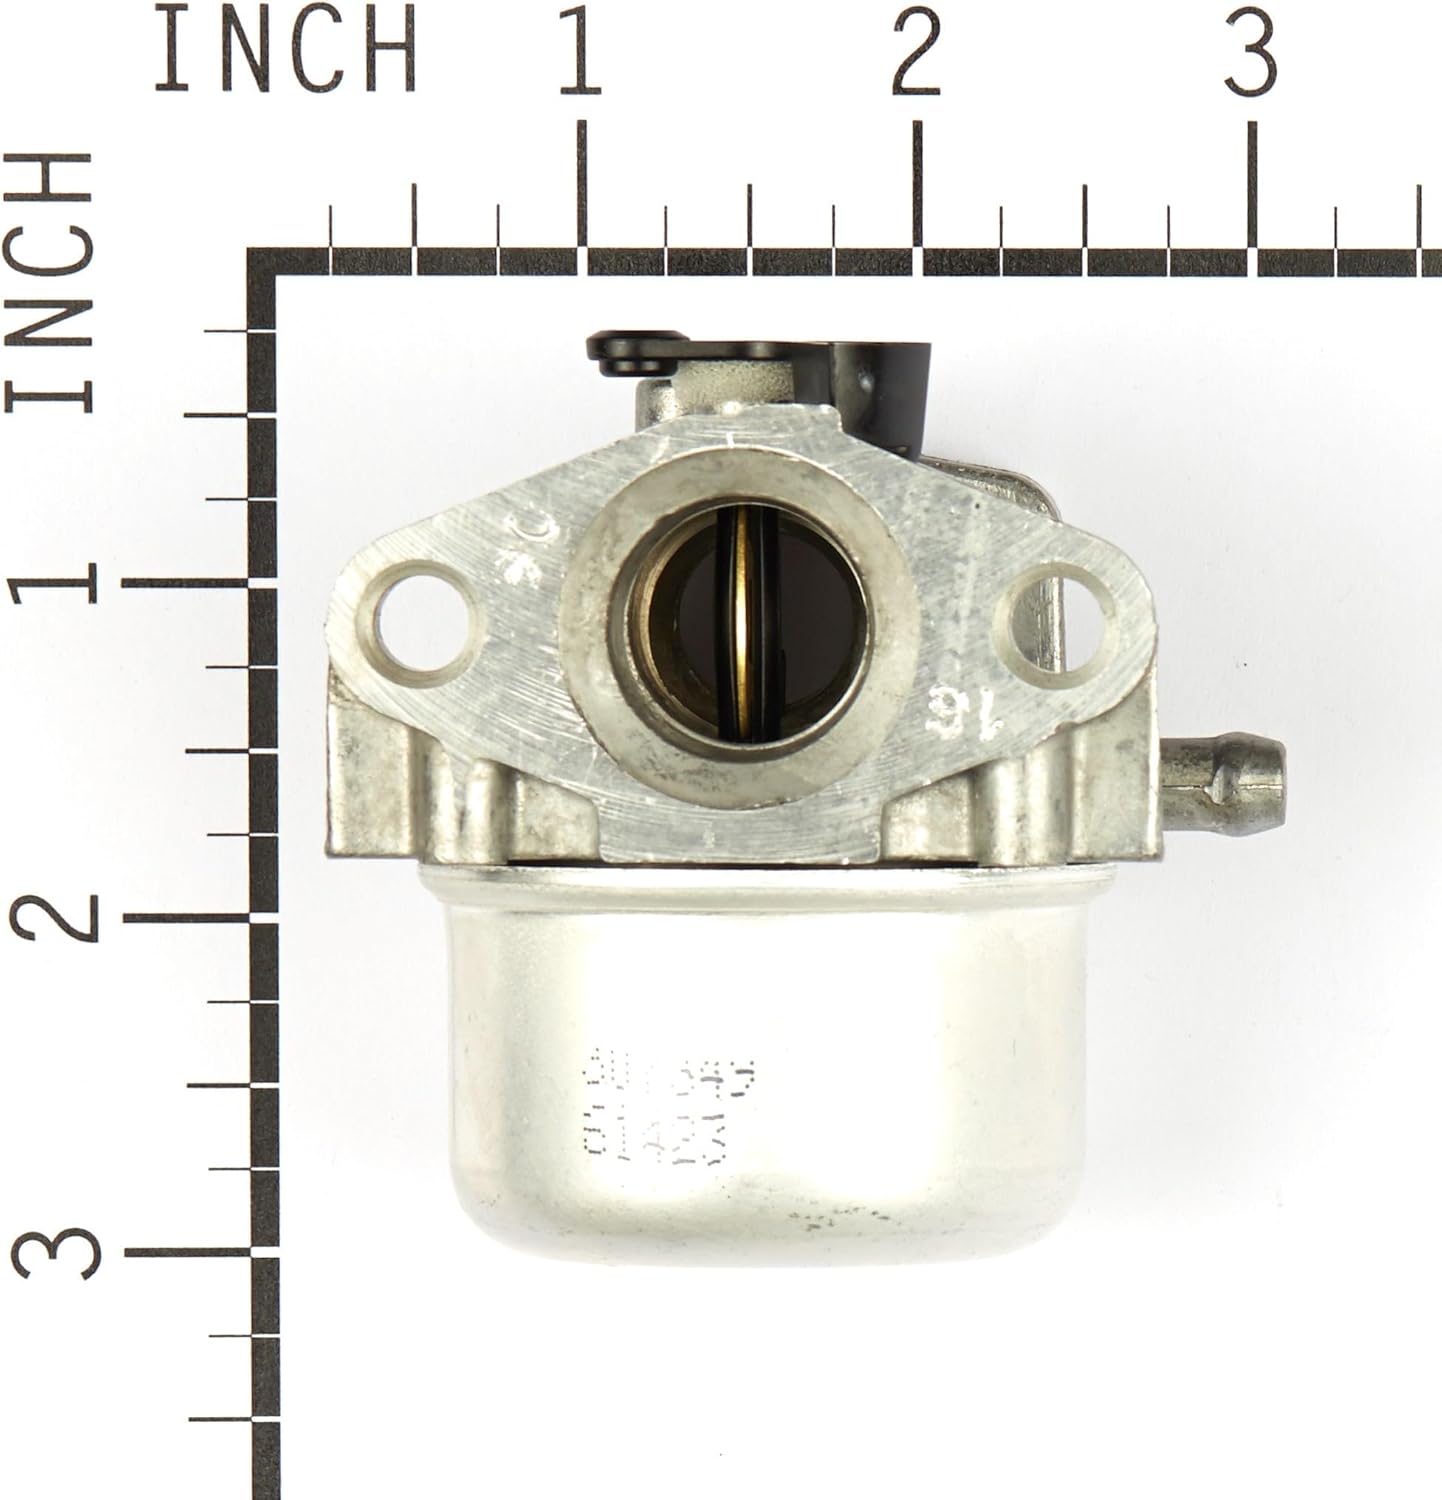
Figure 3: Front view of the carburetor, showing the air intake and mounting holes.

Figure 4: Side view of the carburetor, highlighting the fuel inlet and linkage points.
Operating Instructions
Once the carburetor is installed, the engine should operate as designed. Follow your engine's specific starting procedure.
- Priming: If your engine has a primer bulb, press it 3-5 times before attempting to start the engine.
- Starting: Engage the choke (if applicable) and pull the starter cord firmly. The engine should start within a few pulls.
- Warm-up: Allow the engine to warm up for a short period before engaging any equipment.
Maintenance
Regular maintenance helps prolong the life of your carburetor and engine.
- Fuel Quality: Always use fresh, clean gasoline. Stale fuel can cause deposits and clog the carburetor.
- Fuel Stabilizer: Use a fuel stabilizer, especially during periods of storage, to prevent fuel degradation and carburetor issues.
- Air Filter: Regularly inspect and clean or replace the air filter to ensure proper air-fuel mixture. A clogged air filter can affect carburetor performance.
- Storage: Before long-term storage, either run the engine until it runs out of fuel or drain the fuel system to prevent gumming in the carburetor.
Troubleshooting
If you encounter issues after carburetor installation, consider the following common problems and solutions:
| Problem | Possible Cause | Solution |
|---|---|---|
| Engine does not start or starts with difficulty. | Incorrect installation, fuel line issues, clogged air filter, spark plug issue. | Review installation steps, check fuel line for kinks or blockages, ensure primer bulb is used correctly, inspect/replace air filter and spark plug. |
| Engine runs rough or stalls. | Improper fuel mixture, dirty fuel, air leak around carburetor. | Ensure fresh fuel is used, check for proper seating of gaskets and O-rings, inspect for cracks in fuel lines. |
| Fuel leaks from carburetor. | Damaged O-ring or gasket, float needle issue, loose connections. | Verify O-ring and gasket are correctly installed and undamaged. Check fuel line connections for tightness. If issues persist, the carburetor may require further inspection by a qualified technician. |
For persistent issues, it is recommended to consult a certified Briggs & Stratton service technician.
Specifications
| Feature | Detail |
|---|---|
| Model Number | 799868 |
| Replaces Part Numbers | 498254, 497347, 497314, 498170, 497586, 497410 |
| Product Dimensions | 2.78 x 3.38 x 4 inches (approximate) |
| Item Weight | 0.32 ounces |
| Manufacturer | Briggs & Stratton |
| Engine Compatibility | Select 12 cu. in. vertical shaft L-Head engines, most 124000 model Briggs & Stratton Engines |
Warranty and Support
As a genuine Briggs & Stratton part, this carburetor is covered by the manufacturer's standard warranty for replacement parts. For specific warranty details, claims, or technical support, please refer to the official Briggs & Stratton website or contact their customer service directly.
Official Briggs & Stratton Website: www.briggsandstratton.com


