1. Introduction
The Optex CX-702 is a high-performance Multi-Focus Passive Infrared (PIR) motion detector designed for reliable security applications. It utilizes advanced multi-focus optics to provide precise detection capabilities, minimizing false alarms while ensuring accurate intruder detection. This manual provides essential information for the proper installation, operation, and maintenance of your CX-702 detector.
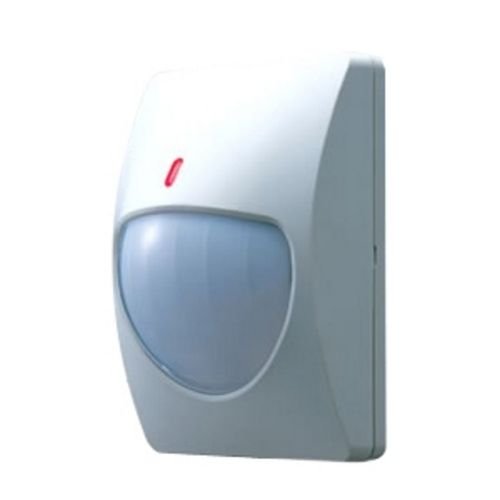
Figure 1: Optex CX-702 Multi-Focus PIR Motion Detector. This image shows the compact, white casing of the motion detector, typically mounted on a wall.
2. Safety Information
Please read and understand all safety instructions before installing or operating the CX-702 detector. Failure to follow these instructions may result in injury, damage to the device, or improper operation.
- Electrical Safety: Ensure all power is disconnected before performing any wiring or maintenance. Installation should be performed by qualified personnel in accordance with local electrical codes.
- Mounting: Mount the detector securely to a stable surface to prevent it from falling.
- Environmental Conditions: Do not expose the detector to extreme temperatures, high humidity, or direct water spray.
- Interference: Avoid installing the detector near sources of strong electromagnetic interference, heating/cooling vents, or direct sunlight, which can cause false alarms.
3. Package Contents
Verify that all items are present in the package before proceeding with installation:
- Optex CX-702 Multi-Focus PIR Motion Detector unit
- Mounting bracket (if applicable)
- Mounting screws and anchors
- Instruction Manual (this document)
4. Setup and Installation
Proper installation is crucial for optimal performance of the CX-702 detector.
4.1 Mounting Location
- The CX-702 is designed for Wall Mount installation.
- Choose a location where the detector has an unobstructed view of the area to be protected.
- Avoid aiming the detector directly at windows, heat sources, or areas with significant air currents.
- Recommended mounting height is typically between 2.1 to 2.7 meters (7 to 9 feet) for optimal coverage.
4.2 Wiring
The CX-702 operates on Corded Electric power. Refer to the wiring diagram inside the detector casing for specific terminal connections. Typically, connections include:
- Power Input: Connect to a stable DC power source (e.g., 9-16V DC). Observe polarity.
- Alarm Output: Connect to the alarm control panel's zone input. This is usually a normally closed (NC) relay output.
- Tamper Output: (If available) Connect to a tamper zone on the control panel. This activates if the detector cover is removed.
4.3 Sensitivity Adjustment
The detector may feature internal jumpers or potentiometers for adjusting sensitivity. Consult the internal diagram for specific settings. Adjust sensitivity to suit the environment, balancing detection reliability with false alarm immunity.
5. Operating Instructions
Once installed and powered, the Optex CX-702 detector will begin its warm-up period, typically lasting a few minutes. During this time, the detector may not be fully operational.
5.1 Detection Principle
The CX-702 uses Passive Infrared (PIR) technology to detect changes in infrared energy (heat) within its detection pattern. When a person moves through the detection zones, the detector senses the change in infrared energy and triggers an alarm.
5.2 Detection Range
The detector offers a Maximum Range of up to 70 Feet (approximately 21 meters). The actual coverage area depends on mounting height, sensitivity settings, and environmental factors.
5.3 LED Indicator
Most PIR detectors include an LED indicator. This LED typically illuminates when motion is detected. During normal operation, the LED may be disabled to prevent drawing attention to the detector. Refer to the internal settings for LED control.
6. Maintenance
Regular maintenance ensures the long-term reliability and performance of your CX-702 detector.
- Cleaning: Periodically clean the detector lens with a soft, dry, lint-free cloth. Do not use abrasive cleaners or solvents, as these can damage the lens and affect detection.
- Obstruction Check: Ensure that no objects are obstructing the detector's field of view.
- Functionality Test: Test the detector's functionality regularly (e.g., monthly) by walking through its detection pattern to confirm it triggers an alarm.
7. Troubleshooting
If you experience issues with your CX-702 detector, refer to the following common problems and solutions:
- Detector not triggering:
- Check power supply connections.
- Verify wiring to the alarm panel.
- Ensure the detection area is clear of obstructions.
- Increase sensitivity settings if necessary.
- False alarms:
- Check for heat sources (heaters, direct sunlight) or air currents (vents) in the detection area.
- Ensure the detector is not aimed at windows where temperature changes or moving objects outside could cause detection.
- Reduce sensitivity settings.
- Clean the detector lens.
- Tamper alarm:
- Ensure the detector cover is securely closed.
- Check tamper switch connection.
8. Specifications
| Feature | Specification |
|---|---|
| Brand | Optex |
| Model Number | AL-OPT-CX702 (CX-702) |
| Power Source | Corded Electric |
| Item Weight | 0.22 Kilograms (7.7 ounces) |
| Maximum Range | 70 Feet |
| Mounting Type | Wall Mount |
| ASIN | B007HKI93G |
| Date First Available | September 4, 2010 |
9. Warranty Information
Optex products are manufactured to high-quality standards. For specific warranty terms and conditions, please refer to the warranty card included with your product or visit the official Optex website. Keep your proof of purchase for warranty claims.
10. Technical Support
If you require further assistance with installation, operation, or troubleshooting that is not covered in this manual, please contact Optex customer support or your authorized dealer. Contact information can typically be found on the official Optex website: www.optexamerica.com


