
Introduction
This manual provides detailed instructions for the operation and maintenance of your Eton Grundig G2 AM/FM/Shortwave Radio Recorder. Please read this manual thoroughly before using the device to ensure proper function and longevity.
Package Contents
Verify that all items are present in the package:
- Eton Grundig G2 Radio Recorder
- Power Cord
- Rechargeable Battery
- User Manual (this document)
Product Overview
Familiarize yourself with the various components and controls of your Grundig G2 radio.

Figure 1: Front Panel Controls and Display. This image shows the front of the Eton Grundig G2 radio, highlighting the LCD display, dual speakers, numeric keypad, and various function buttons for power, volume, tuning, and mode selection.

Figure 2: Portable Use Example. The radio is shown being held by two hands, demonstrating its compact and portable design suitable for use in various environments, such as outdoor events.

Figure 3: Rear Panel and Battery Compartment. This image displays the back of the radio, including the battery cover, product information, and ventilation grilles.

Figure 4: Top Panel with Micro SD Slot. A close-up of the top edge of the radio, showing the Micro SD card slot for media playback and recording storage.
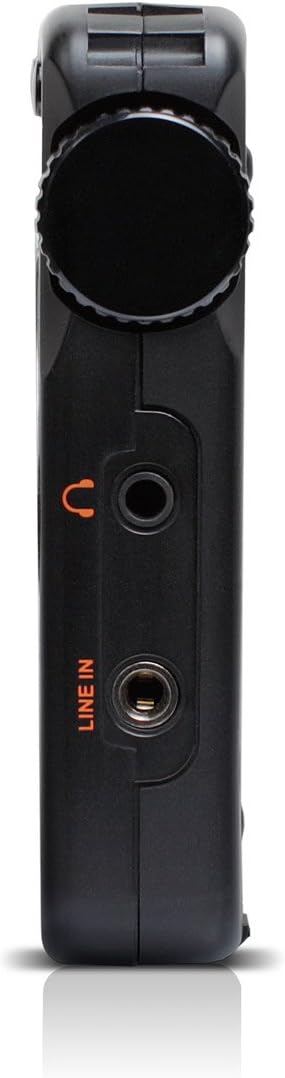
Figure 5: Left Side Panel. This view highlights the headphone jack and line-in audio input on the left side of the device.

Figure 6: Right Side Panel. This image shows the USB port, microphone input, and power switch located on the right side of the radio.
Setup
1. Battery Installation and Charging
- Locate the battery compartment on the rear of the radio (refer to Figure 3).
- Open the compartment cover and insert the provided rechargeable battery, ensuring correct polarity.
- Close the battery compartment cover securely.
- Connect the power cord to the radio's power input and a suitable power outlet. The radio will begin charging. Allow approximately four hours for a full charge during initial use.
2. Initial Power On
- Ensure the battery is installed or the power cord is connected.
- Press the Power button (usually located on the top left of the front panel) to turn on the radio.
- The LCD display will illuminate.
Operating Instructions
Power On/Off
Press the Power button to turn the unit on or off.
Volume Adjustment
Use the V- and V+ buttons to decrease or increase the volume level.
Radio Tuning (AM/FM/SW)
The Grundig G2 offers five tuning methods:
- Band Selection: Press the FM, MW (AM), or SW buttons to select the desired frequency band.
- Jog Tuning: Rotate the tuning knob (often labeled MENU/ENTER or similar) to manually scan frequencies.
- Manual Tuning: Use the Up/Down arrow buttons to adjust the frequency step by step.
- Auto Tuning: Press and hold the Up/Down arrow buttons to automatically scan for the next available station.
- ATS (Auto Tuning Storage): Press and hold the SET button to automatically scan and store strong stations in the current band.
- Memory Tuning: Use the numeric keypad (0-9) to directly enter a stored station number or frequency.
Station Memory Storage
To store a station:
- Tune to the desired station.
- Press the SET button. The memory location number will flash on the display.
- Use the numeric keypad or tuning knob to select a memory location.
- Press SET again to confirm. The station is now stored.
The radio supports up to 248 station memory storage locations.
MP3 and WMA Playback
The Grundig G2 can play MP3 and WMA audio files from a Micro SD card.
- Insert a Micro SD card containing MP3/WMA files into the Micro SD slot (refer to Figure 4).
- Press the RADIO/MP3 button to switch to MP3 mode.
- Use the Play/Pause, Next/Previous Track buttons to control playback.
Recording Function
The radio supports recording of radio broadcasts and external audio via the microphone or line-in input.
- Ensure a Micro SD card is inserted.
- To record radio: Tune to the desired station. Press the REC button (if available, or a combination like MENU/ENTER then select record).
- To record via microphone: Ensure the radio is in recording mode. Speak into the built-in microphone.
- To record via line-in: Connect an external audio source to the LINE IN jack (refer to Figure 5). Ensure the radio is in recording mode.
- Press the STOP button to end recording. Recordings are saved to the Micro SD card.
Language Settings
The radio supports multiple display languages. To change the language:
- Press the MENU/ENTER button.
- Navigate through the menu options using the tuning knob or arrow buttons until you find "Language" or a similar setting.
- Select the desired language and confirm.
Maintenance
- Cleaning: Use a soft, dry cloth to clean the radio's exterior. Do not use liquid cleaners or abrasive materials.
- Storage: When not in use for extended periods, store the radio in a cool, dry place. Remove the battery if storing for several months.
- Battery Care: Recharge the battery regularly to maintain its lifespan. Avoid fully discharging the battery frequently.
- Antenna: Handle the telescopic antenna with care to prevent damage.
Troubleshooting
| Problem | Possible Cause | Solution |
|---|---|---|
| Radio does not power on. | Battery is discharged or not installed correctly. Power cord is not connected. | Ensure battery is charged and correctly inserted. Connect the power cord. |
| Poor radio reception. | Weak signal. Antenna not extended. Interference from other electronics. | Extend the telescopic antenna fully. Reposition the radio. Move away from interfering devices. |
| MP3/WMA files not playing. | Micro SD card not inserted or corrupted. Incorrect file format. | Ensure Micro SD card is properly inserted. Verify files are MP3 or WMA format. Try a different Micro SD card. |
| Recording not working. | No Micro SD card inserted. Card full. | Insert a Micro SD card. Delete old files to free up space. |
| Display shows incorrect time. | Time not set or ATS not used. | Manually set the time or use the ATS function on an FM station that broadcasts RDS time data. |
Specifications
| Model Number | NG2B |
| Dimensions (L x W x H) | 7.5 x 3.5 x 0.8 inches |
| Weight | 9.6 ounces |
| Radio Bands Supported | AM, FM, Shortwave (SW) |
| Tuning Methods | Jog, Manual, Auto, Memory, ATS |
| Memory Presets | 248 stations |
| Audio Playback | MP3, WMA (via Micro SD card) |
| Recording | Radio broadcasts, Microphone, Line-in |
| Connectivity | USB |
| Power Source | Rechargeable Battery, Corded Electric |
| Included Components | Power Cord, Battery |
Warranty and Support
For warranty information and technical support, please refer to the official Eton or Grundig website or contact their customer service department. Keep your proof of purchase for warranty claims.
Note: Specific warranty terms may vary by region and retailer.


