Introduction
The Rollei C5i Aluminum Tripod is a versatile and robust tool designed for professional photography and videography. Constructed from aluminum and magnesium, it offers both functionality and durability in a compact form factor. This tripod supports a maximum load of 8 kg and can extend to a height of 159 cm, making it suitable for various professional camera setups, including those with large lenses. Its reversible central column facilitates macro photography, allowing the camera to be positioned close to the ground. The legs feature non-slip foam grips for comfortable handling and quick-lock systems for easy height adjustment. The included panoramic ball head with a quick-release system and spirit level ensures precise horizontal and vertical alignment. The C5i can also be converted into a monopod, offering enhanced flexibility for different shooting scenarios.

Image: The Rollei C5i Aluminum Tripod in its standard configuration, showcasing the panoramic ball head and leg design.
What's in the Box
Upon unboxing your Rollei C5i Tripod, please verify that all the following components are included:
- Rollei C5i Tripod
- Panoramic Ball Head
- Tripod Hook
- Allen Key
- Quick Release Plate
- Tripod Bag
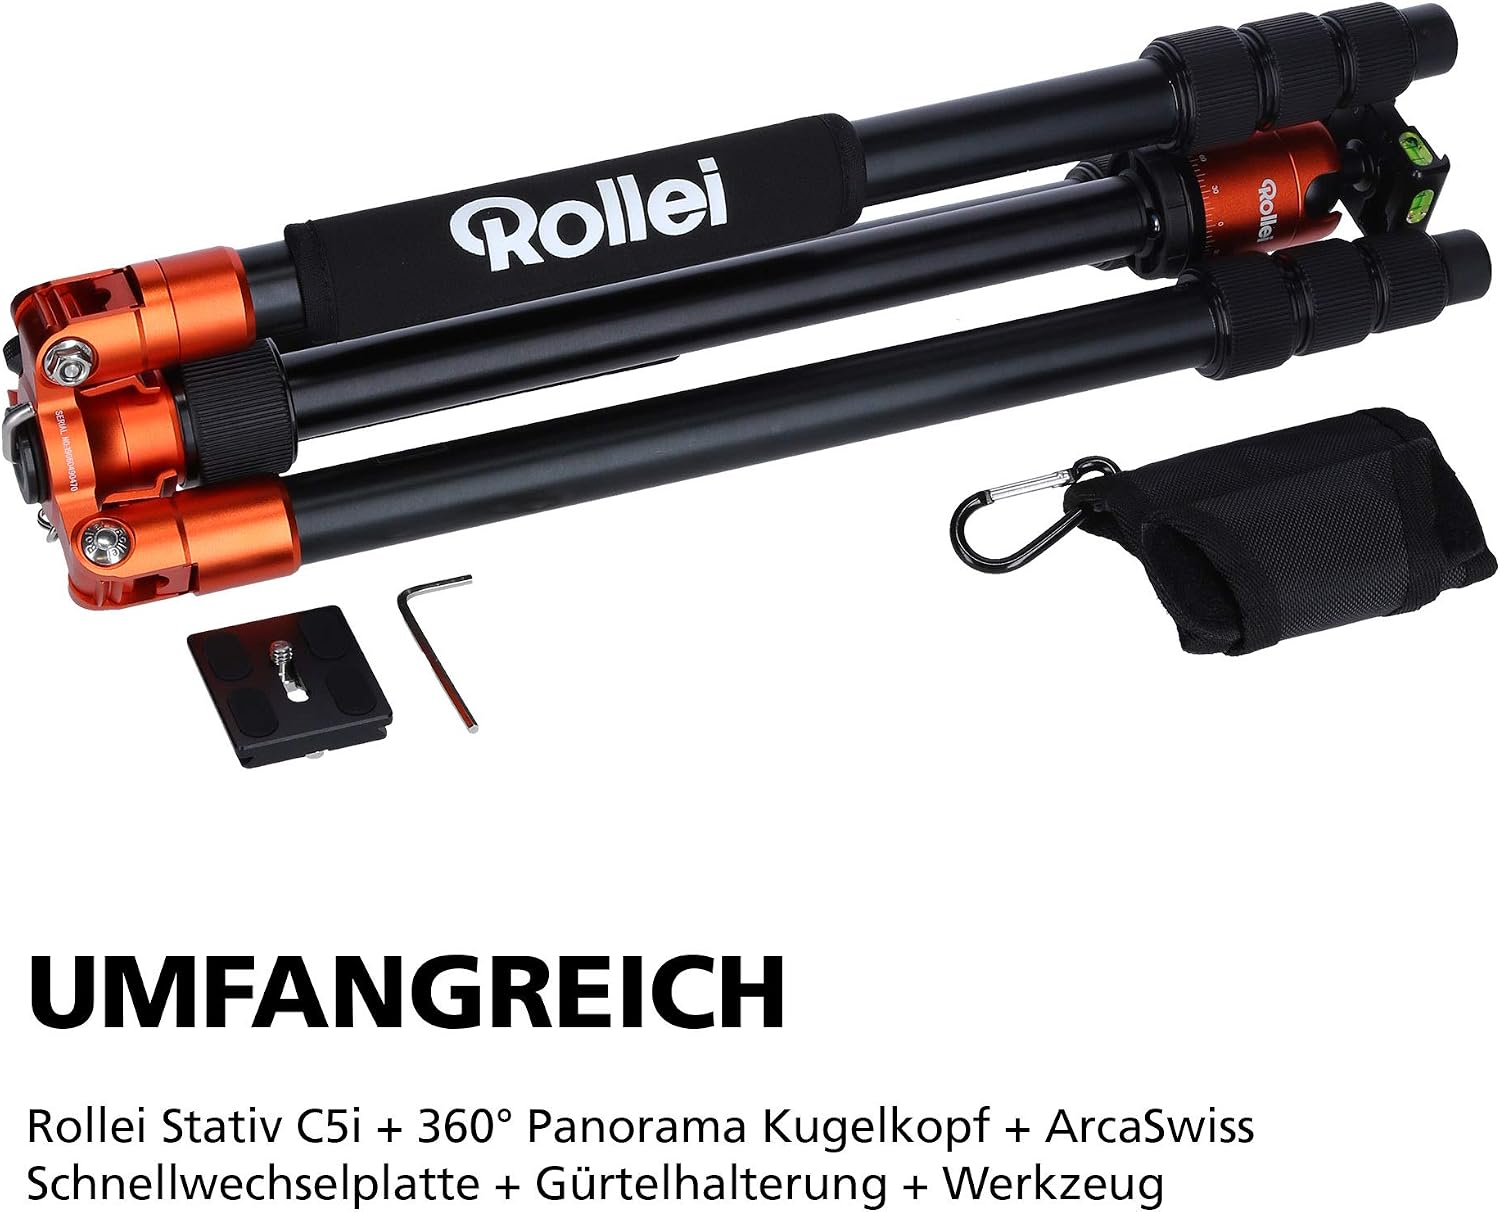
Image: All components included with the Rollei C5i Tripod, including the tripod, ball head, quick release plate, tools, and carrying bag.
Setup
1. Attaching the Ball Head
- Carefully remove the ball head from its packaging.
- Locate the mounting screw on the tripod's center column.
- Screw the ball head onto the tripod's center column until it is securely tightened. Ensure it is firm but do not overtighten.
2. Extending and Adjusting Legs
- Release the leg angle locks by pressing the button at the top of each leg hinge.
- Extend the legs to your desired angle. The tripod offers multiple leg angle stops for stability on uneven terrain.
- To extend the leg segments, twist the quick-lock collars on each leg segment a quarter turn to loosen. Pull out the segments to the desired length.
- Twist the quick-lock collars back a quarter turn to tighten and secure the leg segments.

Image: A close-up of the quick-release system on the tripod legs, demonstrating how a quarter turn locks and unlocks the segments for rapid setup.
3. Attaching Your Camera
- Ensure the quick release plate is detached from the ball head.
- Screw the quick release plate onto the bottom of your camera. Use a coin or the provided Allen key to ensure it is snug.
- Slide the quick release plate with your camera into the clamp on the ball head. Ensure it clicks into place and then tighten the locking knob on the ball head to secure the camera.
Operating
1. Adjusting Height and Stability
The tripod's height can be adjusted by extending the leg segments and the center column. For maximum stability, extend the legs fully before raising the center column. The tripod hook located at the bottom of the center column can be used to hang a weight (e.g., a camera bag) to increase stability, especially in windy conditions.
2. Using the Panoramic Ball Head
The panoramic ball head allows for precise camera positioning. It features multiple knobs:
- Main Locking Knob: Loosen to adjust the camera's angle (tilt and swivel). Tighten to lock the camera in position.
- Panning Lock Knob: Loosen to allow the camera to rotate horizontally (panning) while keeping the tilt locked. Tighten to lock panning.
- Friction Control Knob: Adjusts the resistance of the main ball movement.
The ball head also includes a spirit level for accurate horizontal and vertical alignment of your camera.
3. Macro Photography (Reversible Center Column)
For low-angle or macro photography, the center column can be reversed:
- Remove the camera and ball head from the center column.
- Loosen the center column locking knob.
- Pull the center column completely out of the tripod.
- Flip the center column upside down and reinsert it into the tripod.
- Reattach the ball head and camera. This allows the camera to be positioned very close to the ground for extreme low-angle shots or macro work.

Image: The Rollei C5i Tripod configured for macro photography, demonstrating the reversible center column that allows the camera to be positioned very close to the ground.
4. Monopod Conversion
One of the tripod legs can be detached and combined with the center column to form a monopod:
- Identify the leg with the foam grip and the Rollei logo. This leg is designed for monopod conversion.
- Unscrew this leg from the tripod chassis.
- Unscrew the center column from the tripod chassis.
- Screw the detached leg onto the bottom of the center column.
- Reattach the ball head to the top of the newly formed monopod.

Image: A detached tripod leg being used as a monopod, illustrating the versatility of the Rollei C5i.
Maintenance
Proper maintenance will extend the life and performance of your Rollei C5i Tripod:
- Cleaning: After use, especially in dusty, sandy, or wet environments, wipe down the tripod with a clean, damp cloth. Avoid using harsh chemicals or abrasive materials.
- Lubrication: The leg locking mechanisms and ball head generally do not require lubrication. If movement becomes stiff, consult professional service.
- Storage: Store the tripod in its carrying bag in a dry, cool place away from direct sunlight and extreme temperatures.
- Inspection: Periodically check all screws and connections to ensure they are tight. Do not overtighten.
Troubleshooting
- Tripod is unstable: Ensure all leg segments are fully extended and locked. Verify that the leg angle locks are engaged. Hang a weight from the center column hook for added stability.
- Leg segments slide out or do not lock: Check if the quick-lock collars are properly tightened. If a segment consistently slides out, inspect the internal locking mechanism for debris or damage. Do not force the mechanism.
- Ball head movement is stiff or loose: Adjust the friction control knob on the ball head. Ensure the main locking knob is not overtightened or too loose.
- Camera not secure on ball head: Ensure the quick release plate is firmly attached to your camera and fully seated in the ball head clamp. Tighten the quick release plate locking knob securely.
Specifications
| Model Name | Rollei C5i |
| Item Model Number | 20827 |
| Material | Aluminum |
| Maximum Height | 159 Centimeters |
| Minimum Height | 21.5 Centimeters (approx. with reversed column) |
| Folded Length | 43 Centimeters |
| Item Weight | 3.75 pounds (1.7 kg) |
| Weight Limit | 26.5 Pounds (8 kg) |
| Tripod Head Type | Ball Heads (Panoramic) |
| Compatible Devices | Camera |
| Special Feature | Macro Photography, Monopod Conversion |

Image: The Rollei C5i Tripod emphasizing its robust yet lightweight construction, capable of supporting up to 8 kg.

Image: The Rollei C5i Tripod demonstrating its compact folded size of 46.2 cm, making it suitable for travel.
Warranty and Support
For warranty information and technical support, please refer to the official Rollei website or contact Rollei USA customer service. Keep your purchase receipt as proof of purchase for any warranty claims.


