
Introduction
The MANHATTAN 4-Port KVM Switch (Model 151269) allows you to control up to four USB-enabled multimedia computers using a single USB keyboard, USB mouse, and VGA monitor. This compact KVM switch also features audio and microphone switching functionality, enabling you to share a single set of speakers and a microphone across all connected computers. It is designed for both SOHO (Small Office/Home Office) and general office desktop multimedia applications, providing an efficient solution for managing multiple systems.
The device includes four sets of detachable USB KVM combo cables and four sets of audio/mic cables, simplifying the connection process. It supports independent or simultaneous switching of PC channels and audio/microphone channels, offering flexibility in your setup.
Features
- Controls up to four computers from a single USB keyboard, USB mouse, and VGA monitor.
- Integrated audio and microphone switching for shared speakers and microphone.
- Supports USB interface for multiplatform compatibility (PC, Macintosh G3/G4, iMac).
- User-programmable simultaneous/independent PC and audio/mic switching.
- Includes four 1.5m detachable KVM connection cables and audio/mic cables.
- Compact design for desktop use.
- Push-button and hotkey switching options.
Package Contents
Verify that all items are present and in good condition upon opening the package:
- MANHATTAN 4-Port KVM Switch (Model 151269)
- Four (4) KVM combo cables (USB and VGA)
- Four (4) Audio/Microphone cables
- User Manual (this document)
Setup Instructions
Follow these steps to set up your MANHATTAN 4-Port KVM Switch:
1. Identify Ports
Familiarize yourself with the ports on the KVM switch. The front panel typically contains console ports for your keyboard, mouse, speakers, and microphone. The rear and side panels contain the PC connection ports (VGA, USB, Audio, Mic) for each computer.
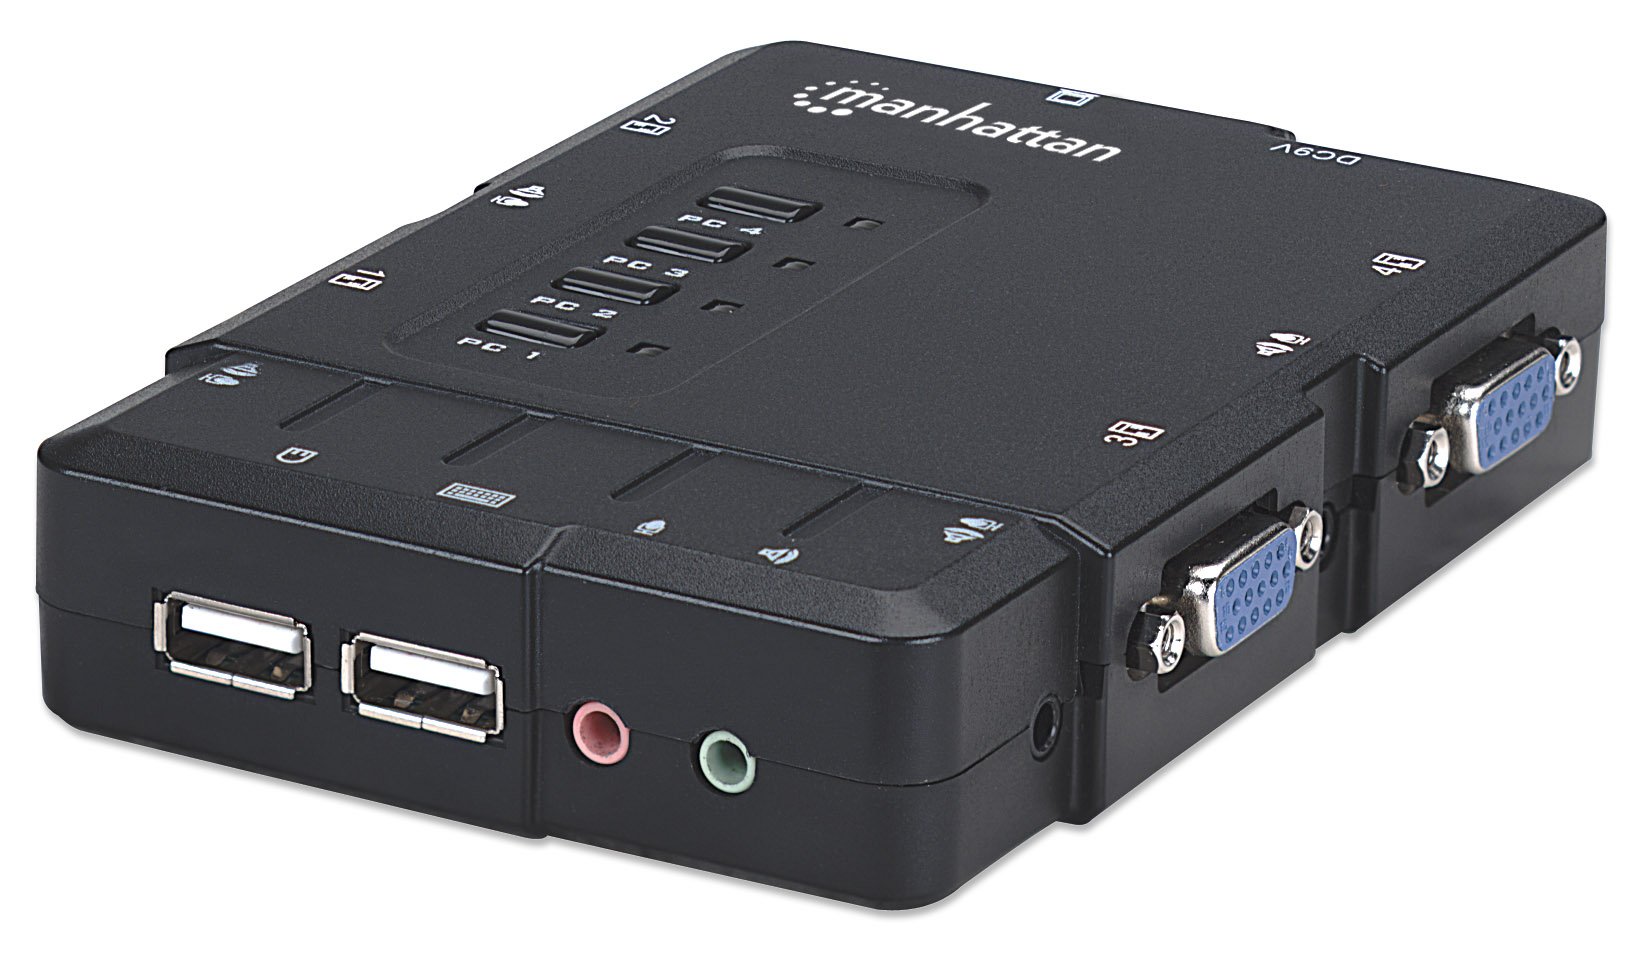
Image: Top-down view of the MANHATTAN 4-Port KVM Switch, highlighting the front console ports for USB keyboard/mouse and audio/mic, along with the PC selection buttons (PC 1-4).
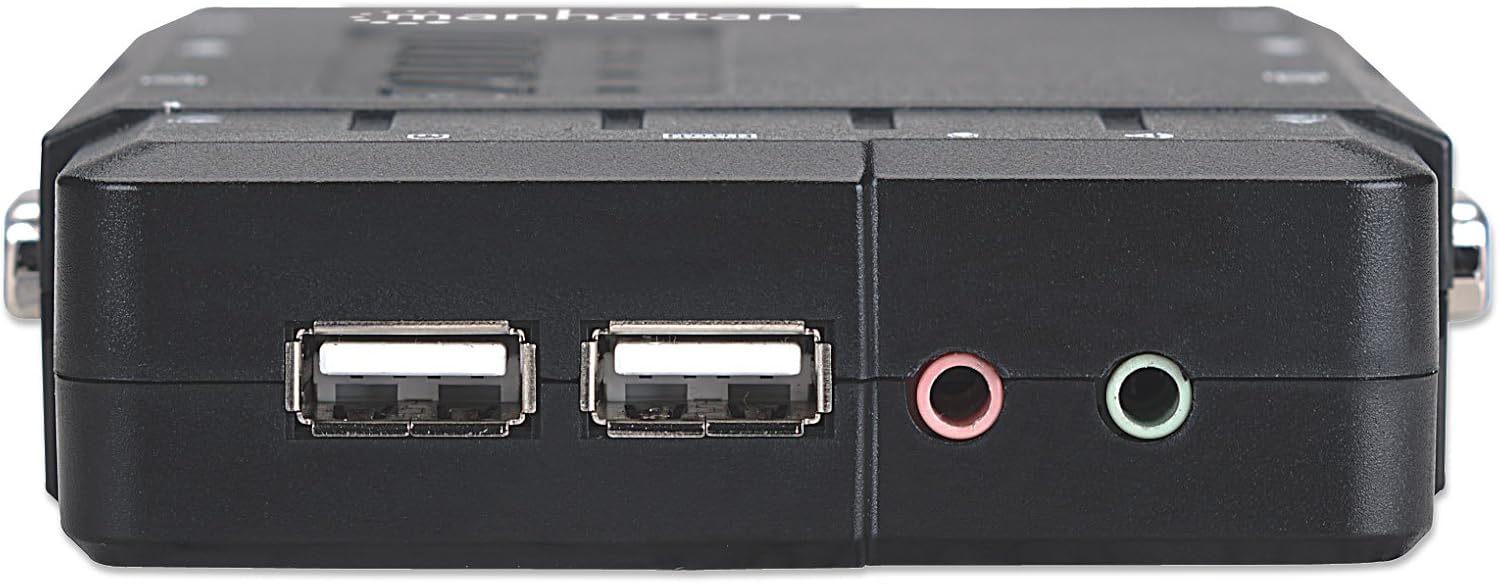
Image: Front view of the KVM switch, displaying the two USB ports for console keyboard and mouse, and the 3.5mm jacks for console microphone (pink) and speakers (green).
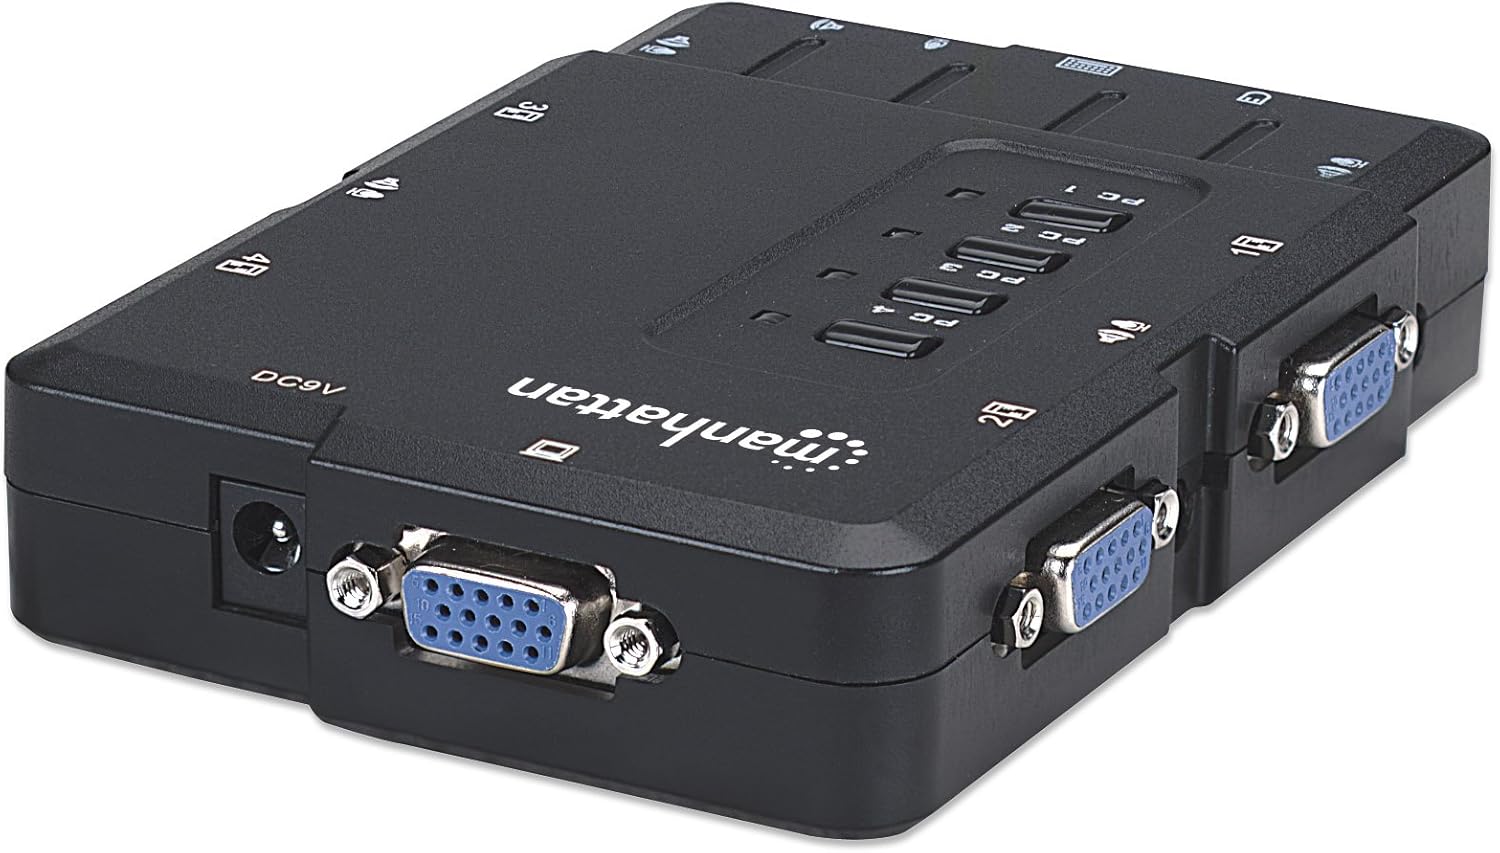
Image: Rear view of the KVM switch, showing the VGA input ports for connecting computers and the DC9V power input port.
2. Connect Console Devices
- Connect your USB keyboard to one of the USB ports on the front panel of the KVM switch.
- Connect your USB mouse to the other USB port on the front panel.
- Connect your VGA monitor to the VGA output port on the KVM switch.
- If using, connect your speakers to the green audio output jack and your microphone to the pink microphone input jack on the front panel.
3. Connect Computers
For each computer you wish to connect (up to four):
- Ensure the computer is powered off.
- Use one of the provided KVM combo cables to connect the computer's VGA output to a corresponding VGA input port on the KVM switch (e.g., PC 1 VGA).
- Connect the USB connector from the same KVM combo cable to an available USB port on the computer.
- If using audio/microphone, connect the provided audio cable from the computer's audio output to the corresponding audio input on the KVM switch, and the microphone cable from the computer's microphone input to the corresponding microphone input on the KVM switch.
- Repeat for all computers.
Note: The KVM switch does not require an external power adapter for basic operation, as it draws power from the connected computers via USB. However, a 9V DC power input is available if additional power is needed for stability, especially with high-power USB devices or long cable runs. An optional 9V AC adapter can be purchased separately.
4. Power On
Once all connections are secure, power on your computers. The KVM switch will automatically detect the active computer or default to PC 1.
Operating Instructions
The MANHATTAN 4-Port KVM Switch offers two methods for switching between connected computers:
1. Front Panel Push Buttons
Press the corresponding "PC 1", "PC 2", "PC 3", or "PC 4" button on the front panel of the KVM switch to select the desired computer. An LED indicator will illuminate to show which PC is currently active.
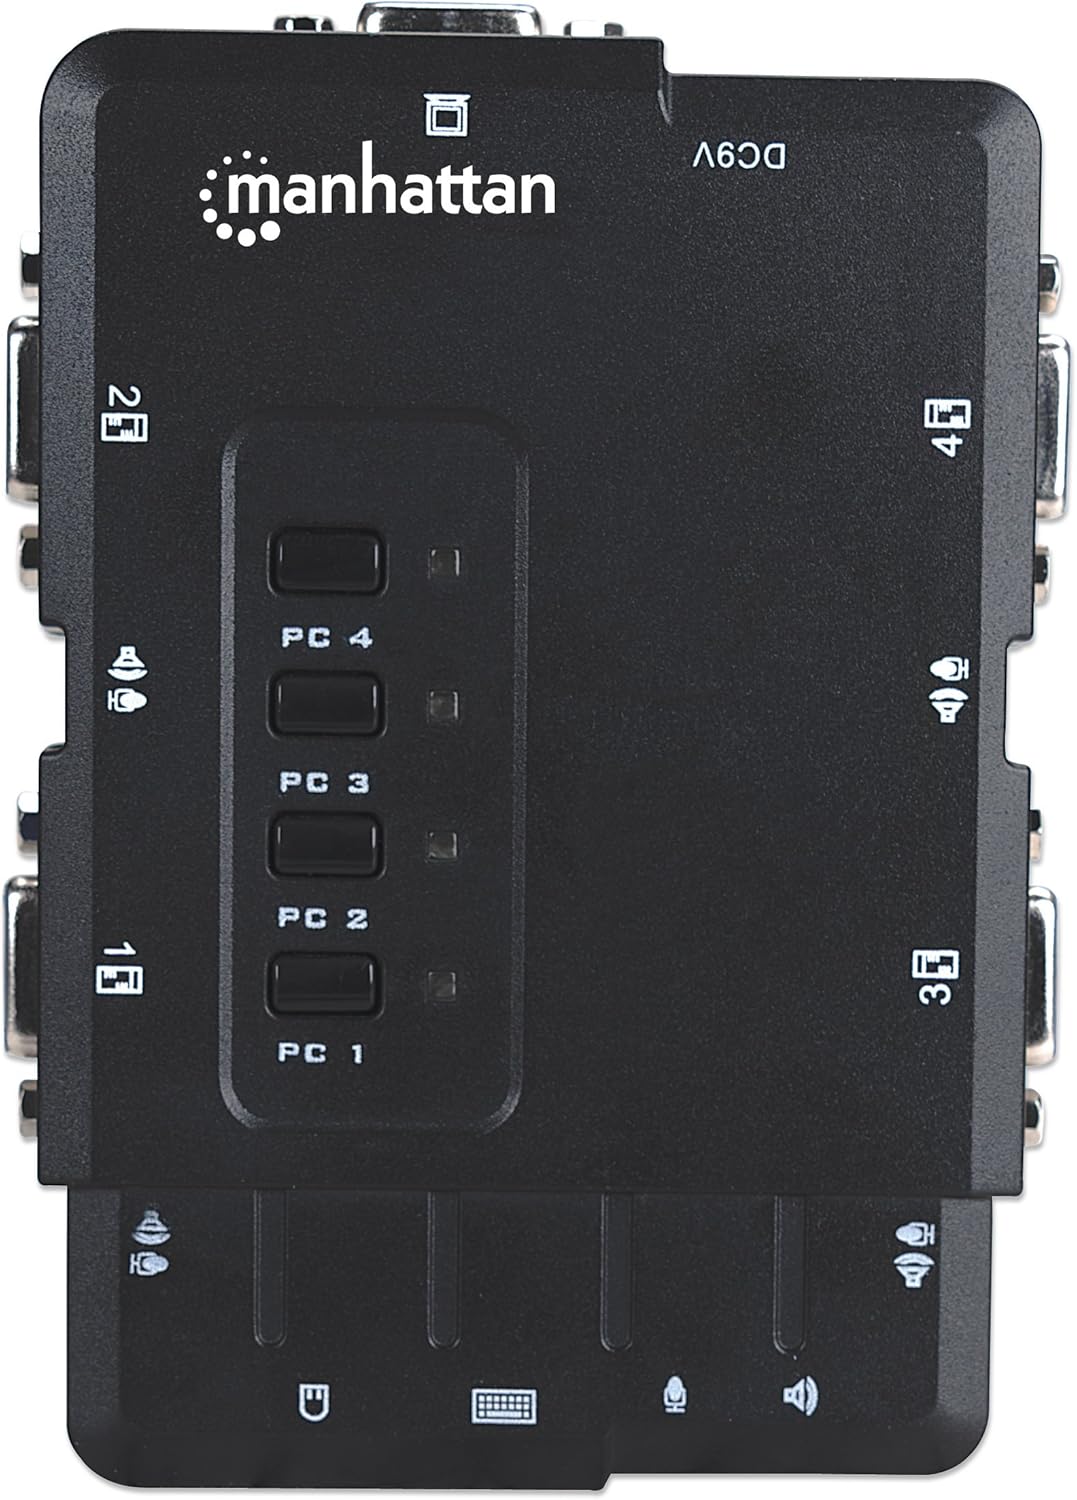
Image: Top view of the KVM switch, clearly showing the four push buttons labeled PC 1 through PC 4 for direct computer selection.
2. Keyboard Hotkeys
You can switch between computers using keyboard hotkey commands. The default hotkey sequence is:
- Press the Scroll Lock key twice in quick succession.
- Then, press the number key corresponding to the desired PC (e.g., 1 for PC 1, 2 for PC 2, etc.).
Example: To switch to PC 3, press Scroll Lock, Scroll Lock, then 3.
Some KVM switches also support switching using the Left CTRL key twice, followed by the PC number. Refer to the on-screen display or manufacturer's website for advanced hotkey configurations if the default does not work or if you wish to customize.
Audio and Microphone Switching
The KVM switch allows for independent or simultaneous switching of audio/microphone channels. By default, audio and microphone typically switch along with the selected PC. Consult the manufacturer's website or advanced settings for options to decouple audio switching from PC switching if desired.
Maintenance
To ensure optimal performance and longevity of your KVM switch:
- Keep the device in a clean, dry environment, away from direct sunlight, excessive heat, and moisture.
- Avoid blocking ventilation openings on the device.
- Clean the exterior with a soft, dry cloth. Do not use liquid or aerosol cleaners.
- Ensure all cables are securely connected. Loose connections can cause signal loss or intermittent issues.
- Do not attempt to open or repair the device yourself. Refer to qualified service personnel.
Troubleshooting
If you encounter issues with your KVM switch, try the following troubleshooting steps:
- No Display or Flickering Screen:
- Ensure all VGA cables are securely connected to both the KVM switch and the computers/monitor.
- Try restarting the KVM switch by disconnecting and reconnecting the USB cables from the computers, or by connecting an optional 9V power adapter if available.
- Verify that your monitor is set to the correct input source.
- Test with different VGA cables if possible.
- Keyboard or Mouse Not Responding:
- Ensure the USB cables from the KVM switch are securely connected to the computers.
- Check that your keyboard and mouse are connected to the correct console USB ports on the KVM switch.
- Some specialized keyboards (e.g., gaming keyboards with advanced features) may not be fully compatible with KVM switches. Try a standard USB keyboard and mouse to isolate the issue.
- Restart the KVM switch and the affected computer.
- No Audio or Microphone Functionality:
- Verify that all audio and microphone cables are correctly connected between the KVM switch and the computers/speakers/microphone.
- Check the audio settings on each computer to ensure the correct output/input device is selected (e.g., "USB Audio Device" or similar).
- Ensure volume levels are not muted on the computer or speakers.
- Some operating systems (e.g., certain Linux distributions) might require specific driver configurations for audio through KVM.
- Hotkeys Not Working:
- Ensure you are pressing the hotkey sequence correctly and quickly (e.g., Scroll Lock, Scroll Lock, then PC number).
- Confirm that the keyboard is fully recognized by the KVM switch.
- Try using the front panel push buttons to switch PCs as an alternative.
Specifications
| Feature | Description |
|---|---|
| Model | 151269 |
| Brand | MANHATTAN |
| Switch Type | KVM Switch with Audio and Microphone Functionality |
| Number of Ports | 4 |
| Console Connections | 1 x VGA, 2 x USB (Type-A), 1 x 3.5mm Audio Out, 1 x 3.5mm Mic In |
| PC Connections (per PC) | 1 x VGA, 1 x USB (Type-B), 1 x 3.5mm Audio In, 1 x 3.5mm Mic Out |
| Control Method | Push Button, Hotkeys |
| Connectivity Protocol | USB |
| Material | Polycarbonate |
| Color | Black |
| Item Dimensions (L x W x H) | 8.46 x 7.52 x 3.74 inches (21.5 x 19.1 x 9.5 cm) |
| Item Weight | 2 pounds (0.91 kg) |
| Power | USB-powered (optional 9V DC input for external power) |
| Included Components | KVM Switch, 4 KVM combo cables, 4 Audio/Mic cables |
Warranty
MANHATTAN products are designed for durability and are backed by a manufacturer's warranty. For specific warranty terms, duration, and claim procedures, please refer to the official MANHATTAN website or the warranty card included with your product. Keep your proof of purchase for warranty service.
Support
For technical assistance, product updates, or additional information, please visit the official MANHATTAN website. You can typically find FAQs, driver downloads, and contact information for customer support there.
MANHATTAN Official Website: www.manhattanproducts.com


