1. Introduction
This manual provides detailed instructions for the installation, operation, and maintenance of your Marley MD26 Qmark Electric Line Voltage Wall Thermostat. This wall-mounted thermostat is designed for heating-only applications, featuring a snap-action design for extended durability. Please read this manual thoroughly before proceeding with installation or operation to ensure safe and efficient use of the product.
2. Safety Information
WARNING: Risk of Electric Shock. Disconnect power at the main service panel before installing or servicing this thermostat. Installation should be performed by a qualified electrician in accordance with all local and national electrical codes.
- Always turn off power at the circuit breaker or fuse box before beginning any electrical work.
- Ensure all wiring connections are secure and properly insulated.
- Do not operate the thermostat with damaged wiring or if it has been exposed to water.
- This thermostat is designed for line voltage applications. Verify your heating system's voltage compatibility before installation.
3. Package Contents
The Marley MD26 Qmark Electric Line Voltage Wall Thermostat package includes:
- 1 x Marley MD26 Wall Thermostat
- Installation and Operating Instructions (this manual)
4. Specifications
| Feature | Specification |
|---|---|
| Brand | Marley |
| Model | MD26 |
| Voltage | 277 Volts |
| Operation Type | DPST Double-Pole |
| Temperature Control Type | Manual (Rotary Knob) |
| Temperature Range | 50°F - 80°F |
| Differential | 5°F |
| Connectivity Technology | Wired |
| Material | Metal |
| Color | White |
| Mounting Type | Wall Mount |
| Dimensions | 2.25 x 2.56 x 4.63 inches |
| Weight | 6.4 ounces |
| Certifications | CSA, UL |
5. Installation (Setup)
The Marley MD26 thermostat is designed for wall mounting and requires connection to a line voltage heating system. Due to the nature of line voltage wiring, professional installation by a qualified electrician is strongly recommended to ensure safety and compliance with electrical codes.
5.1 Pre-Installation Steps
- Disconnect Power: Locate the circuit breaker or fuse that controls your heating system and turn off the power completely. Verify power is off using a voltage tester.
- Remove Old Thermostat (if applicable): Carefully remove your existing thermostat from the wall. Note how the wires are connected.
- Select Mounting Location: Choose an interior wall, approximately 5 feet (1.5 meters) above the floor, away from direct sunlight, drafts, or heat sources (e.g., lamps, appliances) that could affect temperature readings.
5.2 Wiring Instructions
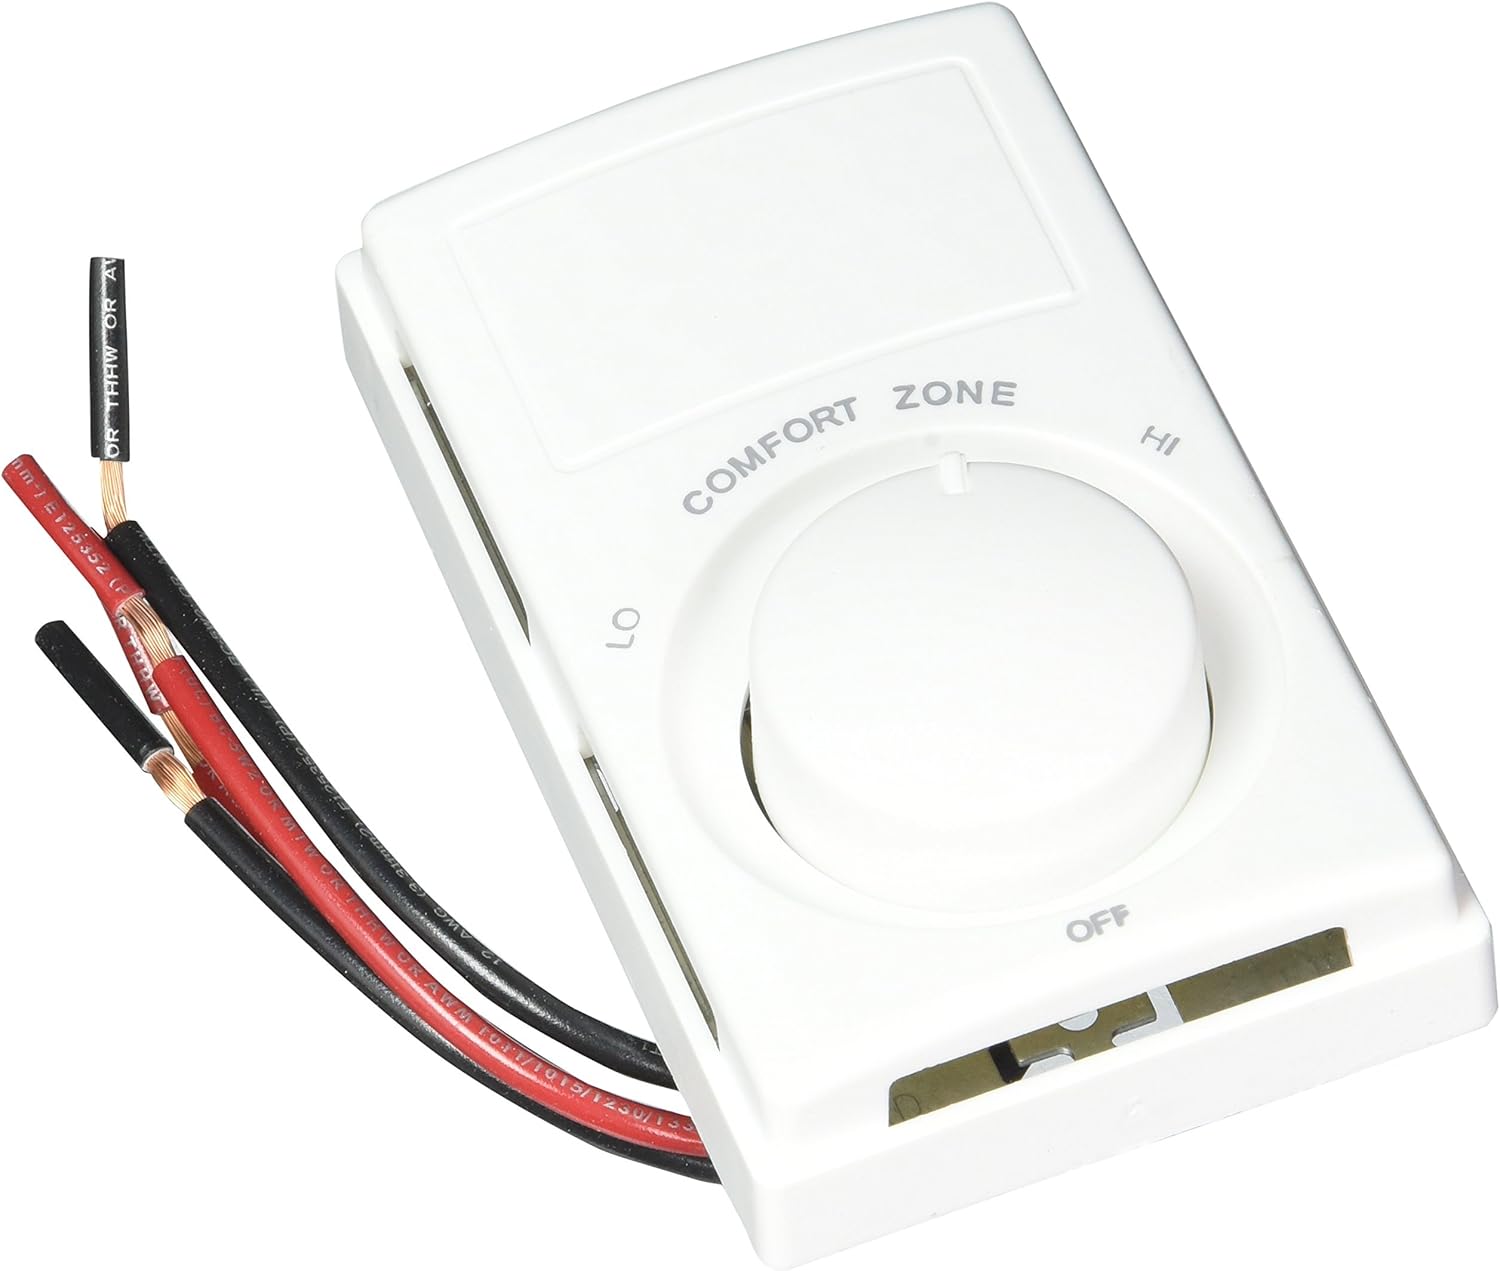
The MD26 thermostat features DPST (Double-Pole Single-Throw) operation, meaning it breaks both sides of the 277V line when turned off. The thermostat includes two sets of wires (typically red and black) for connection.
- Identify Wires: You will have two incoming line voltage wires from your power source and two outgoing wires leading to your electric heater.
- Connect Power Wires: Connect one incoming line voltage wire to one of the thermostat's input wires (e.g., one black wire from the thermostat). Connect the other incoming line voltage wire to the other thermostat input wire (e.g., the other black wire from the thermostat).
- Connect Heater Wires: Connect one outgoing heater wire to one of the thermostat's output wires (e.g., one red wire from the thermostat). Connect the other outgoing heater wire to the other thermostat output wire (e.g., the other red wire from the thermostat).
- Secure Connections: Use appropriate wire nuts or connectors to ensure all connections are tight and insulated.
- Mount Thermostat: Carefully push the wires back into the wall box and secure the thermostat to the wall using the provided screws. Ensure it is level.
5.3 Post-Installation
Once the thermostat is securely mounted and all wiring is complete, restore power at the main service panel. The thermostat is now ready for operation.
6. Operation
The Marley MD26 thermostat provides simple, manual control over your electric heating system.
6.1 Turning On/Off
- To turn the heating system ON, ensure the small slider switch at the bottom of the thermostat is not in the 'OFF' position.
- To turn the heating system OFF completely, slide the small switch at the bottom of the thermostat to the 'OFF' position. This will cut power to the heater.
6.2 Setting the Temperature
The thermostat features a rotary knob for temperature adjustment within a range of 50°F to 80°F. The dial is marked with 'LO', 'COMFORT ZONE', and 'HI' to guide your setting.
- Rotate the central dial clockwise to increase the desired temperature.
- Rotate the central dial counter-clockwise to decrease the desired temperature.
- The 'COMFORT ZONE' typically represents a common living temperature range.
- The thermostat will activate the heater when the room temperature falls 5°F below your setpoint and turn it off when the room temperature reaches the setpoint.
7. Maintenance
The Marley MD26 thermostat requires minimal maintenance.
- Cleaning: Periodically wipe the exterior of the thermostat with a soft, damp cloth. Do not use abrasive cleaners or solvents. Ensure no moisture enters the thermostat housing.
- Dust Removal: Keep the thermostat free of dust and debris, as excessive buildup can affect its performance.
- No User-Serviceable Parts: The thermostat contains no user-serviceable parts. Do not attempt to open or repair the unit yourself.
8. Troubleshooting
If you experience issues with your Marley MD26 thermostat, refer to the following troubleshooting guide:
| Problem | Possible Cause | Solution |
|---|---|---|
| Heater does not turn on | No power to thermostat Thermostat set to 'OFF' Temperature setting too low Loose wiring connection | Check circuit breaker/fuse Ensure 'OFF' switch is disengaged Increase temperature setting (Professional assistance recommended) Verify wiring connections are secure |
| Heater runs continuously / Does not turn off | Temperature setting too high Thermostat malfunction | Decrease temperature setting Slide 'OFF' switch to turn off. If issue persists, thermostat may need replacement. |
| Inaccurate temperature control | Thermostat location affected by drafts/heat sources Thermostat malfunction | Ensure thermostat is not in direct sunlight, near windows, or heat-emitting appliances. If problem persists, thermostat may need replacement. |
| Knob feels loose or broken | Wear and tear Physical damage | The thermostat is not user-serviceable. If the knob is damaged, the unit may need replacement. |
If troubleshooting steps do not resolve the issue, contact a qualified electrician or the manufacturer for assistance.
9. Warranty and Support
For information regarding the product warranty, please refer to the documentation provided at the time of purchase or contact Marley customer support directly. Specific warranty terms may vary by region and retailer.
For technical support or further inquiries, please visit the official Marley website or contact their customer service department.


