
Fishman PRO-PSY-201
Fishman Presys+ Preamp and Pickup System User Manual
Model: PRO-PSY-201
1. Introduction
The Fishman Presys+ Preamp and Pickup System is designed to provide exceptional amplified acoustic guitar tone with comprehensive tone shaping capabilities. This system integrates a piezo pickup and a microphone blend for a rich, natural sound. It features intuitive controls for volume, equalization, and feedback suppression, along with a convenient built-in tuner.

Figure 1: The Fishman Presys+ Preamp and Pickup System, showing the control panel and the pre-wired Sonicore pickup.
2. Key Features
- Small Footprint: Designed to fit a wide range of acoustic guitars.
- Volume Control: Adjust the overall output level.
- 3-Band EQ: Independent Bass, Middle, and Treble controls for precise tone shaping.
- Built-in Tuner: Integrated chromatic tuner with LED display for accurate tuning.
- Phase Switch: Helps to eliminate feedback and phase issues, especially when combining with external microphones.
- Low Battery Indicator: Alerts when the 9-Volt battery needs replacement.
- Unique Pivot Design: Allows for easy and instant access to the 9-Volt battery compartment.
- Pre-wired Fishman Sonicore Pickup: Ensures easy, solder-free installation.
- Onboard Anti-feedback Control (Notch): Reduces resonant feedback frequencies.
- Brilliance Control: Adds clarity and sparkle to the sound.
3. Specifications
| Attribute | Detail |
|---|---|
| Item Weight | 10.6 ounces |
| Product Dimensions | 3.94 x 1.97 x 0.28 inches |
| Country of Origin | China |
| Item Model Number | PRO-PSY-201 |
| Batteries Required | 1 x 9V battery |
| Color | Black |
| Compatible Devices | Guitar |
| Connector Type | 6.35mm Jack |
| Material Type | Metal |
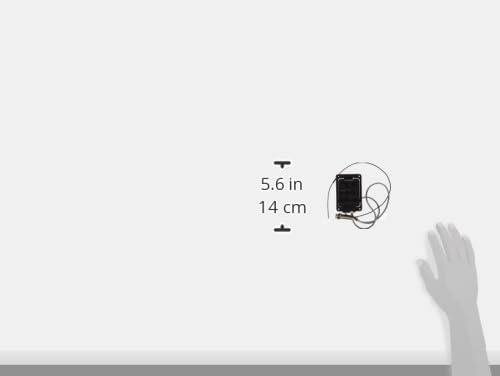
Figure 2: Product dimensions of the Fishman Presys+ Preamp and Pickup System.
4. Setup and Installation
Installation of the Fishman Presys+ system typically involves modifying the guitar body to accommodate the preamp unit and the endpin jack. Due to the precision required for cutting into the guitar's wood, it is highly recommended that installation be performed by a qualified guitar technician or luthier. Incorrect installation can damage your instrument.
4.1. Pre-Installation Considerations
- Ensure the guitar's saddle is properly seated and the bridge is in good condition.
- Confirm the internal bracing of your guitar allows for the installation of the preamp unit without obstruction.
- Gather necessary tools, including appropriate drills and cutting tools for wood, if performing self-installation.
4.2. Installation Steps (Professional Installation Recommended)
- Prepare the Guitar: Remove all strings and carefully protect the guitar's finish.
- Cut Preamp Opening: Precisely cut the opening for the preamp unit on the side of the guitar, ensuring it matches the dimensions of the Presys+ unit.
- Install Endpin Jack: Drill the necessary hole for the endpin jack at the bottom of the guitar.
- Route Wiring: Carefully route the pre-wired Sonicore pickup from the bridge saddle area to the preamp unit and the endpin jack.
- Install Pickup: Place the Sonicore pickup under the saddle, ensuring even pressure across all strings.
- Secure Preamp: Mount the Presys+ preamp unit into the prepared opening and secure it with the provided screws.
- Connect Components: Connect the pickup and battery clip to the preamp unit.
- Install Battery: Insert a fresh 9V battery into the battery compartment.
- Restring and Test: Restring the guitar and test the system's functionality.
5. Operating Instructions
5.1. Basic Operation
- Power On/Off: The system powers on automatically when a 6.35mm (1/4-inch) instrument cable is plugged into the endpin jack. Unplugging the cable turns the system off.
- Volume Control: Rotate the "Volume" knob to adjust the overall output level of the amplified sound.
5.2. Tone Shaping (EQ)
The Presys+ features a 3-band equalizer to sculpt your sound:
- Bass: Adjusts the low-frequency response. Turn clockwise for more warmth and fullness, counter-clockwise for less boominess.
- Middle: Controls the mid-range frequencies. Adjust to cut or boost the presence of your guitar in the mix.
- Treble: Adjusts the high-frequency response. Turn clockwise for more brightness and clarity, counter-clockwise to reduce harshness.
- Brilliance: Provides additional high-frequency contouring to add sparkle and definition to your tone.
5.3. Tuner Function
To use the built-in tuner:
- Press the "Tuner" button to activate the chromatic tuner. The display will light up.
- Play a single string. The display will show the note name and indicate if it is sharp, flat, or in tune.
- Adjust your tuning pegs until the note is centered and the indicator shows it is in tune.
- The tuner automatically mutes the output signal when active, allowing for silent tuning.
- Press the "Tuner" button again to deactivate the tuner and restore the output signal.
5.4. Anti-Feedback Controls
- Notch: This control helps to eliminate feedback by cutting a specific frequency. Rotate the knob while feedback is occurring to find and suppress the offending frequency.
- Phase Switch: Pressing the "Phase" button inverts the phase of the output signal. This can be useful in live situations to reduce feedback, especially when using the system in conjunction with an external microphone. Experiment with both positions to find the optimal sound and feedback suppression.
6. Maintenance
6.1. Battery Replacement
The Presys+ system operates on a single 9-Volt battery. A low battery indicator LED will illuminate when the battery voltage is low, signaling that replacement is needed. To replace the battery:
- Unplug the instrument cable from the endpin jack to power off the system.
- Locate the battery compartment on the preamp unit. The unique pivot design allows for easy access.
- Gently open the battery compartment.
- Remove the old 9-Volt battery and replace it with a new one, ensuring correct polarity.
- Close the battery compartment securely.
6.2. Cleaning
Wipe the control panel and visible parts of the preamp with a soft, dry cloth. Avoid using abrasive cleaners or solvents, as these can damage the finish or electronic components.
7. Troubleshooting
| Problem | Possible Cause | Solution |
|---|---|---|
| No Sound Output |
|
|
| Excessive Feedback |
|
|
| Uneven String Volume |
|
|
8. Warranty and Support
For warranty information and technical support, please refer to the official Fishman website or contact their customer service department. Keep your proof of purchase for any warranty claims.
Fishman Contact Information:
- Website: www.fishman.com
- Support: Refer to the support section on the official website for FAQs, manuals, and contact forms.
Related documentsPRO-PSY-201

Ask a question about this manual
Ask about setup, troubleshooting, compatibility, parts, safety, or missing instructions. Manuals+ will review the question and use this page’s manual context to help answer it.