1. Introduction
Welcome to the world of creative embroidery with your new Janome 350E Memory Craft Embroidery Machine. This machine is designed to bring your embroidery visions to life with ease and precision. This manual provides essential information for setting up, operating, and maintaining your machine to ensure optimal performance and longevity.
2. Safety Instructions
Before operating your Janome 350E, please read and understand all safety instructions. Keep this manual in a safe place for future reference.
- Always unplug the machine from the electrical outlet immediately after using and before cleaning, making any adjustments, or performing any maintenance.
- Do not operate the machine with a damaged cord or plug. If the machine is not working properly, has been dropped or damaged, or dropped into water, return it to an authorized Janome service center for examination and repair.
- Keep fingers away from all moving parts. Special care is required around the sewing machine needle.
- Use only accessories recommended by the manufacturer as contained in this manual.
- Never drop or insert any object into any opening.
- Do not use outdoors.
- Do not operate where aerosol (spray) products are being used or where oxygen is being administered.
- To disconnect, turn all controls to the off position, then remove plug from outlet.
3. Product Overview
The Janome 350E is an embroidery-only machine featuring a range of functions to enhance your creative projects.
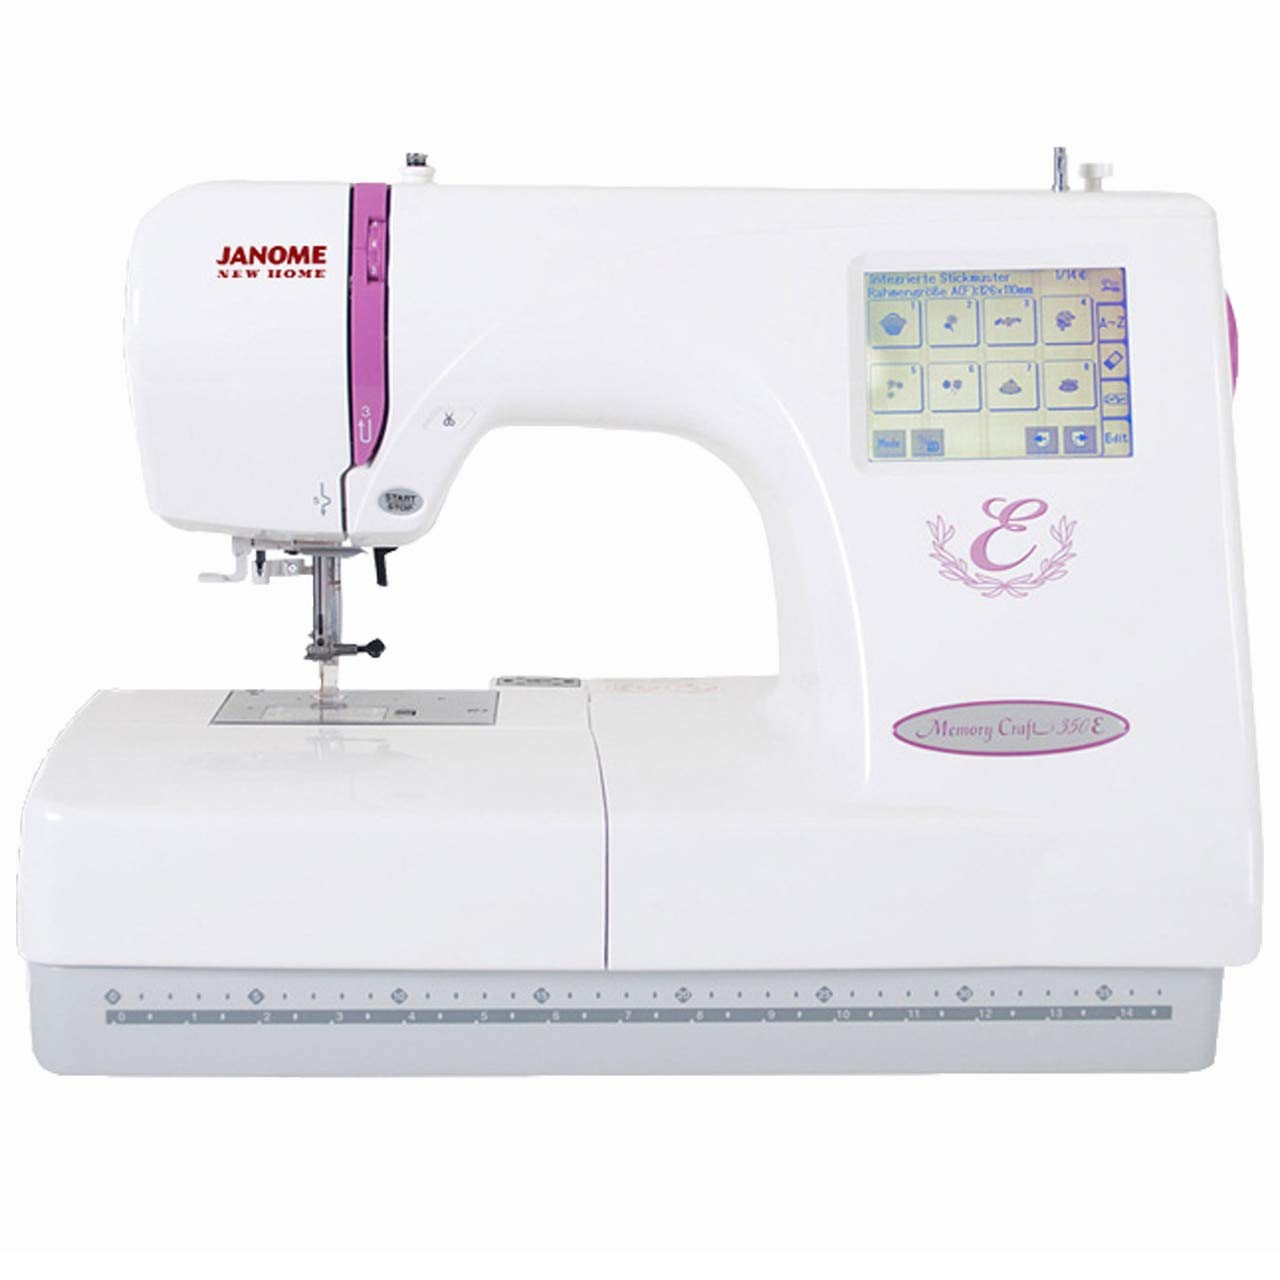
Figure 3.1: Front view of the Janome 350E Memory Craft Embroidery Machine. This image displays the machine's overall design, including the needle area, embroidery arm, and the integrated LCD touchscreen on the right side.

Figure 3.2: Rear view of the Janome 350E Memory Craft Embroidery Machine. This perspective shows the power input, main power switch, and ventilation grilles on the back of the machine.
Key Features:
- Built-in Designs: 100 unique embroidery designs.
- Embroidery Area: Maximum embroidery size of 5.5” x 7.9” (140mm x 200mm).
- LCD Touchscreen: Backlit for clear visibility and easy navigation.
- Monogramming Fonts: 3 built-in fonts for personalized projects.
- Design Transfer: Convenient design transfer via USB.
- Automatic Bobbin Winding: Simplifies bobbin preparation.
- Dust Cover: Included for machine protection.
4. Setup
4.1 Power Connection
- Place the machine on a stable, flat surface.
- Ensure the power switch (refer to Figure 3.2) is in the 'OFF' position.
- Connect the power cord to the machine's power input and then to a suitable electrical outlet.
4.2 Bobbin Winding
The Janome 350E features automatic bobbin winding. Follow the instructions in the machine's quick start guide for proper bobbin placement and winding procedure.
4.3 Threading the Machine
The machine requires manual threading. Refer to the numbered threading path indicated on the machine body and in the detailed threading diagrams in your quick start guide.
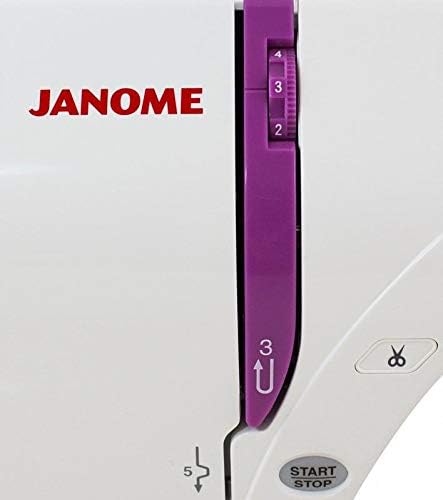
Figure 4.1: Close-up of the thread tension adjustment dial and thread cutter on the Janome 350E. Ensure proper tension for consistent stitch quality.

Figure 4.2: Detailed view of the needle area on the Janome 350E, showing the needle, presser foot, and needle plate. This area is crucial for precise embroidery.
4.4 Hooping Fabric
Select the appropriate hoop size for your design. Place stabilizer and fabric securely within the hoop, ensuring the fabric is taut and wrinkle-free. Attach the hooped fabric to the embroidery unit.
5. Operating the Machine
5.1 Selecting Designs
Turn on the machine. The backlit LCD touchscreen will display the main menu. You can select from the 100 built-in designs or load your own.
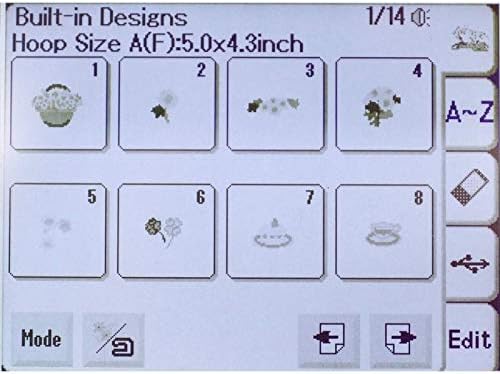
Figure 5.1: The Janome 350E LCD screen showing a selection of built-in embroidery designs. Users can navigate and select designs directly from this interface.
5.2 Transferring Designs via USB
To use custom designs, save them to a USB flash drive in a compatible format (e.g., .jef). Insert the USB drive into the machine's USB port. Use the touchscreen interface to navigate to the USB drive and select your desired design. It is recommended to use smaller capacity USB drives and limit the number of designs per drive for optimal machine recognition.
5.3 Starting Embroidery
- Once a design is selected and positioned, ensure the fabric is correctly hooped and attached.
- Lower the presser foot.
- Press the Start/Stop button to begin the embroidery process.
- Monitor the embroidery process. The machine will typically alert you for thread changes or if an error occurs.

Figure 5.2: The Janome 350E actively embroidering a design on hooped fabric. This illustrates the machine's functionality during an embroidery project.
5.4 Bobbin Monitoring
The machine is designed to provide a low bobbin warning. However, this warning may not always be consistent. It is advisable to periodically check your bobbin thread level, especially during longer embroidery sequences, to prevent interruptions.
6. Maintenance
Regular maintenance ensures your Janome 350E continues to perform reliably.
- Cleaning: Regularly clean the bobbin area, feed dogs, and needle plate with a small brush to remove lint and dust.
- Oiling: Refer to your detailed instruction manual for specific oiling points and frequency. Use only recommended sewing machine oil.
- Needle Replacement: Replace the needle frequently, especially if it becomes bent, dull, or if you notice skipped stitches.
- Storage: When not in use, cover the machine with the provided dust cover to protect it from dust and debris.
7. Troubleshooting
This section addresses common issues you might encounter with your Janome 350E.
| Problem | Possible Cause | Solution |
|---|---|---|
| LCD Screen Clarity Issues | Display settings may change, or screen may fade. | Adjust brightness/contrast settings on the screen. If issues persist, contact an authorized service center. |
| Inconsistent Low Bobbin Warning | Sensor inconsistency. | Manually check bobbin thread levels frequently during embroidery. |
| Machine Not Recognizing USB Designs | Incorrect file format, too many designs on USB, or incompatible USB drive. | Ensure designs are in .jef format. Use smaller capacity USB drives (e.g., 2GB or 4GB) and limit designs to fewer than 20 per drive. Ensure designs are in the correct folder structure (e.g., MY DESIGN). |
| Skipped Stitches or Poor Stitch Quality | Incorrect threading, dull/bent needle, incorrect tension, or wrong stabilizer. | Re-thread the machine, replace the needle, adjust thread tension, and ensure appropriate stabilizer is used for your fabric. |
| Machine Locks Up or Displays Error Message | Sensor issue, mechanical jam, or software error. | Turn the machine off, wait a few minutes, then turn it back on. If the error persists, consult your dealer or an authorized service center. |
8. Specifications
| Feature | Detail |
|---|---|
| Product Dimensions | 15"D x 22"W x 21"H (38.1 cm D x 55.88 cm W x 53.34 cm H) |
| Item Weight | 26.98 pounds (12.24 kg) |
| Power Source | Corded Electric |
| Embroidery Designs | 100 built-in designs |
| Maximum Embroidery Size | 5.5” x 7.9” (140mm x 200mm) |
| Standard Hoops Included | Large: 5.5” x 7.9” (140mm x 200mm), Standard: 5” x 4.3” (126mm x 110mm) |
| Display | Backlit LCD Touchscreen |
| Monogramming Fonts | 3 fonts |
| Design Transfer | USB |
| Needle Threading System | Manual |
| Automatic Bobbin Winding | Yes |
| Case/Cover Included | Dust cover |
9. Warranty and Support
For warranty information, please refer to the documentation included with your purchase or visit the official Janome website. If you encounter issues that cannot be resolved using this manual's troubleshooting section, please contact your authorized Janome dealer or Janome customer support for assistance. Ensure you have your machine's model number (350E) and serial number ready when contacting support.


