Introduction
Welcome to the user manual for your Waring Pro WPM10 Professional Popcorn Maker. This appliance is designed to provide a convenient and efficient way to prepare fresh popcorn. Please read these instructions carefully before first use to ensure safe operation and optimal performance.
Important Safeguards
When using electrical appliances, basic safety precautions should always be followed to reduce the risk of fire, electric shock, and/or injury to persons, including the following:
- Read all instructions.
- Do not touch hot surfaces. Use handles or knobs.
- To protect against electrical hazards, do not immerse cord, plugs, or appliance in water or other liquid.
- Close supervision is necessary when any appliance is used by or near children.
- Unplug from outlet when not in use and before cleaning. Allow to cool before putting on or taking off parts.
- Do not operate any appliance with a damaged cord or plug, or after the appliance malfunctions or has been damaged in any manner.
- The use of accessory attachments not recommended by the appliance manufacturer may cause injuries.
- Do not use outdoors.
- Do not let cord hang over edge of table or counter, or touch hot surfaces.
- Do not place on or near a hot gas or electric burner, or in a heated oven.
- Extreme caution must be used when moving an appliance containing hot oil or other hot liquids.
- Always attach plug to appliance first, then plug cord into the wall outlet. To disconnect, turn any control to "off", then remove plug from wall outlet.
- Do not use appliance for other than intended use.
- Ensure the lid is properly secured during operation.
- Avoid contact with moving parts.
SAVE THESE INSTRUCTIONS
Product Overview
The Waring Pro WPM10 Professional Popcorn Maker consists of several key components designed for optimal popcorn preparation.
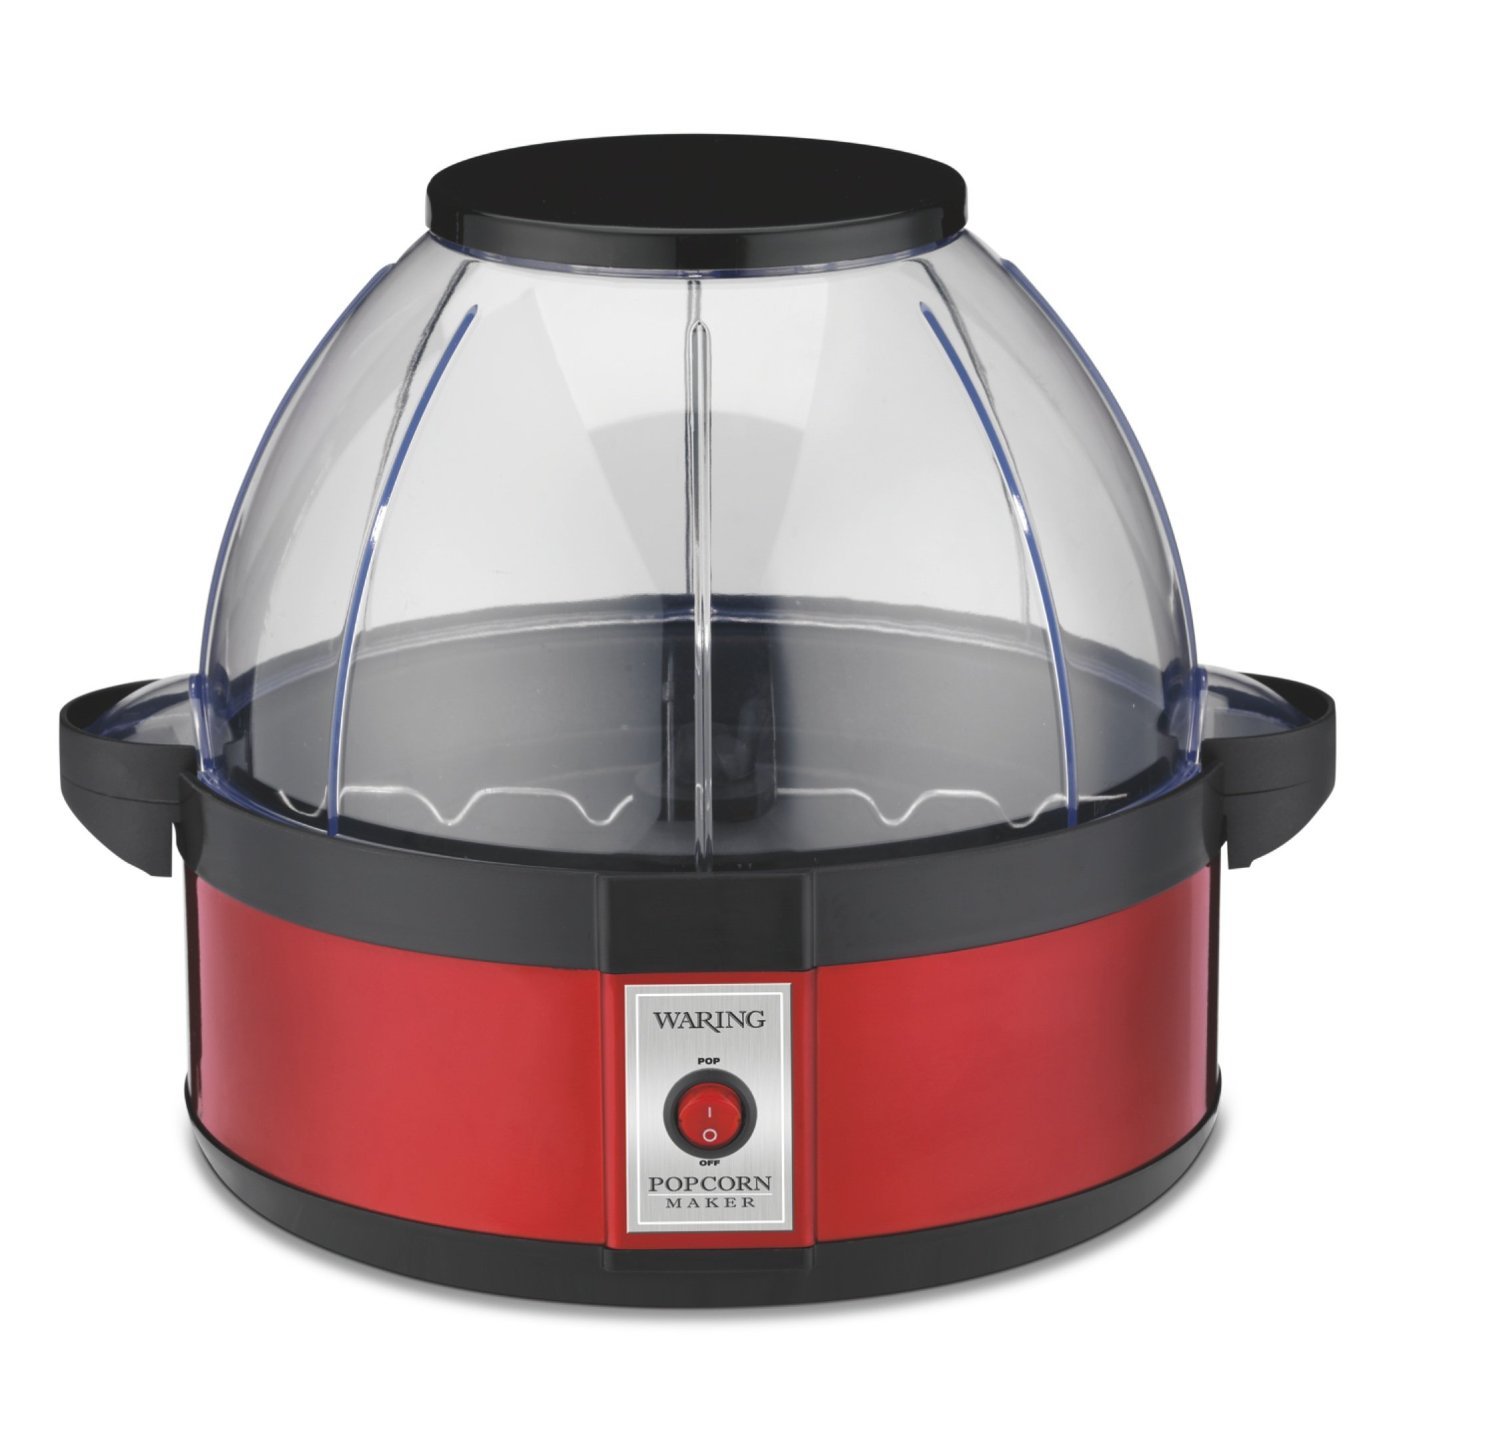
Image: The Waring Pro WPM10 Professional Popcorn Maker, showcasing its red base, clear dome lid, and stirring mechanism.
Key Components:
- Base Unit: Contains the heating element and motor for the stirring arm.
- Popping Plate: Non-stick surface where kernels are popped.
- Stirring Arm: Rotates to ensure even heating and efficient popping of kernels.
- Dome Lid/Serving Bowl: A clear plastic lid that covers the popping plate during operation and can be inverted to serve as a popcorn bowl.
- Ventilation Vents: Located on the lid to release steam and keep popcorn dry.
Setup
- Unpack: Carefully remove all packaging materials and components from the box.
- Clean: Before first use, wipe the popping plate and stirring arm with a damp cloth. Wash the dome lid/serving bowl in warm, soapy water, then rinse and dry thoroughly.
- Assemble: Place the popping plate onto the base unit, ensuring it is securely seated. Attach the stirring arm to the center post of the popping plate. Place the dome lid securely on top of the popping plate.
- Placement: Position the popcorn maker on a stable, flat, heat-resistant surface, away from flammable materials. Ensure there is adequate ventilation around the unit.
- Power Connection: Plug the power cord into a standard electrical outlet.
Operating Instructions
Follow these steps to make delicious popcorn with your Waring Pro WPM10.
- Prepare Ingredients: Measure the desired amount of popcorn kernels (up to 20 cups capacity). For best results, use fresh, high-quality popcorn kernels.
- Add Oil: Add a small amount of cooking oil (e.g., vegetable oil, coconut oil) to the popping plate. The stirring arm allows for efficient popping with less oil.
- Add Kernels: Distribute the popcorn kernels evenly over the popping plate.
- Secure Lid: Place the dome lid firmly onto the popping plate.
- Start Popping: Plug the unit into an electrical outlet and turn the power switch ON. The halogen heater will begin to heat, and the stirring arm will rotate.
- Monitor Popping: Popcorn will begin to pop within a few minutes. The stirring arm will continue to move the kernels for even popping.
- Finish Popping: Once the popping slows to approximately 2-3 seconds between pops, turn the power switch OFF and unplug the unit immediately. This prevents burning.
- Serve: Carefully remove the dome lid using the handles. Invert the lid and use it as a serving bowl. Be cautious as the unit and popcorn will be hot.
- Season: Season popcorn to taste with salt, butter, or other desired toppings.
Caution: The popping plate and base unit will be hot after use. Allow the unit to cool completely before cleaning or handling.
Cleaning and Maintenance
Regular cleaning ensures the longevity and optimal performance of your popcorn maker.
- Unplug and Cool: Always unplug the appliance from the electrical outlet and allow it to cool completely before cleaning.
- Remove Popping Plate: Detach the popping plate from the base unit.
- Clean Popping Plate and Stirring Arm: Wipe the non-stick popping plate and stirring arm with a damp cloth. For stubborn residue, use a soft sponge with warm, soapy water. Avoid abrasive cleaners or scouring pads that could damage the non-stick coating.
- Clean Dome Lid/Serving Bowl: Wash the dome lid/serving bowl in warm, soapy water. It can also be placed on the top rack of a dishwasher. Rinse thoroughly and dry.
- Clean Base Unit: Wipe the exterior of the base unit with a damp cloth. Never immerse the base unit, cord, or plug in water or any other liquid.
- Storage: Ensure all parts are clean and dry before storing. Store the popcorn maker in a cool, dry place.
Warning: Do not use metal scouring pads or abrasive cleaners on any part of the popcorn maker, as they may scratch or damage surfaces.
Troubleshooting
| Problem | Possible Cause | Solution |
|---|---|---|
| Popcorn not popping or popping poorly. | Unit not plugged in; power switch off; insufficient oil; old kernels. | Ensure unit is plugged in and power switch is ON. Use recommended amount of oil. Use fresh popcorn kernels. |
| Popcorn is burning. | Unit left on too long after popping stops. | Turn off and unplug the unit immediately once popping slows significantly (2-3 seconds between pops). |
| Stirring arm not rotating. | Stirring arm not properly attached; obstruction. | Ensure stirring arm is correctly seated on the center post. Check for any obstructions and remove them. |
| Lid does not fit securely. | Lid not aligned correctly. | Ensure the lid is properly aligned with the popping plate and seated firmly. |
| Excessive unpopped kernels. | Old kernels; insufficient oil; too many kernels. | Use fresh kernels. Ensure proper oil amount. Do not exceed maximum kernel capacity. |
| Popcorn is soggy. | Steam trapped in the lid. | The unit has large vents for steam release. Ensure these are not blocked. Remove popcorn promptly after popping. |
| Oil leakage under the black lid. | Excessive oil used; improper cleaning. | Use only recommended amounts of oil. Clean thoroughly after each use, especially around the popping plate and base connection. |
| Bowl cracking. | Physical stress or impact. | Handle the dome lid/serving bowl with care, especially where handles connect. Avoid dropping or applying excessive pressure. |
| Top raises up when 3/4 full. | Normal operation with large batches. | Gently hold down one of the tabs at the bottom of the dome if this occurs, especially during the final seconds of popping. |
Specifications
- Brand: Waring
- Model: WPM10
- Color: Red
- Capacity: Up to 20 Cups (popped popcorn)
- Material: Aluminum (popping plate), Plastic (lid/bowl)
- Dimensions: 11.75 x 11.75 x 11.5 inches (L x W x H)
- Weight: 4.9 Pounds
- Power: Electric
- Special Feature: Portable, Halogen heater with built-in stirrer system
Warranty and Support
For warranty information, product registration, or technical support, please refer to the official Waring website or contact their customer service department. Keep your purchase receipt as proof of purchase for warranty claims.
Waring Customer Service: For assistance, please visit Waring Commercial Products Support or refer to the contact information provided in your product packaging.
Product Registration: Registering your product helps Waring provide you with the most up-to-date product information and support.


