
LARIN CC-500
Larin CC-500 Rear Cargo Carrier with Cage Net
Instruction Manual
1. Introduction
The Larin CC-500 Rear Cargo Carrier with Cage Net is designed to expand your vehicle's cargo capacity, providing a secure platform for transporting various items. This carrier is compatible with vehicles equipped with either a 1-1/4 inch or 2 inch receiver hitch. Its robust construction and integrated cage net ensure your gear remains safe during transit. This manual provides essential information for assembly, operation, maintenance, and troubleshooting to ensure safe and effective use of your cargo carrier.

Figure 1.1: Fully assembled Larin CC-500 Rear Cargo Carrier with Cage Net.
2. Safety Information
WARNING: Failure to follow these safety instructions may result in serious injury or property damage.
- Always ensure the cargo carrier is securely attached to your vehicle's receiver hitch using the provided pin and clip.
- Do not exceed the maximum load capacity of 500 pounds for the carrier, or your vehicle's hitch capacity, whichever is lower.
- Distribute cargo evenly on the carrier. Place heavier items in the center and secure all items to prevent shifting during transit.
- Regularly inspect all bolts, nuts, and connections for tightness, especially before and after each use.
- Be aware of the increased length and width of your vehicle when the carrier is installed, especially when backing up or maneuvering in tight spaces.
- Ensure proper lighting and visibility of your vehicle's taillights and license plate. Additional lighting may be required by local regulations.
- Keep hands and fingers clear of pinch points during assembly and folding operations.
- Do not modify the cargo carrier in any way. Use only original replacement parts if necessary.
3. Parts List
Before beginning assembly, verify that all parts are present and undamaged. If any parts are missing or damaged, contact Larin customer support.
| Item | Description | Quantity |
|---|---|---|
| A | Platform Halves (Left & Right) | 2 |
| B | Side Cage Sections | 4 |
| C | Front/Rear Cage Sections | 2 |
| D | Receiver Tube / Shank (Item G from review) | 1 |
| E | Center Tube (Item F from review) | 1 |
| F | Hitch Pin & Clip (Item H from review) | 1 set |
| G | Assembly Hardware (Bolts, Washers, Nuts) | 1 set |
| H | Stretchable Cargo Net | 1 |
| I | Waterproof Fitted Nylon Cover | 1 |
4. Setup and Assembly
Assembly requires basic hand tools (wrenches, possibly a file for hitch fitment). It is recommended to assemble the carrier on a flat, stable surface.
- Attach Platform Halves: Connect the two Platform Halves (A) using the provided hardware. Ensure they are aligned correctly to form a single, sturdy platform.
- Install Center Tube: Secure the Center Tube (E) to the underside of the assembled platform. Note that the Center Tube (E) has a small clip on one side. This clip is typically intended for securing wiring for optional lighting accessories. For standard installation, position the tube so the clip opening faces upwards, towards the bottom of the platform, allowing for potential wire routing.
- Attach Receiver Tube: Insert the Receiver Tube / Shank (D) into the Center Tube (E) and secure it with the appropriate hardware. Ensure a snug fit. Note: Some vehicle receiver hitches may have slight manufacturing variations. If the Receiver Tube (D) does not slide easily into your vehicle's hitch, a small amount of filing on the outer edges of the shank may be required to remove any burrs or excess material.
- Assemble Cage Sections: Attach the Side Cage Sections (B) and Front/Rear Cage Sections (C) to the perimeter of the platform using the remaining assembly hardware. Ensure all cage sections are securely fastened and the folding mechanism operates smoothly.
- Final Tightening: Once all components are in place, go back and tighten all bolts and nuts securely. Do not overtighten, but ensure there is no wobble.
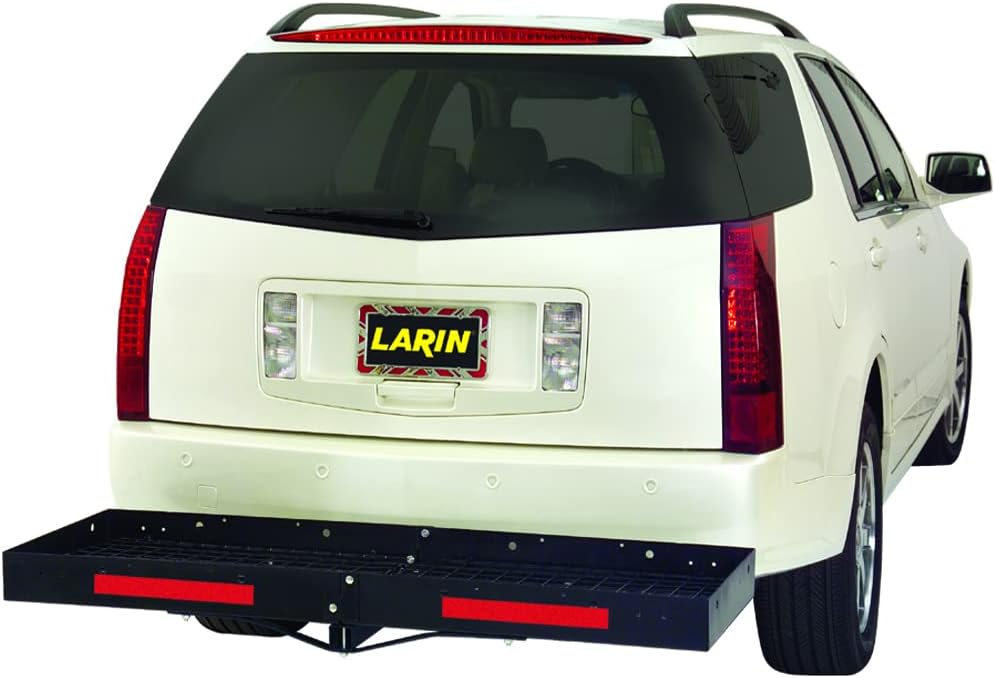
Figure 4.1: Larin CC-500 Rear Cargo Carrier in its folded, compact position when not in use.
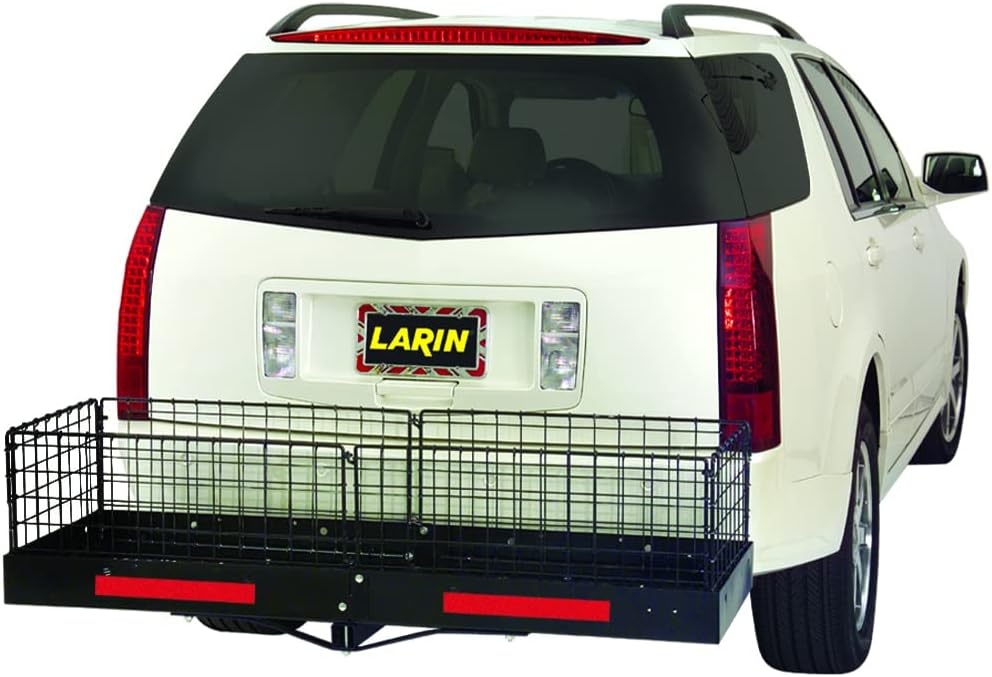
Figure 4.2: Larin CC-500 Rear Cargo Carrier with the cage net deployed, ready for cargo.
5. Operating Instructions
5.1 Attaching to Vehicle
- Slide the Receiver Tube / Shank (D) into your vehicle's receiver hitch.
- Align the pin holes and insert the Hitch Pin (F). Secure it with the clip.
- Ensure the carrier is firmly seated and does not wobble excessively.
5.2 Loading Cargo
- Before loading, ensure the cage net is fully deployed and secured in the upright position.
- Place heavier items towards the center of the carrier and as close to the vehicle as possible to maintain vehicle stability.
- Distribute weight evenly to prevent imbalance.
- Secure all cargo using the included Stretchable Cargo Net (H) and/or additional tie-downs (not included) to prevent shifting, falling, or rattling during transit.
- For weather protection, use the Waterproof Fitted Nylon Cover (I) over your cargo.
- Do not allow cargo to obstruct your vehicle's taillights, turn signals, or license plate.
5.3 Driving with the Carrier
- Drive cautiously, especially over bumps or uneven terrain.
- Allow for increased braking distance due to the added weight.
- Be mindful of the extended length of your vehicle when turning or parking.
6. Maintenance
- Regular Inspection: Before each use, inspect the carrier for any signs of damage, wear, or loose fasteners. Pay close attention to welds, bolts, and the hitch connection.
- Cleaning: Clean the carrier with mild soap and water. Rinse thoroughly and dry to prevent rust.
- Rust Prevention: The carrier features a powder-coated, rust-resistant finish. However, nicks or scratches can expose bare metal. Touch up any exposed areas with rust-inhibiting paint to prevent corrosion.
- Storage: When not in use, store the carrier in a dry place to prolong its lifespan. The carrier can be folded for more compact storage.
7. Troubleshooting
| Problem | Possible Cause | Solution |
|---|---|---|
| Carrier wobbles excessively in hitch receiver. | Loose hitch pin; improper hitch fit; worn receiver. | Ensure hitch pin is fully inserted and secured. Check for burrs on the receiver tube and file if necessary. Consider an anti-wobble device (sold separately) if the issue persists. |
| Difficulty inserting receiver tube into vehicle hitch. | Manufacturing tolerances; burrs on receiver tube. | Inspect the receiver tube for any raised edges or burrs, especially at the corners. Use a metal file to carefully remove any obstructions. Do not force the tube. |
| Cage sections do not fold smoothly. | Tight or misaligned bolts; rust/debris in hinges. | Loosen and re-tighten bolts around hinge points, ensuring proper alignment. Clean hinges and apply a light lubricant if necessary. |
| Cargo shifting during transit. | Improperly secured cargo; insufficient tie-downs. | Always use the cargo net and additional tie-downs (straps, bungee cords) to secure all items. Ensure cargo is distributed evenly. |
8. Specifications
| Feature | Detail |
|---|---|
| Model Number | CC-500 |
| Brand | LARIN |
| Load Capacity | 500 Pounds |
| Platform Dimensions (Approx.) | 59.5 inches (L) x 19.5 inches (W) |
| Hitch Compatibility | 1-1/4 inch and 2 inch receiver hitches |
| Material | Powder-coated, rust-resistant steel |
| Item Weight | 64.5 pounds |
| Color | Gray |
| UPC | 008435000879 |
9. Warranty and Support
Larin products are manufactured to high-quality standards. For specific warranty information regarding your CC-500 Rear Cargo Carrier, please refer to the warranty card included with your purchase or visit the official Larin website. For technical support, replacement parts, or any inquiries not covered in this manual, please contact Larin customer service directly.
Manufacturer: Larin Corporation
Please note: Warranty terms and support contact information may vary and are subject to change. Always refer to the most current information provided by the manufacturer.
Ask a question about this manual
Ask about setup, troubleshooting, compatibility, parts, safety, or missing instructions. Manuals+ will review the question and use this page’s manual context to help answer it.