
1. Safety Information
Before installing, read and understand all instructions. Improper installation can result in serious injury or death. Always turn off power at the circuit breaker or fuse box before beginning installation. If you are unsure about any part of these instructions, consult a qualified electrician. This device is for indoor use only.
2. Product Overview
The Lutron Maestro Motion Sensor Light Switch automatically turns lights on when you enter a room and off when you leave. This enhances convenience and helps conserve energy by ensuring lights are not left on unnecessarily. It is suitable for various indoor spaces such as bathrooms, garages, laundry rooms, and closets.
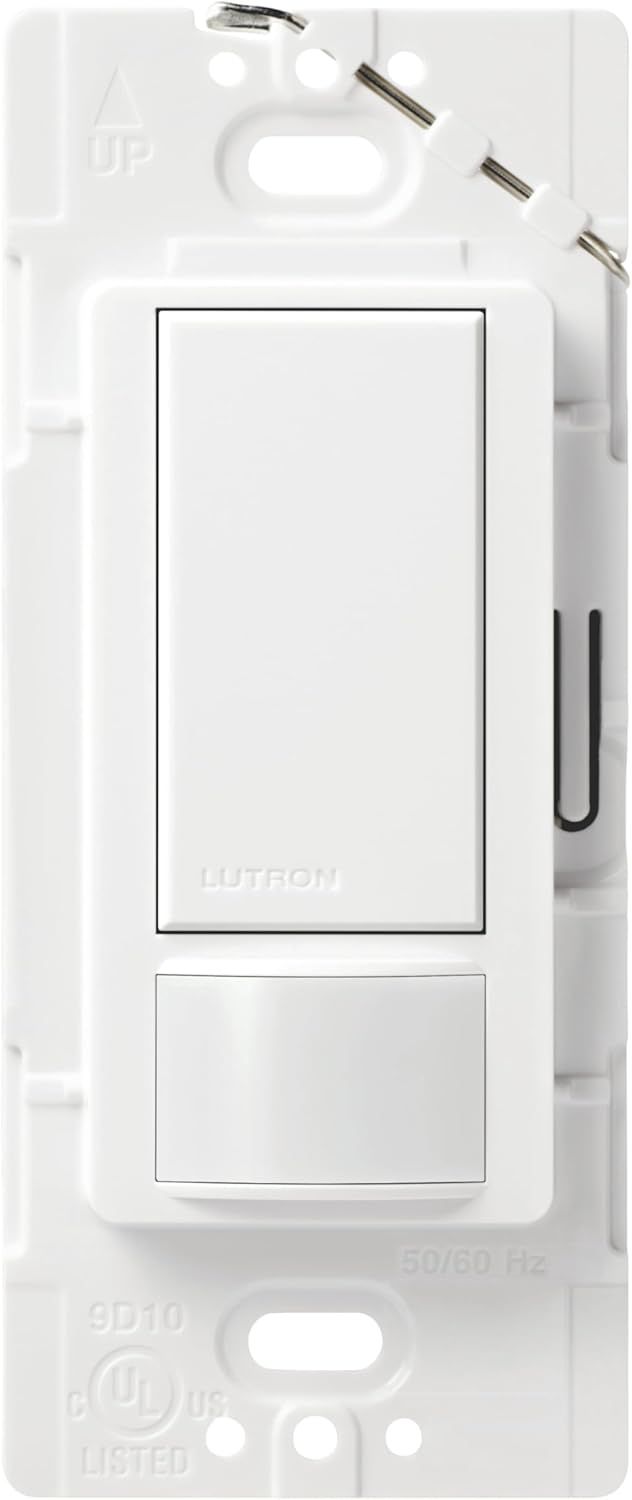
Front view of the white Lutron Maestro Motion Sensor Light Switch, showing the paddle switch and motion sensor lens.
3. Features
- Advanced XCT Sensing Technology: Detects fine motions, such as reading or working at a desk, ensuring lights remain on when the room is occupied. Reliably senses motion up to 30 feet away, covering up to 900 square feet.
- Ambient Light Detection: Utilizes patented technology to detect daylight in the room, activating lights only when necessary to save energy.
- Occupancy Mode (Auto ON, Auto OFF): Lights turn on automatically upon entry and turn off automatically after a set time when the room is vacant. Ideal for high-traffic areas like bathrooms, laundry rooms, and garages.
- Vacancy Mode (Manual ON, Auto OFF): Lights are turned on manually and turn off automatically after a set time when the room is vacant. Suitable for bedrooms or areas with pets.
- Adjustable Timeout: Program the sensor to turn lights off after 1, 5, 15, or 30 minutes of no motion detection.
- Wide Compatibility: Works with incandescent, halogen, electronic low voltage (up to 600W), magnetic low voltage (up to 200W), CFL and LED bulbs (up to 150W), and ceiling or exhaust fans (up to 3 Amps).
- No Neutral Wire Required: Simplifies installation in homes without a neutral wire.
- Single-Pole and 3-Way Applications: Supports both single-location and multi-location control of lighting.
4. Setup (Installation)
Installation typically takes about 15 minutes. Ensure power is OFF at the circuit breaker before proceeding.
4.1 Single-Pole Wiring
- Turn off power at the circuit breaker.
- Remove the existing wall plate and switch.
- Identify the wires: typically two black wires (hot and load), a bare copper or green ground wire, and possibly a white neutral wire.
- Connect the Maestro switch wires according to the diagram:
- Connect the two black wires from the wall to the two black wires on the Maestro switch.
- Connect the bare copper or green ground wire from the wall to the green wire on the Maestro switch.
- If a white neutral wire is present in the wall box, cap off the white wire on the Maestro switch as it is not needed for single-pole applications.
- Carefully push the wires back into the wall box and mount the new switch.
- Install the new wall plate.
- Restore power at the circuit breaker.
4.2 3-Way / Multi-Location Wiring
For multi-location installations (where two or more switches control the same light), refer to the detailed wiring diagrams and instructional videos provided by Lutron. This typically involves one Maestro sensor switch and one or more Maestro companion switches (MA-AS or MSC-AS).

Back view of the Lutron Maestro Motion Sensor Light Switch, showing the pre-stripped wiring for easy installation.
4.3 Installation Videos
Official video guide for installing the Lutron Maestro motion sensor switch in multi-location (3-way) setups.
Official video demonstrating the installation process for the Lutron Maestro 5 Amp and 6 Amp sensor switch.
Official product video showcasing the features and benefits of the Lutron Maestro Occupancy Sensor Switch.
5. Operating Instructions
After installation and power restoration, the sensor will take approximately 1 minute to power up. During this time, you can manually turn the lights on and off using the paddle switch.
5.1 Manual Control
- Press the top of the paddle switch to turn lights ON.
- Press the bottom of the paddle switch to turn lights OFF.
5.2 Automatic Operation
Once powered up, the sensor will automatically turn lights on when motion is detected and turn them off after a set period of no motion, based on the selected mode (Occupancy or Vacancy).

Woman entering a laundry room with a laundry basket, lights automatically turn on, demonstrating the convenience of the motion sensor.
6. Programming Options
The Maestro sensor switch offers customizable settings to optimize its performance for your specific needs.
6.1 Adjusting Timeout
The timeout setting determines how long the lights remain on after no motion is detected. Options include 1, 5, 15, or 30 minutes. Refer to the detailed instructions on Lutron's website for specific programming steps.

A bathroom scene highlighting the customizable timeout feature, allowing users to set how long lights stay on after motion ceases.
6.2 Adjusting Sensor Mode (Occupancy/Vacancy)
You can switch between Occupancy Mode (Auto ON, Auto OFF) and Vacancy Mode (Manual ON, Auto OFF) to suit the room's usage. This setting is typically adjusted using a small button or switch located behind the wall plate.

Diagram illustrating the different mode settings available for the Maestro motion sensor switch, including Occupancy and Vacancy modes.
6.3 Adjusting Motion Sensitivity
The motion sensitivity can be adjusted to prevent unwanted activations or ensure detection of subtle movements. This setting is also typically found behind the wall plate.
7. Compatibility
The Maestro Motion Sensor Light Switch is designed for broad compatibility:
- Bulb Types: Incandescent, Halogen, Electronic Low Voltage (up to 600W), Magnetic Low Voltage (up to 200W), CFL and LED bulbs (up to 150W).
- Fans: Ceiling or exhaust fans (up to 3 Amps).
8. Maintenance
To maintain the appearance and functionality of your Maestro Motion Sensor Light Switch, simply wipe it with a soft, damp cloth. Avoid using abrasive cleaners or solvents.
9. Troubleshooting
If your Maestro Motion Sensor Light Switch is not functioning as expected, consider the following:
- No Power: Check the circuit breaker to ensure power is restored to the switch.
- Lights Not Turning On/Off Automatically: Verify the sensor mode (Occupancy/Vacancy) and timeout settings are correctly configured. Ensure there are no obstructions blocking the sensor's view.
- Incorrect Wiring: Review the installation instructions and diagrams to confirm all wires are correctly connected.
For further assistance, please contact Lutron Customer Support.
10. Specifications
| Operation Mode | Automatically, Off |
| Current Rating | 5 Amps |
| Operating Voltage | 120 Volts |
| Contact Type | Single-pole, Single-throw |
| Connector Type | Screw |
| Item Dimensions (L x W x H) | 1.75 x 2 x 4.2 inches |
| Wattage | 600 watts |
| Color | White |
| Power Source | Hardwire |

Diagram illustrating the dimensions and main components of the Lutron Maestro Motion Sensor Light Switch.
11. Warranty and Support
The Lutron Maestro Motion Sensor Light Switch comes with a 10-year warranty upon product registration. A 5-year warranty is provided without registration. For any questions or assistance, Lutron offers 24/7 Customer Support.
For additional instructions on how to change the timeout, sensitivity, and sensor mode, visit Lutron.com/OPS5M.


