1. Introduction
This manual provides essential instructions for the safe and effective operation, setup, and maintenance of your YATO YT-2341 HVLP (High Volume Low Pressure) Spray Gun. Please read this manual thoroughly before using the product and retain it for future reference.
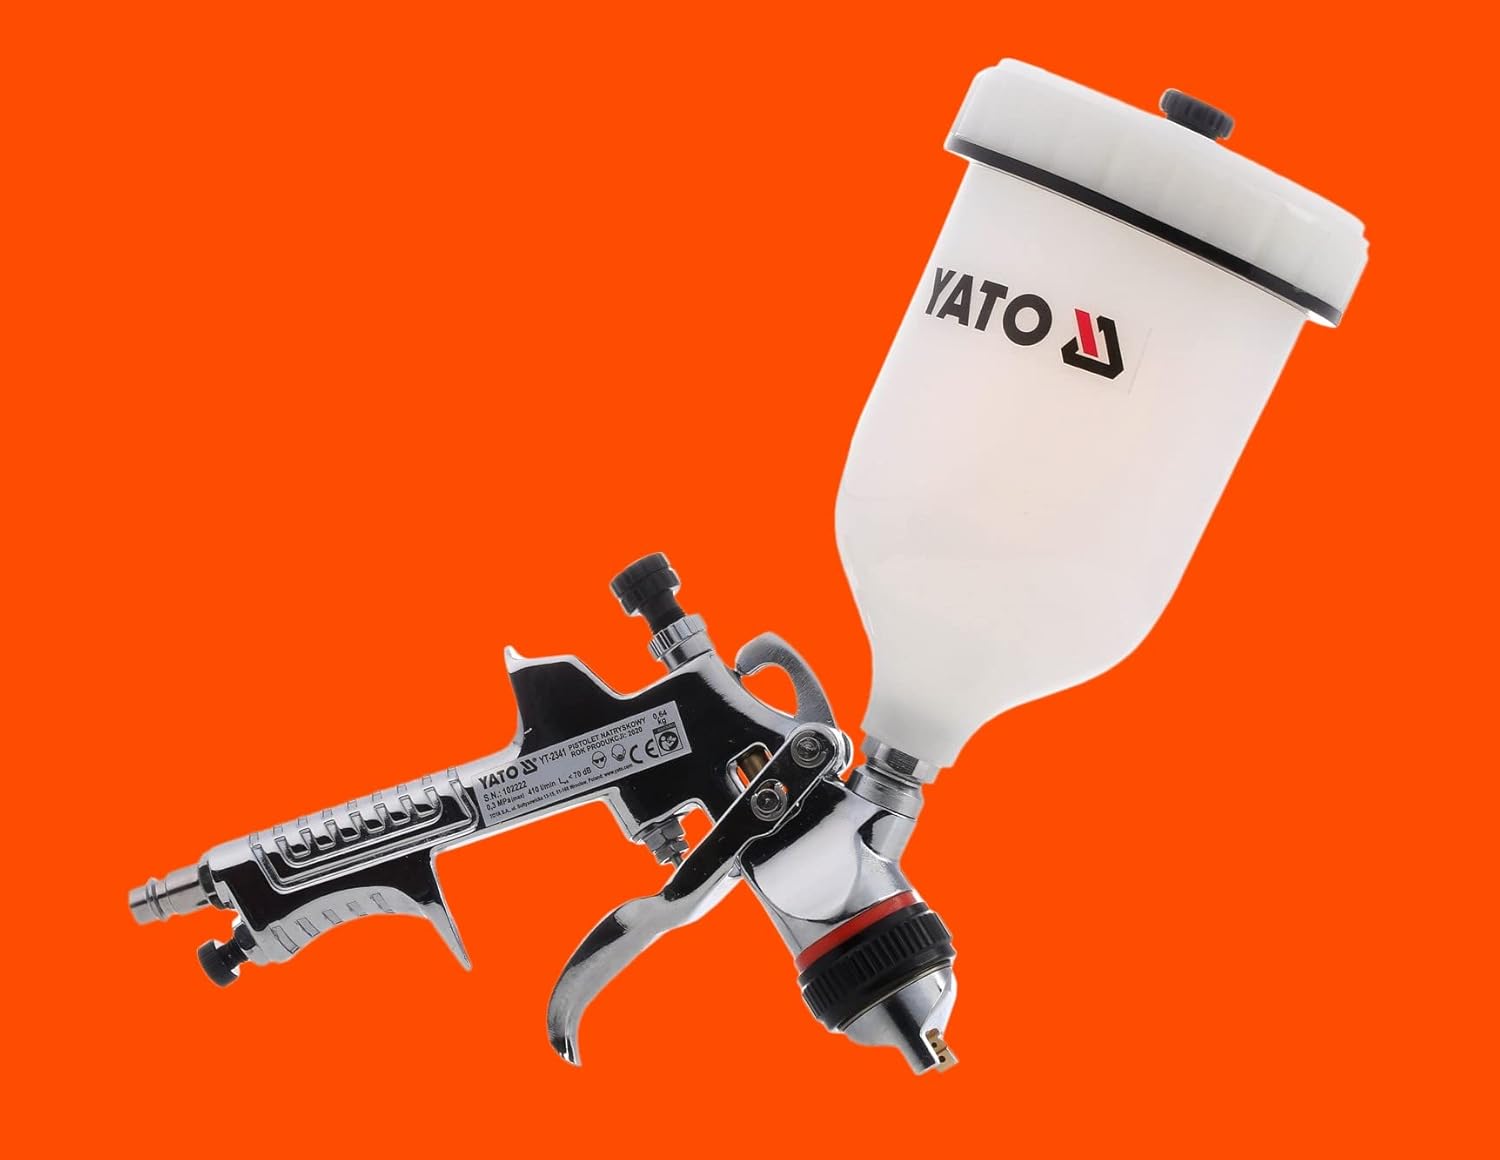
Figure 1: YATO YT-2341 HVLP Spray Gun with attached 600ml liquid cup. This image displays the complete assembly of the spray gun, including the main body, trigger, air inlet, and the top-mounted paint cup.
2. Safety Information
Always adhere to the following safety precautions to prevent injury or damage to the product.
- Ventilation: Always operate the spray gun in a well-ventilated area to prevent the accumulation of hazardous fumes.
- Personal Protective Equipment (PPE): Wear appropriate PPE, including safety glasses, gloves, and a respirator, to avoid contact with skin and eyes and inhalation of paint fumes.
- Liquid Compatibility: Do not use the spray gun with liquids for which it is not designed. Ensure the paint or coating material is compatible with the gun's components and suitable for HVLP application.
- Grounding: If the spray gun or its associated equipment has electrical components, ensure proper grounding before use to prevent electrical shock.
- Disconnection and Cooling: Always disconnect the spray gun from its air supply and allow it to cool down completely before performing any cleaning, maintenance, or adjustments.
- Heat Sources: Keep the spray gun and all associated materials away from heat sources, open flames, and sparks.
- Disposal: Dispose of all paint, solvents, and containers in accordance with local environmental regulations.
3. Product Overview and Specifications
3.1 Components
The YATO YT-2341 HVLP Spray Gun typically includes the following main components:
- Spray Gun Body with Trigger and Air Inlet
- 600 ml Easy Clean Liquid Cup (Gravity Feed)
- 1.5 mm Nozzle Set (Air Cap, Fluid Nozzle, Needle)
- Air Flow and Fluid Control Knobs
- Pattern Adjustment Knob
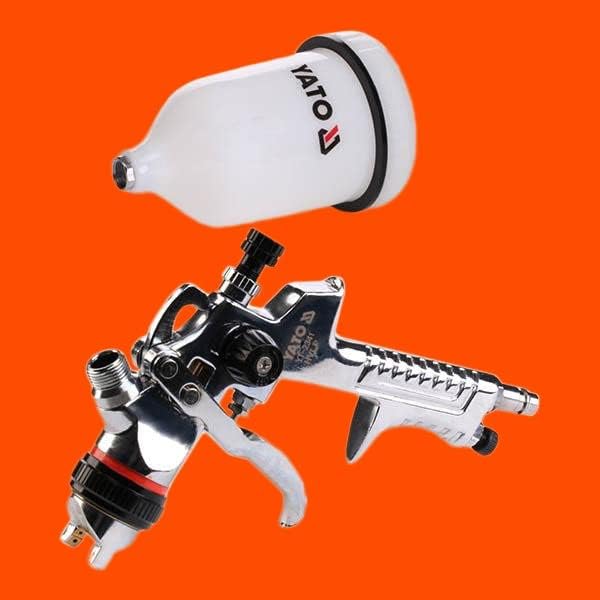
Figure 2: Main components of the YATO YT-2341 HVLP Spray Gun, showing the gun body and the detached liquid cup. This view highlights the separate parts for assembly and cleaning.
3.2 Technical Specifications
| Feature | Specification |
|---|---|
| Operating Pressure | 3 bar (0.3 MPa max) |
| Connection Thread | 1/4 inch |
| Air Consumption | 410 l/min |
| Liquid Cup Capacity | 0.6 liters (600 ml) |
| Nozzle Size | 1.5 mm |
| Weight | 0.85 kg |
| Material | Plastic, Stainless Steel |
| Dimensions (L x W x H) | 14 x 11.99 x 34.01 cm |

Figure 3: Visual representation of key technical specifications for the YATO YT-2341 spray gun.
4. Setup
Follow these steps to prepare your spray gun for use:
- Inspect Components: Ensure all parts are clean and free from damage.
- Attach Liquid Cup: Securely screw the 600 ml liquid cup onto the top of the spray gun body.
- Connect Air Supply: Attach a suitable air hose (with a 1/4 inch connection thread) from your air compressor to the air inlet on the spray gun. Ensure the connection is tight and leak-free.
- Prepare Material: Mix your paint or coating material according to the manufacturer's instructions. Strain the material to remove any particles that could clog the nozzle.
- Fill Liquid Cup: Pour the prepared material into the liquid cup. Do not overfill.
- Adjust Air Pressure: Set your air compressor to the recommended operating pressure of 3 bar (approximately 43.5 PSI).
5. Operating Instructions
Once set up, follow these guidelines for effective spraying:
- Initial Adjustments:
- Fluid Control: Turn the fluid control knob (usually at the back of the gun) clockwise to decrease fluid flow or counter-clockwise to increase it.
- Pattern Adjustment: Turn the pattern adjustment knob (often on the side) to change the spray pattern from round to fan shape.
- Air Flow: Adjust the air flow knob (usually at the bottom) to control the amount of air passing through the gun.
- Test Spray: Always perform a test spray on a scrap piece of material to fine-tune your settings and ensure the desired finish.
- Spraying Technique:
- Hold the gun perpendicular to the surface, maintaining a consistent distance (typically 6-8 inches).
- Move the gun at a steady speed, overlapping each pass by about 50%.
- Release the trigger at the end of each pass to avoid excessive build-up.
- Layering: Apply multiple thin coats rather than one thick coat for a smoother, more durable finish. Allow adequate drying time between coats.
6. Maintenance
Proper cleaning and maintenance are crucial for the longevity and performance of your spray gun.
- Immediate Cleaning: Clean the spray gun immediately after each use.
- Disconnect Air: Always disconnect the air supply before cleaning.
- Empty Cup: Empty any remaining material from the liquid cup and clean it thoroughly with an appropriate solvent or water, depending on the material used.
- Flush Gun: Pour a small amount of cleaning solvent (or water for water-based paints) into the cup and spray it through the gun until it runs clear.
- Disassemble Nozzle: Carefully remove the air cap, fluid nozzle, and needle. Clean these components with a brush and appropriate solvent. Do not use metal tools that could scratch or damage the precision parts.
- Clean Gun Body: Wipe down the exterior of the gun body.
- Lubrication: Apply a small amount of spray gun lubricant to the needle packing and air valve packing periodically.
- Storage: Store the clean and dry spray gun in a safe, dry place, away from extreme temperatures.

Figure 4: View of the YATO YT-2341 spray gun with the liquid cup detached, illustrating the components accessible for cleaning and maintenance.
7. Troubleshooting
Refer to this section for common issues and their potential solutions:
- Poor Spray Pattern / Spitting:
- Cause: Clogged nozzle, insufficient air pressure, material too thick, loose air cap.
- Solution: Clean nozzle and air cap, check air pressure, thin material if necessary, tighten air cap.
- No Material Flow:
- Cause: Clogged fluid nozzle, empty cup, fluid control knob closed, needle stuck.
- Solution: Clean fluid nozzle, refill cup, open fluid control, check needle movement.
- Excessive Overspray:
- Cause: Too much air pressure, gun too far from surface, material too thin.
- Solution: Reduce air pressure, move gun closer, thicken material.
- Leaks:
- Cause: Loose connections, damaged seals/gaskets.
- Solution: Tighten all connections, inspect and replace damaged seals/gaskets.
8. Warranty and Support
Specific warranty details for the YATO YT-2341 HVLP Spray Gun are not provided in this document. For warranty claims, technical support, or to inquire about replacement parts, please contact Yato customer service or the retailer from whom the product was purchased. Ensure you have your product model number (YT-2341) and proof of purchase available when contacting support.


