
Introduction
The AmScope M600 is a compound monocular microscope designed for biological and educational applications, offering high magnification for detailed specimen inspection. This manual provides essential information for the proper setup, operation, and maintenance of your microscope to ensure optimal performance and longevity.
What's in the Box
Carefully unpack all components and verify that the following items are included:
- AmScope M600 monocular microscope with mechanical stage
- WF10x eyepiece (23mm)
- 4x DIN achromatic objective (20mm)
- 10x DIN achromatic objective (20mm)
- 40xS DIN achromatic objective (20mm)
- 100xS (oil) DIN achromatic objective (20mm)
- Stage clips (pair)
- Spare tungsten bulb
- Spare fuse
- Dust cover
- Instruction manual (this document)
Setup
- Unpacking: Remove the microscope and all accessories from the packaging. Place the microscope on a stable, level surface.
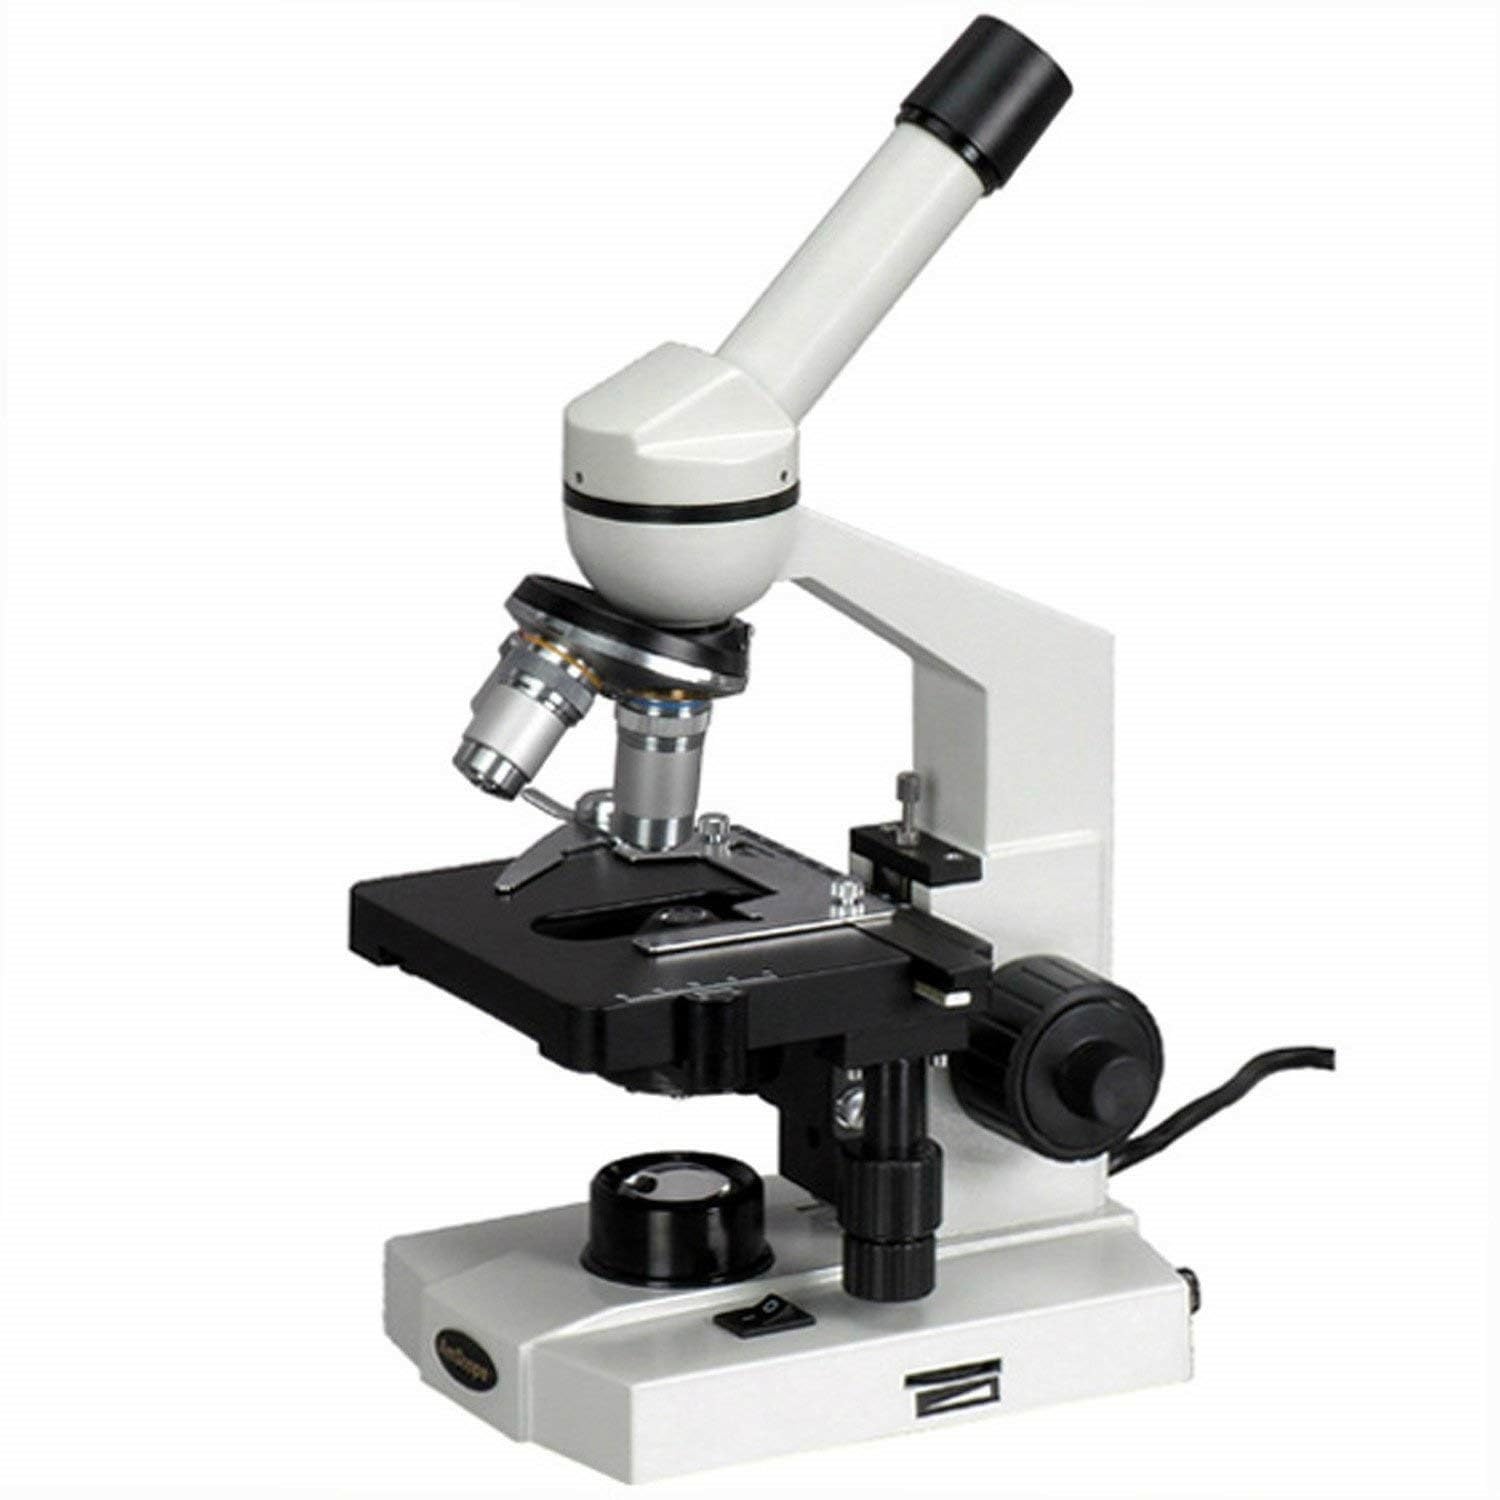
Figure 1: AmScope M600 Monocular Microscope. This image shows the complete microscope unit with the monocular head, objective lenses, mechanical stage, and base.
- Eyepiece Installation: Gently insert the WF10x eyepiece into the monocular viewing tube.
- Power Connection: Connect the power cord to the microscope's power input and then to a standard 110V electrical outlet. Ensure the power switch is in the "off" position before connecting.
Operating Instructions
- Power On: Flip the power switch located on the base of the microscope to the "on" position.

Figure 2: Microscope base showing the power switch and illumination control. The power switch is typically located on the side or back of the base.
- Adjust Illumination: Use the rheostat control knob to adjust the brightness of the tungsten illumination. Start with a lower intensity and increase as needed.
- Select Objective Lens: Rotate the revolving nosepiece to select the lowest power objective lens (e.g., 4x). Ensure it clicks firmly into place.

Figure 3: Close-up view of the objective lenses mounted on the revolving nosepiece. Rotate this to select different magnifications.
- Place Specimen: Place your prepared slide on the mechanical stage. Use the stage clips to secure it. Use the X-Y axis control knobs on the mechanical stage to position the specimen directly over the light source.

Figure 4: View of the mechanical stage with X-Y axis control knobs and coaxial coarse and fine focus knobs. These controls allow precise movement of the slide and focusing.
- Focusing:
- While looking through the eyepiece, use the coarse focus knob to bring the specimen into approximate focus.
- Then, use the fine focus knob for precise focusing and to achieve a sharp image.
- Adjust the focus tension control if the stage drifts.
- Condenser and Iris Diaphragm Adjustment:
- Adjust the 1.25 NA Abbe condenser using its spiral mechanism to control the distance from the stage.
- Open or close the iris diaphragm to optimize contrast and resolution for your specimen.
- Changing Magnification: Once focused at a lower power, rotate the nosepiece to a higher power objective. Only minor adjustments with the fine focus knob should be needed due to the parfocal design. For the 100xS objective, apply a small drop of immersion oil directly onto the slide before rotating the 100xS objective into place.
Maintenance
- Cleaning Optics: Use only specialized lens cleaning paper and lens cleaning solution to clean objective lenses and eyepieces. Never touch optical surfaces with bare fingers.
- General Cleaning: Wipe the microscope body with a soft, damp cloth. Avoid using harsh chemicals or abrasive cleaners.
- Dust Cover: Always cover the microscope with the provided dust cover when not in use to protect it from dust and debris.
- Bulb Replacement: If the illumination bulb burns out, replace it with the provided spare tungsten bulb. Refer to the diagram in the full printed manual for specific instructions on accessing the bulb housing.
- Fuse Replacement: If the microscope loses power unexpectedly, check the fuse. Replace it with the provided spare fuse if necessary. Consult the full printed manual for fuse location and replacement procedure.
- Storage: Store the microscope in a cool, dry place. The anti-mold head helps preserve optics in high-humidity areas, but proper storage is still recommended.
Troubleshooting
| Problem | Possible Cause | Solution |
|---|---|---|
| No illumination | Power cord disconnected, power switch off, bulb burned out, fuse blown. | Check power connection, turn on switch, replace bulb, replace fuse. |
| Image is blurry or out of focus | Incorrect focus adjustment, objective lens not clicked into place, dirty optics, slide upside down. | Adjust coarse and fine focus, rotate nosepiece until objective clicks, clean lenses, reorient slide. |
| Image is too dark or too bright | Illumination intensity incorrect, iris diaphragm improperly adjusted, condenser position incorrect. | Adjust rheostat, adjust iris diaphragm, adjust Abbe condenser. |
| Dust or spots visible in view | Dust on eyepiece, objective, or slide. | Clean eyepiece, objective, and slide using lens paper. Rotate eyepiece to determine if dust is on it. |
Specifications
| Model Name | M600 |
| Head | Monocular, 45-degree fixed inclination, 360-degree rotatable |
| Eyepiece | WF10x (23mm) |
| Objective Lenses | 4x, 10x, 40xS, 100xS (oil) DIN Achromatic |
| Maximum Magnification | 1000x |
| Focus System | Coaxial coarse and fine focus with tension control |
| Stage | Double-layer mechanical stage (5" x 4-1/2"), 1mm divisions, 2-3/4" x 3/4" traveling range |
| Condenser | 1.25 NA Abbe condenser with iris diaphragm |
| Illumination | Tungsten (incandescent) with rheostat control, Brightfield (BF) |
| Power Source | Corded Electric, 110V |
| Material | Metal frame with stain-resistant enamel finish |
| Item Weight | 6.6 pounds |
| Manufacturer | United Scope LLC. |
| UPC | 013964562118 |
Warranty and Support
The AmScope M600 microscope is backed by a 5-Year Manufacturer Warranty, ensuring quality and reliability. For technical assistance, warranty claims, or general inquiries, please contact AmScope customer support. Detailed contact information can typically be found on the official AmScope website or within the original product packaging.
AmScope is committed to providing high-quality microscopy equipment and support to its users.


