1. Introduction
This manual provides comprehensive instructions for the setup, operation, and maintenance of your AmScope SE420 Professional Binocular Stereo Microscope. Please read this manual thoroughly before using the instrument to ensure proper function and longevity.
1.1 What's in the Box?
Upon unpacking, verify that all components listed below are present and undamaged:
- AmScope SE420 stereo microscope with boom-arm stand
- WF10x18mm eyepieces, 30.5mm, one pair
- 2x objective
- (2) Eye guards
- Tungsten light
- Dust cover
- Power cord
- Instructions (this manual)
2. Safety Information
To ensure safe operation and prevent damage to the microscope or injury to yourself, please observe the following precautions:
- Always handle the microscope with care. Avoid sudden movements or impacts.
- Do not disassemble the microscope or its optical components. Refer servicing to qualified personnel.
- Ensure the microscope is placed on a stable, level surface to prevent tipping.
- Keep the microscope away from direct sunlight, high temperatures, dust, and corrosive chemicals.
- Use only the provided power cord and ensure the voltage matches your local power supply (110V-120V).
- Unplug the power cord before cleaning or when the microscope is not in use for extended periods.
- Avoid touching optical surfaces with bare hands. Use a lens cleaning cloth.
- The tungsten light can become hot during operation. Avoid direct contact with the light housing.
3. Product Overview
The AmScope SE420 is a professional binocular stereo microscope designed for inspecting large-scale specimens. It features a boom-arm stand for versatile positioning and a 2x objective with 10x widefield eyepieces, providing 20x magnification.

Figure 3.1: Overall view of the AmScope SE420 Stereo Microscope, showing the binocular head, eyepieces, objective, tungsten light, and boom-arm stand.
3.1 Key Components
- Binocular Viewing Head: Houses the eyepieces and objective, providing a stereoscopic view.
- WF10x Eyepieces: Widefield 10x magnification eyepieces.
- 2x Objective: Provides 2x magnification for the primary optical system.
- Boom-Arm Stand: Allows for flexible positioning of the microscope head over large work areas.
- Focus Knobs: Bilateral coarse focus for adjusting image clarity.
- Tungsten Light: Side-mounted 10W tungsten light for illumination.
- Pillar: Vertical support for the boom arm.
- Base: Stable foundation for the microscope.
4. Setup
Follow these steps to assemble and prepare your microscope for use:
- Unpack Components: Carefully remove all parts from the packaging and place them on a clean, stable work surface.
- Assemble Boom-Arm Stand:
- Insert the vertical pillar into the base and secure it with the locking screw.
- Attach the boom arm to the pillar, ensuring it is securely fastened.
- Mount Microscope Head:
- Carefully attach the binocular viewing head to the boom arm. Tighten any securing screws to prevent movement.
- Install Eyepieces:
- Remove the protective caps from the eyepiece tubes.
- Gently insert the WF10x eyepieces into the tubes.
- Place the eye guards onto the eyepieces.
- Install Objective:
- The 2x objective is typically pre-installed. If not, carefully screw it into the objective housing.
- Connect Tungsten Light:
- Ensure the tungsten light is securely mounted to the microscope head.
- Connect the light's power cable to the appropriate port on the microscope base or power supply.
- Power Connection:
- Connect the power cord to the microscope base and then to a grounded electrical outlet (110V-120V).
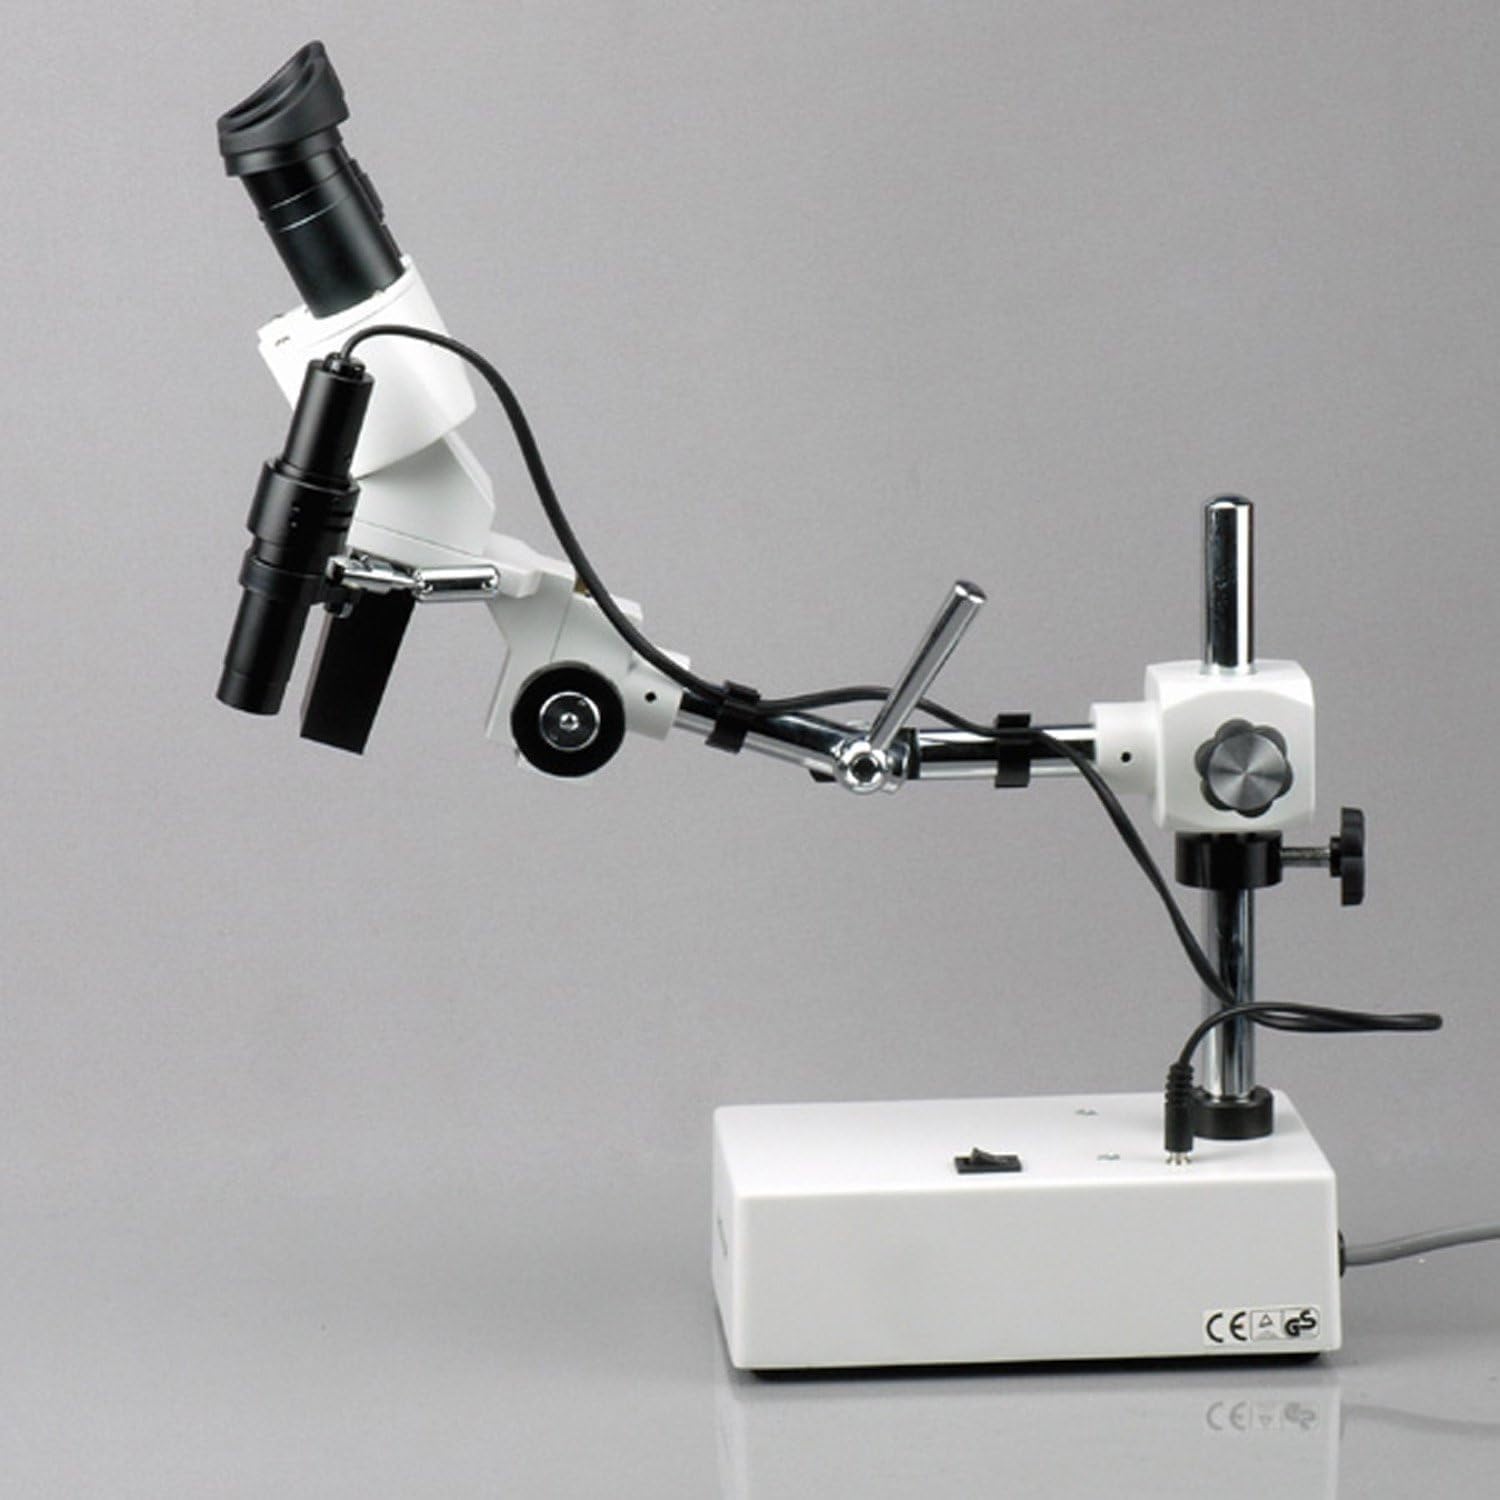
Figure 4.1: Side view of the AmScope SE420, illustrating the boom arm's extension capability for flexible positioning.
5. Operating Instructions
5.1 Powering On/Off
Locate the power switch on the microscope base. Flip the switch to the 'ON' position to power on the tungsten light. Flip it to 'OFF' when finished.
5.2 Adjusting Eyepieces
- Interpupillary Distance: While looking through the eyepieces, adjust the distance between the two eyepiece tubes until you see a single, clear circular field of view.
- Dioptric Adjustment: If one of your eyes has a different strength, use the diopter adjustment ring on one of the eyepieces to fine-tune the focus for that eye after focusing with the other eye.
5.3 Focusing
Place your specimen on the work surface beneath the objective. Use the bilateral coarse focus knobs located on the microscope head to raise or lower the head until the specimen comes into sharp focus. The microscope offers a 6-inch vertical working distance.
5.4 Boom Arm and Head Rotation
The boom arm provides a 12-inch working distance and allows for extensive movement. Loosen the locking knobs on the boom arm to extend, retract, or rotate the arm. The microscope head can also be rotated on its X- and Y-axes for optimal viewing angles. Ensure all knobs are tightened after adjustment to secure the position.

Figure 5.1: Angled view of the AmScope SE420, demonstrating the side-mounted tungsten light and its illumination area.
5.5 Illumination
The 10W tungsten light provides incident (reflected) illumination. It is side-mounted and moves with the microscope head, ensuring consistent lighting on your specimen regardless of the head's position.
6. Maintenance
Proper maintenance will extend the life and performance of your microscope.
- Cleaning Lenses: Use a soft, lint-free lens cleaning cloth and a specialized lens cleaning solution. Never use abrasive materials or harsh chemicals. Gently wipe the lens surfaces.
- Cleaning Body: Wipe the microscope body with a soft, damp cloth. Avoid getting moisture into electrical components.
- Dust Cover: Always use the provided dust cover when the microscope is not in use to protect it from dust and debris.
- Storage: Store the microscope in a cool, dry place, away from direct sunlight and vibrations.
- Bulb Replacement: If the tungsten bulb burns out, ensure the microscope is unplugged and the bulb has cooled before attempting replacement. Refer to the manufacturer's guidelines for specific bulb types and replacement procedures.
7. Troubleshooting
This section addresses common issues you might encounter. For problems not listed here, please contact AmScope customer support.
| Problem | Possible Cause | Solution |
|---|---|---|
| No illumination | Power cord not connected; Power switch off; Bulb burnt out | Check power cord connection; Turn power switch on; Replace bulb |
| Image is blurry or out of focus | Improper focusing; Eyepieces not adjusted correctly; Specimen too far/close | Adjust focus knobs; Adjust interpupillary distance and diopter; Reposition specimen within working distance |
| Dust or spots in the field of view | Dust on eyepieces or objective lens | Clean eyepieces and objective lens with a lens cleaning kit |
| Microscope head is loose | Locking knobs not tightened | Tighten the locking knobs on the boom arm and head mount |
8. Specifications
| Feature | Detail |
|---|---|
| Head | Binocular |
| Magnification | 20x |
| Objective Power | 2x |
| Eyepieces (DIN, 30.5mm) | WF10x18mm |
| Focus | Bilateral coarse |
| Microscope Stand | Boom-arm stand |
| Vertical Working Distance | 6" (13.5" overall pillar length) |
| Boom Arm Working Distance | 12" (17" overall length) |
| Head Rotation | X- and Y-axes |
| Illumination Type | Upper, reflected |
| Light Source | 10W tungsten, side-mounted |
| Power | 110V-120V, UL listed |
| Product Dimensions | 9.63 x 15.2 x 12.95 inches |
| Item Weight | 0.01 ounces |
| Material | Metal |
9. Warranty and Support
AmScope products are manufactured by United Scope LLC. For warranty information, technical support, or service inquiries, please contact AmScope directly. Contact details can typically be found on the official AmScope website or through your point of purchase.
United Scope LLC, founded in 1996, is headquartered in Irvine, CA.


