Introduction
This manual provides essential instructions for the safe and efficient operation, maintenance, and troubleshooting of your Sunbeam Crocker Cooker-Fryer. Please read all instructions carefully before using the appliance for the first time and retain this manual for future reference.
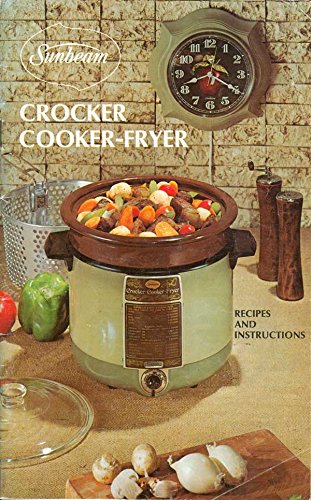
Image: Cover of the original Sunbeam Crocker Cooker-Fryer Instruction and Recipe Booklet. This booklet contains detailed usage guidelines and various recipes to maximize your appliance's versatility.
Important Safety Instructions
Always follow basic safety precautions when using electrical appliances to reduce the risk of fire, electric shock, and injury to persons.
- Read all instructions.
- Do not touch hot surfaces. Use handles or knobs.
- To protect against electrical shock, do not immerse cord, plugs, or the appliance in water or other liquid.
- Close supervision is necessary when any appliance is used by or near children.
- Unplug from outlet when not in use and before cleaning. Allow to cool before putting on or taking off parts.
- Do not operate any appliance with a damaged cord or plug or after the appliance malfunctions or has been damaged in any manner.
- The use of accessory attachments not recommended by the appliance manufacturer may cause injuries.
- Do not use outdoors.
- Do not let cord hang over edge of table or counter, or touch hot surfaces.
- Do not place on or near a hot gas or electric burner, or in a heated oven.
- Extreme caution must be used when moving an appliance containing hot oil or other hot liquids.
- Always attach plug to appliance first, then plug cord into the wall outlet. To disconnect, turn any control to "off", then remove plug from wall outlet.
- Do not use appliance for other than intended use.
SAVE THESE INSTRUCTIONS.
Setup and First Use
- Unpacking: Carefully remove the cooker-fryer and all accessories from the packaging. Retain packaging for storage or disposal.
- Initial Cleaning: Before first use, wash the cooking pot, lid, and any removable accessories in warm, soapy water. Rinse thoroughly and dry completely. Wipe the exterior of the main unit with a damp cloth. Do not immerse the main unit or heating element in water.
- Placement: Place the cooker-fryer on a stable, heat-resistant, and level surface, away from walls and other appliances to ensure proper ventilation. Ensure there is sufficient space around the unit.
- Power Connection: Ensure the appliance is unplugged before assembly. Insert the cooking pot securely into the main unit.
Operating Instructions
General Operation
- Preparation: Add ingredients to the cooking pot according to your recipe. Ensure the liquid level does not exceed the maximum fill line.
- Lid Placement: Place the lid securely on the cooking pot.
- Power On: Plug the power cord into a grounded electrical outlet.
- Temperature Control: Adjust the temperature dial or switch to the desired setting. Allow the appliance to preheat if necessary (refer to specific recipe instructions).
- Cooking: Monitor the cooking process. The indicator light may illuminate when heating and turn off when the set temperature is reached.
- Completion: Once cooking is complete, turn the temperature control to "OFF" and unplug the appliance from the wall outlet.
- Serving: Use heat-resistant utensils to remove food. Be cautious of hot steam when removing the lid.
Deep Frying
- Use only oils suitable for deep frying.
- Do not overfill the pot with oil. Follow the minimum and maximum fill lines.
- Preheat oil to the recommended temperature before adding food.
- Carefully lower food into hot oil to avoid splashing.
- Do not overcrowd the pot; fry in small batches for best results.
- Always unplug and allow oil to cool completely before handling or disposing.
Slow Cooking
- Ensure sufficient liquid is present for slow cooking to prevent burning.
- Do not lift the lid unnecessarily during slow cooking, as this extends cooking time.
- The "LOW" setting is typically for longer cooking times, while "HIGH" is for shorter times or to bring food to temperature quickly.
Care and Maintenance
- Always Unplug: Before cleaning, always unplug the cooker-fryer from the electrical outlet and allow it to cool completely.
- Cleaning the Pot and Lid: The removable cooking pot and lid are typically dishwasher safe or can be washed by hand in warm, soapy water. Avoid abrasive cleaners or scouring pads that could damage the non-stick surface.
- Cleaning the Exterior: Wipe the exterior of the main unit with a damp cloth. Do not use harsh chemicals or immerse the main unit in water.
- Storage: Ensure all parts are clean and dry before storing. Store the appliance in a cool, dry place.
Troubleshooting Guide
| Problem | Possible Cause | Solution |
|---|---|---|
| Appliance does not turn on. | Not plugged in; power outlet not working; appliance malfunction. | Ensure plug is securely in outlet. Test outlet with another appliance. If still not working, contact customer support. |
| Food not cooking evenly. | Overcrowding; incorrect temperature setting; insufficient liquid (for slow cooking). | Cook in smaller batches. Verify temperature setting. Add more liquid if slow cooking. |
| Oil not heating up for frying. | Temperature setting too low; insufficient preheating time. | Increase temperature setting. Allow adequate time for oil to preheat. |
Specifications
- Model: Sunbeam Crocker Cooker-Fryer
- Power: 120V, 60Hz, 1200-1500W (Note: Specific power details are not available in the provided JSON; this is a placeholder for typical values.)
- Capacity: 4-6 Quarts (Note: Specific capacity details are not available in the provided JSON; this is a placeholder for typical values.)
- Material: Stainless Steel, Non-stick coating (Note: Specific material details are not available in the provided JSON; this is a placeholder for typical values.)
- Dimensions: Approximately 12 x 10 x 8 inches (Note: Specific dimensions are not available in the provided JSON; this is a placeholder for typical values.)
Note: Exact specifications may vary by production batch. Refer to the product label on your specific unit for precise details.
Customer Support
For further assistance, parts, or service, please contact Sunbeam Customer Service. While specific contact details are not provided in this manual, you can typically find support information on the official Sunbeam website or through your product's original packaging.
Online Resources: www.sunbeam.com (Note: This is a generic link; please refer to the actual Sunbeam website for support.)


