1. Introduction
This manual provides comprehensive instructions for the safe and efficient operation, setup, and maintenance of your JUKI LZ-2280 Industrial Zig-Zag Sewing Machine. The JUKI LZ-2280 is a single-needle, zig-zag industrial sewing machine designed for sewing light to medium weight fabrics. It is specifically engineered for zig-zag stitching and is not intended for straight stitch sewing. Please read this manual thoroughly before operating the machine to ensure proper usage and longevity.
2. Safety Instructions
Always observe the following safety precautions to prevent accidents and ensure safe operation:
- Ensure the machine is properly grounded to prevent electrical shock.
- Disconnect power before performing any maintenance, cleaning, or when changing needles.
- Keep hands and fingers away from the needle and moving parts during operation.
- Wear appropriate safety glasses to protect your eyes from flying debris.
- Do not operate the machine if any parts are damaged or missing.
- Keep the work area well-lit and free from clutter.
- This machine is equipped with an industrial clutch motor, which produces noise during operation. Use hearing protection if necessary.
- Only use the machine for its intended purpose: zig-zag stitching on light to medium weight fabrics.
3. Product Overview
The JUKI LZ-2280 is a robust industrial zig-zag sewing machine known for its reliability and precision.
Key Features:
- Max. Sewing Speed: 5500 stitches/minute
- Max. Zig-Zag Width: 5mm
- Needle Type: DP X 5
- Power: 110V with industrial clutch motor
- Suitable for light to medium weight fabrics
Machine Components:
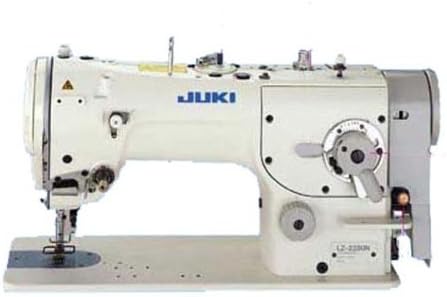
The machine head includes the needle bar, presser foot, thread tension assembly, stitch length adjustment, and zig-zag width control. The complete unit, as supplied, includes the machine head, a sturdy table, a stand, an industrial clutch motor, and a sewing light.
4. Setup
Your JUKI LZ-2280 machine is typically delivered as a complete unit, pre-assembled with the machine head, table, stand, motor, and sewing light. However, minor adjustments or final connections may be required.
- Placement: Position the machine on a stable, level surface in a well-lit area. Ensure adequate space around the machine for safe operation and material handling.
- Power Connection: Connect the machine's power cord to a grounded 110V electrical outlet. Ensure the power switch is in the "OFF" position before plugging in.
- Needle Installation:
- Ensure the power is disconnected.
- Loosen the needle clamp screw.
- Insert a new DP X 5 needle with the flat side facing the correct direction (usually away from the operator or as indicated in the machine's specific diagram).
- Push the needle up as far as it will go, then tighten the needle clamp screw securely.
- Thread Spool Setup: Place your thread spool on the designated spool pin.
- Bobbin Winding: Wind a bobbin according to the machine's bobbin winding mechanism instructions. Ensure the bobbin is wound evenly and not too tightly.
5. Operating Instructions
Follow these steps for basic operation of your JUKI LZ-2280 machine.
- Power On: Flip the power switch to the "ON" position. The sewing light should illuminate.
- Threading the Machine:
- Follow the numbered threading path indicated on the machine, guiding the thread through all tension discs, thread guides, and the take-up lever.
- Thread the needle from front to back (or as specified by the machine's design).
- Inserting the Bobbin: Insert the wound bobbin into the bobbin case and then into the shuttle race, ensuring the thread feeds correctly.
- Bringing Up the Bobbin Thread: Hold the upper thread, turn the handwheel towards you to lower and raise the needle, catching the bobbin thread. Pull both threads under the presser foot and towards the back.
- Adjusting Stitch Length: Use the stitch length regulator dial (typically located on the front of the machine) to set the desired stitch length.
- Adjusting Zig-Zag Width: Use the zig-zag width adjustment lever or dial to set the desired zig-zag width, up to a maximum of 5mm.
- Fabric Placement: Place your fabric under the presser foot, aligning the edge as needed. Lower the presser foot.
- Sewing: Gently press the foot pedal to start sewing. Control the speed with the pedal. The machine can achieve speeds up to 5500 stitches per minute.
- Important Note: This machine is designed exclusively for zig-zag stitching. Attempting to perform straight stitching may result in damage to the machine or poor stitch quality.
- Power Off: When finished, raise the needle to its highest position, lift the presser foot, remove the fabric, and cut the threads. Turn the power switch to "OFF".
6. Maintenance
Regular maintenance ensures the longevity and optimal performance of your JUKI LZ-2280. Always disconnect power before performing maintenance.
- Cleaning:
- Regularly clean lint and dust from the bobbin area, feed dogs, and tension discs using a small brush or vacuum cleaner.
- Wipe down the exterior of the machine with a soft, dry cloth. Avoid using harsh chemicals.
- Lubrication:
- Refer to the machine's specific oiling points, usually marked with red dots or indicated in a detailed diagram.
- Use only high-quality sewing machine oil. Apply a few drops to designated lubrication points regularly, especially if the machine is used frequently.
- Needle Replacement: Replace the needle frequently, especially when sewing different types of fabric or if you notice skipped stitches or fabric damage. Always use DP X 5 needles.
- Belt Inspection: Periodically check the motor belt for wear and tension. Adjust or replace if necessary.
7. Troubleshooting
This section addresses common issues you might encounter. For more complex problems, contact qualified service personnel.
| Problem | Possible Cause | Solution |
|---|---|---|
| Skipped Stitches | Incorrect needle installation, bent needle, wrong needle type, improper threading, incorrect tension. | Reinstall or replace needle (DP X 5), re-thread machine, adjust tension. |
| Thread Breakage | Incorrect threading, too much tension, burrs on thread path, damaged needle, poor quality thread. | Re-thread, reduce tension, check for burrs, replace needle, use quality thread. |
| Uneven Stitches | Incorrect tension, worn feed dogs, improper presser foot pressure. | Adjust upper and bobbin tension, clean feed dogs, adjust presser foot pressure. |
| Machine Not Starting | No power, motor issue, safety switch engaged. | Check power connection, ensure power switch is ON, consult service if motor issue. |
| Excessive Noise | Lack of lubrication, loose parts, normal industrial clutch motor noise. | Lubricate machine, check for loose screws, note that industrial clutch motors are inherently noisy. |
8. Specifications
| Feature | Detail |
|---|---|
| Model | JUKI LZ-2280 |
| Machine Type | Single-Needle Industrial Zig-Zag Sewing Machine |
| Max. Sewing Speed | 5500 stitches/minute |
| Max. Zig-Zag Width | 5mm |
| Needle System | DP X 5 |
| Power Supply | 110V with Industrial Clutch Motor |
| Unit Dimensions (LxWxH) | 48 inches x 20 inches x 48 inches (approximate) |
| Item Weight | 250 pounds |
| Fabric Compatibility | Light to Medium Weight Fabrics |
| UPC | 189684000374 |
9. Warranty and Support
For specific warranty information, please refer to the documentation provided at the time of purchase or contact your authorized JUKI dealer.
If you require technical assistance, parts, or service, please contact the seller, SewingMachineOutlet, or an authorized JUKI service center.
Return Policy: This item is returnable until January 31, 2026. Please refer to the seller's return policy for detailed terms and conditions.


