1. Introduction
The Rollei PDF-S 330 Pro is a versatile, standalone film scanner designed for digitizing slides, negative film strips, and photo prints without the need for a computer. It features a 9-megapixel CMOS sensor, offering an interpolated resolution of up to 3600 dpi for detailed scans. Integrated Magic Touch technology assists in reducing dust and scratches on your originals, enhancing the quality of your digital images. This manual provides essential information for the safe and effective operation of your scanner.
2. Safety Instructions
- Read all instructions thoroughly before operating the device.
- Keep the scanner away from water, moisture, and high humidity environments.
- Do not attempt to disassemble or modify the scanner. Refer all servicing to qualified personnel.
- Use only the power adapter supplied with the device. Using an incorrect adapter may cause damage or fire.
- Ensure the scanner is placed on a stable, level surface to prevent accidental falls.
- Keep the device out of reach of children and pets.
- Unplug the scanner from the power outlet during lightning storms or when unused for extended periods.
3. Package Contents
Please check that all items listed below are included in your package:
- Rollei PDF-S 330 Pro Scanner Unit
- Slide Holder (for mounted 35mm slides)
- Negative Film Holder (for 35mm film strips)
- USB Cable
- Power Adapter
- User Manual (this document)

Image: Included film and slide holders for the Rollei PDF-S 330 Pro scanner.
4. Product Overview
4.1 Front and Side Views

Image: Front view of the Rollei PDF-S 330 Pro scanner.
The front panel features a color display for previewing images, navigation buttons (OK), and a dedicated Scan button. A memory card slot is located below the display for saving scanned images. The top of the unit includes a lid that opens to reveal the flatbed scanning area, while a side slot accommodates the film and slide holders.

Image: Side view of the scanner demonstrating the insertion of a slide holder.
4.2 Flatbed Scanning Area
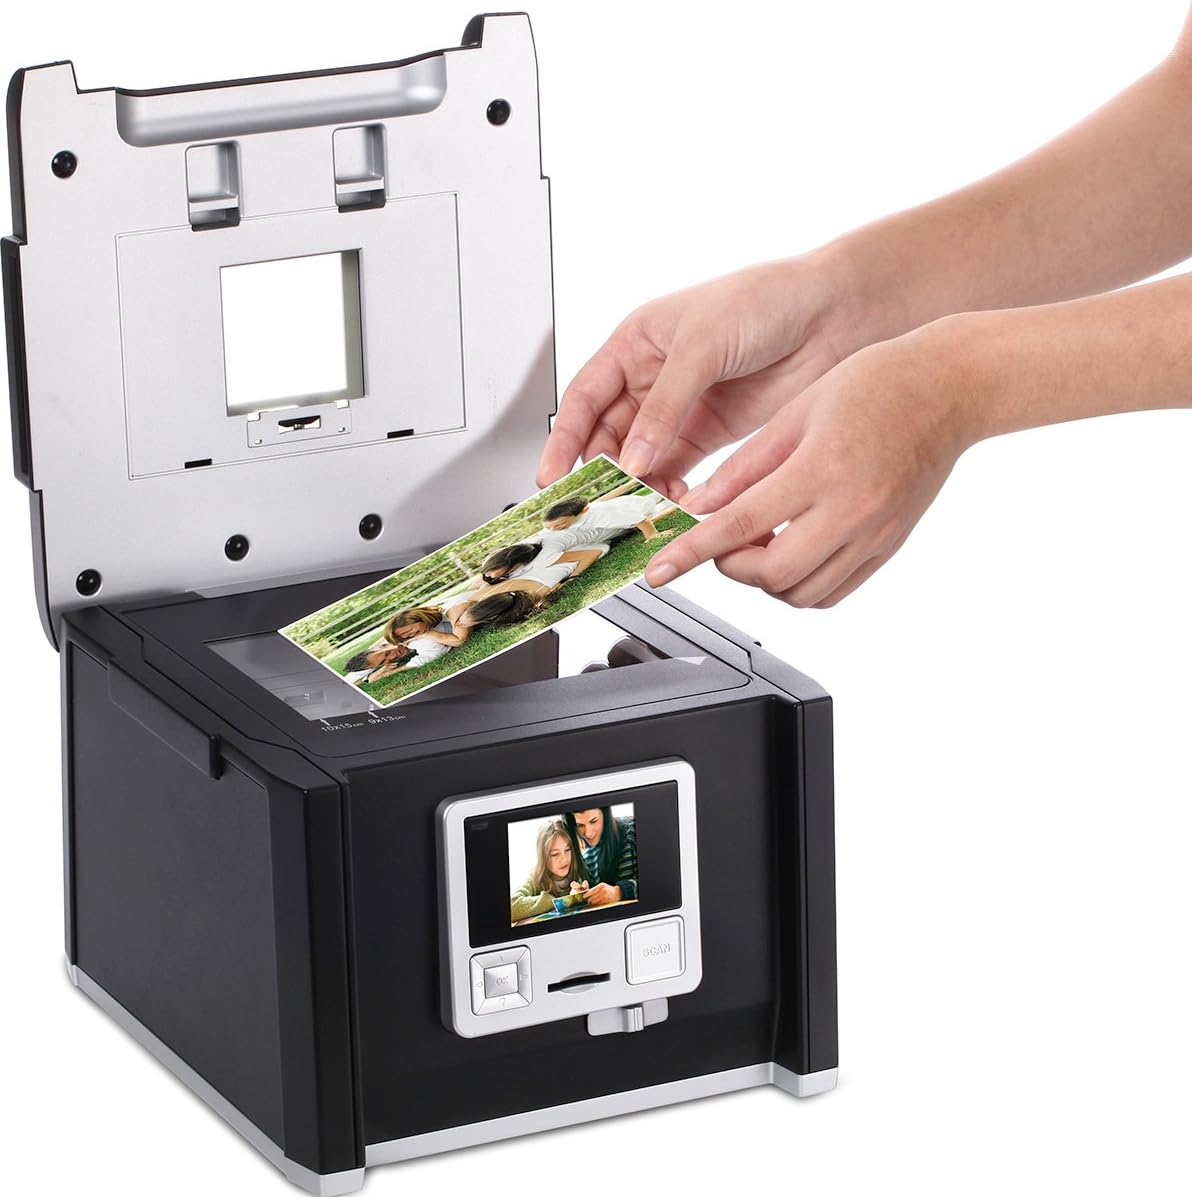
Image: Scanner with the top lid open, showing the flatbed for scanning photo prints.
The top lid opens to expose a flatbed scanning surface, suitable for scanning photo prints up to 10x15 cm. This area is also used for backlighting when scanning film and slides via the side slot.
5. Setup
5.1 Unpacking
Carefully remove the scanner and all accessories from the packaging. Retain the packaging for future storage or transport.
5.2 Power Connection
- Connect the power adapter to the DC IN port on the scanner.
- Plug the power adapter into a suitable electrical outlet.
- The scanner will power on automatically or can be turned on using the power button (if available).
5.3 Initial Power On and Memory Card Insertion
- Upon first power-on, the device may prompt for language selection or date/time settings. Follow the on-screen instructions.
- Insert a compatible SD/SDHC memory card into the card slot on the front of the scanner. Ensure it is inserted correctly until it clicks into place. This card will store your scanned images.
6. Operating Instructions
6.1 Scanning Slides (Mounted)
- Open the slide holder and carefully place your mounted 35mm slides into the designated slots. Close the holder securely.
- Insert the loaded slide holder into the side slot of the scanner.
- On the scanner's display, navigate to the 'Slide' scanning mode.
- Use the display to preview the slide. Adjust settings such as exposure or color balance if necessary.
- Press the 'Scan' button to capture the image. The scanned image will be saved to your memory card.
6.2 Scanning Negatives (Film Strips)
- Open the negative film holder and carefully insert your 35mm film strip into the guide rails. Ensure the film is flat and correctly oriented. Close the holder securely.
- Insert the loaded negative film holder into the side slot of the scanner.
- On the scanner's display, navigate to the 'Negative' scanning mode.
- Use the display to preview the negative. Adjust settings such as exposure or color balance if necessary.
- Press the 'Scan' button to capture the image. The scanner will automatically convert the negative to a positive image and save it to your memory card.
6.3 Scanning Photo Prints

Image: Placing a photo print on the scanner's flatbed.
- Lift the top lid of the scanner to access the flatbed scanning surface.
- Place your photo print (up to 10x15 cm) face down on the glass surface, aligning it with the guides.
- Close the lid gently.
- On the scanner's display, navigate to the 'Photo' scanning mode.
- Use the display to preview the photo. Adjust settings such as exposure or color balance if necessary.
- Press the 'Scan' button to capture the image. The scanned image will be saved to your memory card.
6.4 Using Magic Touch (Dust and Scratch Removal)
The Rollei PDF-S 330 Pro features Magic Touch technology, which attempts to automatically detect and remove dust and scratches from your film and slide scans. This feature can be enabled or disabled in the scanner's settings menu. Note that enabling Magic Touch may increase the scanning time significantly (e.g., from a few seconds to up to 45 seconds per scan), as it requires additional processing.
6.5 Connecting to a Computer (USB)
You can connect the scanner to a computer using the supplied USB cable to transfer scanned images from the memory card. Once connected, the scanner typically appears as a removable storage device, allowing you to access and copy files directly.
7. Maintenance
7.1 Cleaning the Scanner
- Always power off the scanner and unplug it before cleaning.
- Use a soft, dry, lint-free cloth to wipe the exterior of the scanner.
- For the glass scanning surface (flatbed) and the internal light source, use a specialized lens cleaning cloth and a small amount of lens cleaning solution. Avoid spraying liquid directly onto the scanner.
- Regularly clean the film and slide holders to prevent dust and debris from being transferred to your originals.
7.2 Storage
When not in use, store the scanner in a clean, dry, and dust-free environment. Keep it away from direct sunlight and extreme temperatures. If storing for an extended period, remove the memory card and unplug the power adapter.
8. Troubleshooting
- Scanner not powering on: Ensure the power adapter is securely connected to both the scanner and a working electrical outlet.
- Scans are blurry or poor quality: Check that the film/slide/photo is correctly inserted and flat. Clean the scanning surface and film holders for dust or smudges. Ensure appropriate resolution settings are selected.
- Cannot save images: Verify that a compatible memory card is inserted correctly and has sufficient free space. The card may need to be formatted (refer to scanner settings).
- Cannot connect to computer: Ensure the USB cable is securely connected to both the scanner and the computer. Try a different USB port or cable.
- Magic Touch feature is slow: This is normal behavior as the feature requires additional processing time for dust and scratch removal.
9. Technical Specifications
| Feature | Specification |
|---|---|
| Brand | Rollei |
| Model Name | PDF-S 330 PRO |
| Item Model Number | 20670 |
| Scanner Type | Film, Photo Print |
| Optical Sensor Technology | CMOS |
| Resolution | 3600 dpi (interpolated) |
| Connectivity Technology | USB |
| Maximum Media Format | 36 x 24 mm (film/slide), 10 x 15 cm (photo print) |
| Product Dimensions | 25.2 x 23.4 x 18.3 cm |
| Item Weight | 2200 Grams |
| Manufacturer | Rollei |
10. Warranty and Support
The Rollei PDF-S 330 Pro scanner comes with a 24-month warranty and replacement service, ensuring peace of mind regarding product quality and performance.

Image: Rollei 24-Month Warranty and Replacement Service Seal.
For technical assistance, troubleshooting beyond this manual, or warranty claims, please contact Rollei customer support. Refer to the official Rollei website or your purchase documentation for contact details.


