1. Introduction
This manual provides detailed instructions for the installation, operation, and maintenance of your Corsair Carbide Series 500R Mid-Tower Case. Please read this manual thoroughly before beginning assembly to ensure proper setup and to maximize the performance and longevity of your system.
2. Product Overview
The Corsair Carbide Series 500R is a mid-tower computer case designed for high-performance PC builds, offering extensive cooling options, flexible storage configurations, and user-friendly features for assembly and maintenance.
2.1 Key Features
- Supports graphics cards up to 452 mm in length (with hard drive cage removed).
- Integrated multi-channel fan controller.
- Includes a 200 mm side panel fan, two front-mounted 120 mm fans, and one rear 120 mm fan.
- Side panel with mesh fan mount locations for additional cooling.
- Four 5.25-inch drive bays.
- Six 3.5-inch hard drive bays with 2.5-inch compatibility for SSDs.
- Eight expansion slots.
- Supports most 240 mm dual radiators (15 mm spacing).
- Front I/O panel: 2 USB 3.0 connectors, 1 Firewire connector, 3.5-inch headphone and microphone jacks, power and reset switches, and fan LED on/off switch.
- Tool-free drive installation and thumb screws for side panels.
- Integrated, removable dust filters for easy maintenance.
- Cable management system for routing cables behind the motherboard.
2.2 Included Components
The product package contains the following items:
- 1x Corsair Carbide Series 500R Mid-Tower Case
- 1x Quick Start Guide
- 1x Installation Kit (screws, standoffs, cable ties)
2.3 Product Views
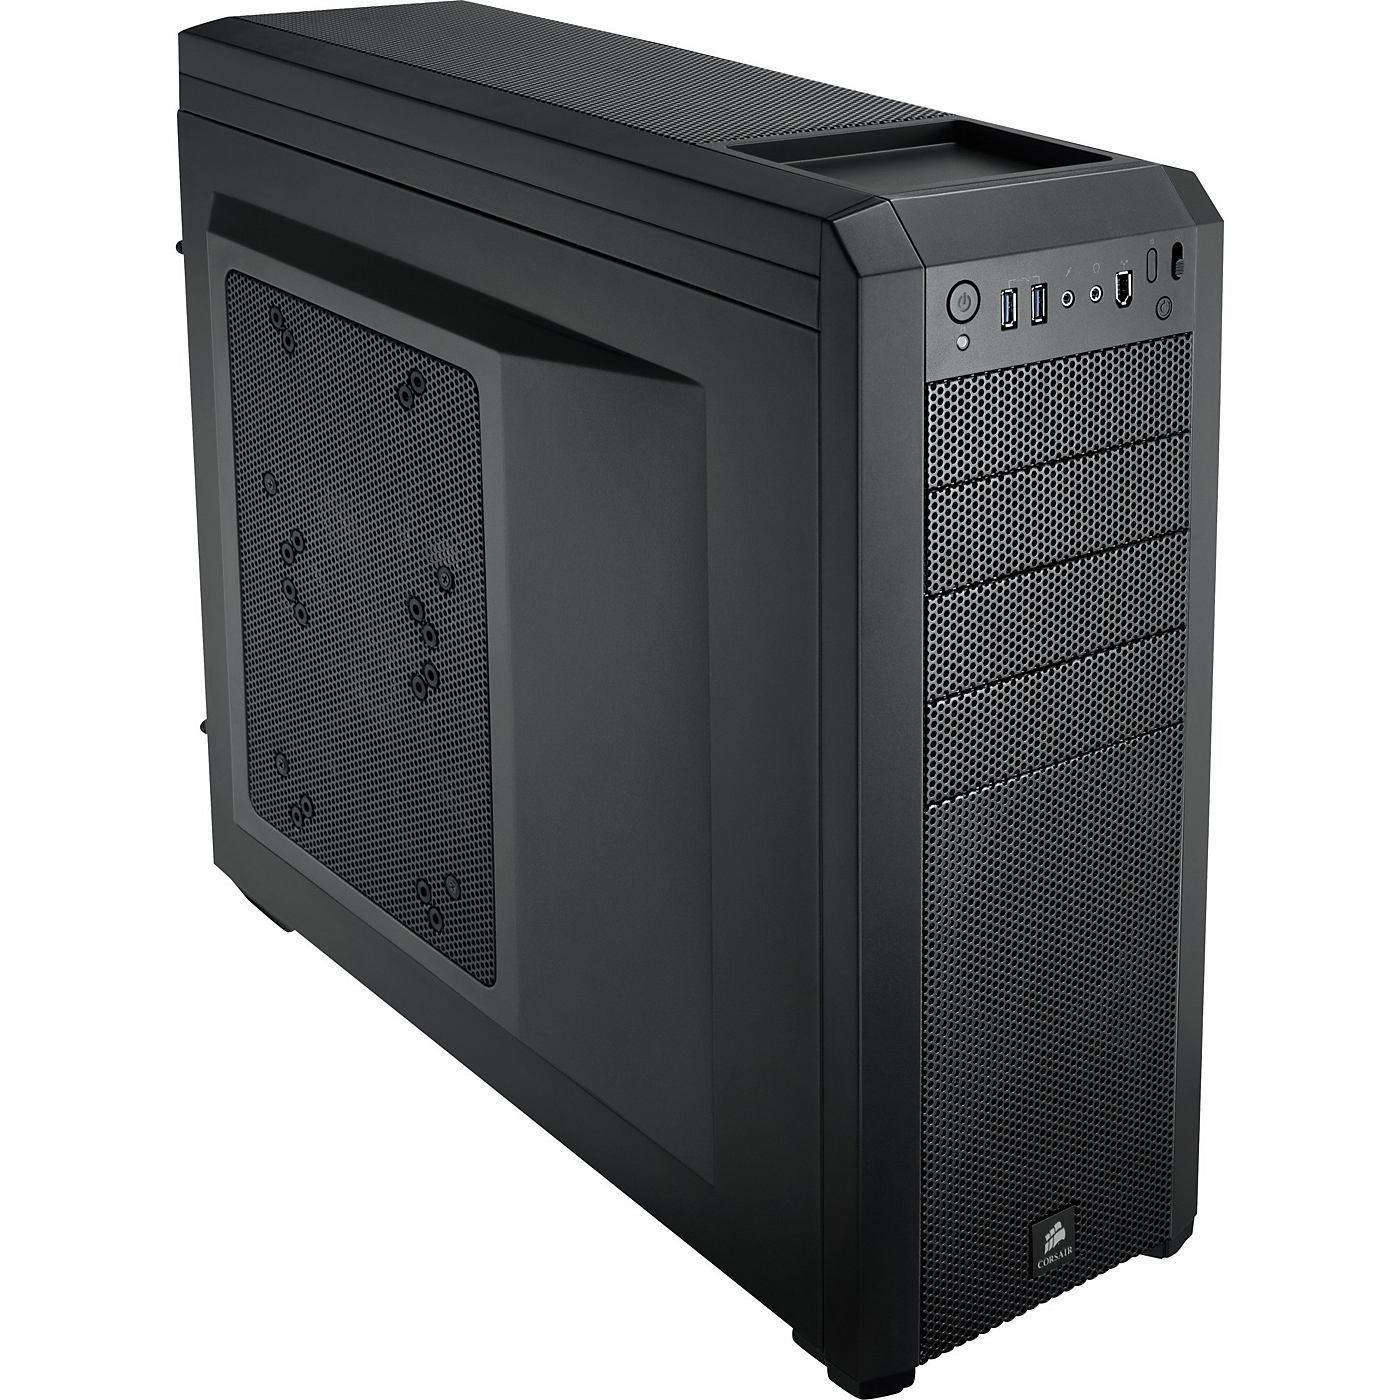
Figure 1: Angled front view of the Corsair Carbide Series 500R Mid-Tower Case.
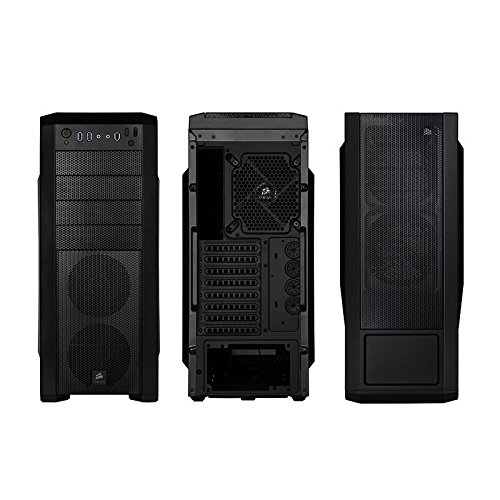
Figure 2: Front, rear, and side panel views of the case, highlighting various ports and fan mounts.
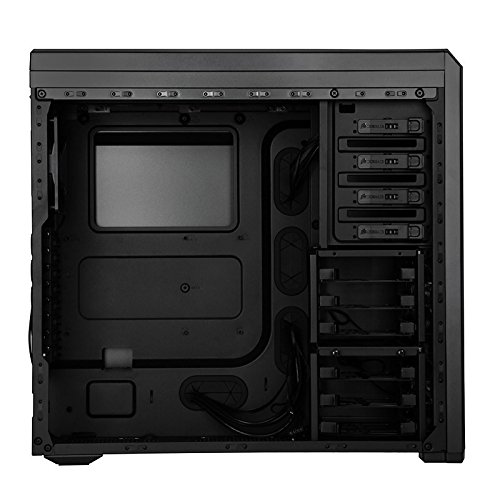
Figure 3: Internal layout of the case, showing drive bays, motherboard tray, and cable routing options.
3. Setup Instructions
Follow these steps to set up your Corsair Carbide Series 500R case and install your computer components.
3.1 Preparing the Case
- Unpack the case and remove all packaging materials.
- Place the case on a stable, flat surface.
- Remove the side panels by unscrewing the thumb screws at the rear of the case and sliding the panels backward.
3.2 Motherboard Installation
- Install the I/O shield provided with your motherboard into the rear I/O cutout of the case.
- Align your motherboard with the pre-installed standoffs. Install additional standoffs from the installation kit if required by your motherboard's form factor.
- Carefully place the motherboard onto the standoffs and secure it with the provided screws.
3.3 Drive Installation
The Carbide Series 500R features tool-free installation for 5.25-inch and 3.5-inch drives.
3.3.1 5.25-inch Optical Drives
- Remove the desired front panel bay cover.
- Slide the 5.25-inch device into the bay from the front until the tool-free locking mechanism engages.
3.3.2 3.5-inch Hard Drives / 2.5-inch SSDs
- Pull out a drive tray from one of the 3.5-inch bays.
- For 3.5-inch drives: Flex the tray and insert the drive, aligning the pins with the screw holes.
- For 2.5-inch SSDs: Secure the SSD to the bottom of the tray using the provided screws.
- Slide the loaded tray back into the drive bay until it clicks into place.
- The hard drive cages are removable and relocatable to accommodate longer graphics cards. To remove, locate the release tabs or screws and carefully detach the cage.
3.4 Graphics Card and Expansion Card Installation
- Remove the necessary expansion slot covers at the rear of the case.
- Insert your graphics card or other expansion cards into the appropriate PCIe/PCI slots on your motherboard.
- Secure the cards with the provided screws or tool-free retention clips.
3.5 Power Supply Installation
- Place your power supply unit (PSU) into the designated compartment at the bottom rear of the case.
- Secure the PSU to the case using the screws from your PSU's accessory kit.
3.6 Cable Management
Utilize the cable routing holes and tie-down points behind the motherboard tray to organize and conceal cables. This improves airflow and maintains a clean internal appearance.
4. Operating Instructions
This section details the operation of the case's integrated features.
4.1 Front I/O Panel
The front I/O panel provides convenient access to essential ports and controls:
- Power Button: Press to turn on or off your computer.
- Reset Button: Press to restart your computer.
- USB 3.0 Ports: Connect compatible USB 3.0 devices for high-speed data transfer.
- Firewire Port: Connect Firewire-compatible devices.
- Headphone Jack: Connect headphones for audio output.
- Microphone Jack: Connect a microphone for audio input.
4.2 Fan Controller
The integrated multi-channel fan controller allows you to adjust the speed of the connected case fans. Refer to the Quick Start Guide for specific fan connections. Typically, the controller offers multiple speed settings (e.g., Low, Medium, High) to balance cooling performance and noise levels.
4.3 Fan LED Control
A dedicated button on the front panel allows you to toggle the white LEDs on the front panel fans on or off, providing aesthetic control.
5. Maintenance
Regular maintenance helps ensure optimal performance and longevity of your computer components.
5.1 Dust Filter Cleaning
The Corsair Carbide Series 500R includes integrated dust filters on the front and bottom of the case. These filters prevent dust buildup inside your system.
- Periodically check the dust filters for accumulation.
- Carefully remove the filters (the bottom filter slides out, front filters may require removing the front panel).
- Clean the filters using compressed air, a soft brush, or by rinsing with water (ensure they are completely dry before reinstallation).
- Reinstall the cleaned dust filters.
5.2 General Cleaning
Use a soft, damp cloth to clean the exterior surfaces of the case. Avoid abrasive cleaners or solvents that could damage the finish.
6. Troubleshooting
This section addresses common issues you might encounter during setup or operation.
6.1 System Not Powering On
- Ensure the power supply is properly connected to the wall outlet and the power switch on the PSU is in the 'ON' position.
- Verify that the motherboard's 24-pin and 8-pin (or 4-pin) power connectors are securely seated.
- Check that the front panel power switch cable is correctly connected to the motherboard's front panel header. Refer to your motherboard manual for correct pin assignments.
6.2 Poor Airflow or Overheating
- Ensure all case fans are spinning correctly. If not, check their power connections to the motherboard or fan controller.
- Clean any accumulated dust from the dust filters and fan blades.
- Verify that cables are neatly routed behind the motherboard tray to avoid obstructing airflow.
- Confirm that the fan controller is set to an appropriate speed for your system's cooling needs.
6.3 Front Panel USB/Audio Not Working
- Check that the USB 3.0 header cable and HD Audio cable from the front panel are securely connected to the corresponding headers on your motherboard.
- Ensure your motherboard drivers are up to date.
7. Specifications
Detailed specifications for the Corsair Carbide Series 500R Mid-Tower Case:

Figure 4: Product dimensions of the Corsair Carbide Series 500R Mid-Tower Case.
| Feature | Specification |
|---|---|
| Brand | Corsair |
| Model Number | CC-9011012-WW |
| Series | Carbide Series 500R |
| Colour | Black |
| Case Type | Mid Tower |
| Motherboard Compatibility | Mini ITX (and larger ATX/Micro-ATX compatible) |
| Product Dimensions (LxWxH) | 52.07 x 20.57 x 50.8 cm (20.5 x 8.1 x 20 inches) |
| Item Weight | 7.26 kg (16 lbs) |
| 5.25-inch Drive Bays | 4 |
| 3.5-inch / 2.5-inch Drive Bays | 6 (with 2.5-inch compatibility) |
| Expansion Slots | 8 |
| Front I/O Ports | 2x USB 3.0, 1x Firewire, 1x Headphone, 1x Microphone |
| Included Fans | 2x 120mm Front, 1x 120mm Rear, 1x 200mm Side |
| Radiator Support | Up to 240mm dual radiators (top) |
8. Warranty and Support
Corsair provides a 2-year warranty for the Carbide Series 500R Mid-Tower Case, covering defects in materials and workmanship under normal use. For warranty claims or technical assistance, please visit the official Corsair support website or contact their customer service.
For additional resources and support, please visit the Corsair Store on Amazon.