Product Overview
The Venmar Constructo Main Wall Control (Model 40350) is designed to provide precise control over your residential ventilation system. This wall-mounted unit features adjustable humidity control and two speed settings, allowing users to optimize indoor air quality and comfort. Its intuitive interface ensures ease of use for daily operation.
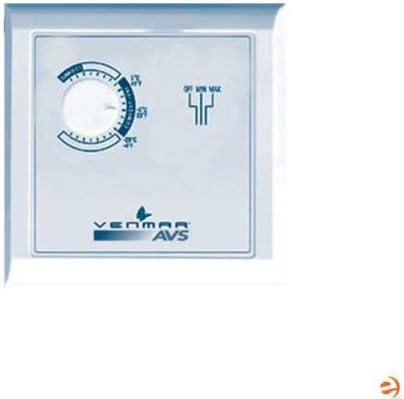
Image: Front view of the Venmar Constructo Main Wall Control. The control features a circular dial for humidity adjustment and a switch for fan speed settings (OFF, MIN, MAX). The Venmar AVS logo is visible at the bottom.
Setup and Installation
Important: Installation should be performed by a qualified electrician or HVAC technician in accordance with all local and national electrical codes.
1. Safety Precautions
- Ensure power to the ventilation unit is disconnected at the circuit breaker before beginning installation.
- Verify voltage compatibility with the control unit.
- Do not install in locations exposed to direct water spray or extreme temperatures.
2. Mounting the Control
- Select a suitable indoor wall location, away from direct drafts or heat sources, at standard switch height.
- Run appropriate wiring from the ventilation unit to the chosen wall control location. Refer to your ventilation unit's manual for specific wiring diagrams.
- Mount the control unit to a standard electrical box using the provided screws.
3. Wiring Connections
Connect the wires from the ventilation unit to the terminals on the back of the wall control. Specific terminal labels and wire colors will vary by ventilation unit model. Always consult the wiring diagram provided with your ventilation system and the wall control for accurate connections.
- Typically, connections include power, common, and control signals for different fan speeds or modes.
- Ensure all connections are secure and insulated.
4. Final Steps
- Attach the faceplate to the control unit.
- Restore power to the ventilation unit at the circuit breaker.
- Test the control unit's functionality.
Operating Instructions
The Venmar Constructo Main Wall Control offers straightforward operation for managing your indoor environment.
Humidity Control Dial
The large circular dial on the left side of the control unit is used to set the desired humidity level. This control allows for adjustable humidity settings, typically ranging from 15% to 65% relative humidity (RH).
- To Increase Humidity Threshold: Rotate the dial clockwise. The ventilation unit will activate when the indoor humidity exceeds the set point.
- To Decrease Humidity Threshold: Rotate the dial counter-clockwise. The ventilation unit will activate only at higher humidity levels.
- Recommended Setting: For most residential applications, a setting between 35% and 50% RH is ideal for comfort and to prevent mold growth. Adjust based on seasonal conditions and personal preference.
Fan Speed Switch
The vertical switch on the right side of the control unit manages the fan speed of your ventilation system. It typically has three positions:
- OFF: The ventilation unit is turned off.
- MIN: The ventilation unit operates at a low, continuous speed. This setting is suitable for maintaining general air quality with minimal noise.
- MAX: The ventilation unit operates at its highest speed. Use this setting for rapid air exchange, such as during cooking, showering, or when indoor air quality needs quick improvement.
Note: The humidity control dial will only activate the ventilation unit if the fan speed switch is set to MIN or MAX, and the humidity threshold is exceeded.
Maintenance
The Venmar Constructo Main Wall Control requires minimal maintenance to ensure its longevity and accurate operation.
Cleaning
- Periodically wipe the surface of the control unit with a soft, damp cloth.
- Do not use abrasive cleaners, solvents, or harsh chemicals, as these can damage the finish or internal components.
- Ensure the control is dry before resuming normal operation.
Inspection
- Occasionally inspect the control for any visible damage or loose connections.
- If any issues are observed, disconnect power to the unit and contact a qualified technician for repair.
No user-serviceable parts are inside the control unit. Do not attempt to open or repair the unit yourself.
Troubleshooting
If you experience issues with your Venmar Constructo Main Wall Control, refer to the following common problems and solutions:
| Problem | Possible Cause | Solution |
|---|---|---|
| Control unit is unresponsive. | No power to the unit; loose wiring connection; faulty control unit. | Check circuit breaker for the ventilation system. Ensure all wiring connections are secure. If power is present and connections are good, the unit may be faulty and require replacement. |
| Ventilation unit does not turn on when humidity is high. | Humidity dial set too high; fan speed switch set to OFF; ventilation unit malfunction. | Lower the humidity threshold on the dial. Ensure the fan speed switch is set to MIN or MAX. Check the ventilation unit's own power and operation. |
| Fan speed settings (MIN/MAX) do not work. | Faulty fan speed switch; wiring issue; ventilation unit malfunction. | Verify wiring connections. If the ventilation unit works with other controls or direct power, the wall control may be faulty. |
If the problem persists after attempting these solutions, contact Venmar customer support or a qualified technician.
Specifications
| Feature | Detail |
|---|---|
| Brand | Venmar |
| Model Number | 40350 |
| Color | White |
| Special Feature | Adjustable Humidity Control |
| Number of Speeds | 2 (MIN, MAX) |
| Recommended Use | Residential |
| Operation Mode | Sleep (Note: This might refer to a low-noise operation mode or a general category for controls.) |
| UPC | 726670212177 |
| ASIN | B005COIMKY |
| Date First Available | January 10, 2014 |
Warranty Information
Venmar products are manufactured to high-quality standards. For specific warranty terms and conditions applicable to your Constructo Main Wall Control (Model 40350), please refer to the warranty card included with your product packaging or visit the official Venmar website. Typically, warranties cover defects in materials and workmanship under normal use.
To make a warranty claim:
- Retain your proof of purchase (receipt or invoice).
- Contact Venmar customer support with your product model number and purchase date.
- Do not attempt to repair the unit yourself, as this may void the warranty.
Customer Support
For further assistance, technical support, or to inquire about replacement parts for your Venmar Constructo Main Wall Control, please contact Venmar customer service.
- Website: Visit the official Venmar website for FAQs, product documentation, and contact forms.
- Phone: Refer to the contact information provided on the Venmar website or your product packaging for direct phone support.
- When contacting support, please have your product model number (40350) and a description of your issue ready.