
1. Introduction
Thank you for choosing the Stabo Freecom 650 Walkie-Talkie Set. This set includes two robust, long-range communication devices designed for reliable two-way communication. Please read this manual carefully before operating your walkie-talkies to ensure proper use, optimal performance, and safety. Keep this manual for future reference.
2. Package Contents
Please check the package contents upon unpacking. If any items are missing or damaged, contact your retailer immediately.
- 2 x Stabo Freecom 650 Walkie-Talkie Units
- 2 x Rechargeable Lithium-Ion Battery Packs
- 1 x Dual Charging Dock
- 1 x Power Adapter for Charging Dock
- 2 x Belt Clips
- 1 x User Manual (this document)
3. Safety Information
To prevent damage to your device or injury to yourself or others, observe the following safety precautions:
- Battery Safety: Use only the specified battery type and charger. Do not attempt to open, crush, or expose batteries to extreme temperatures or fire. Dispose of batteries properly.
- Hearing Protection: Avoid prolonged exposure to high volume levels, which can cause permanent hearing damage. Adjust the volume to a comfortable level.
- Water and Moisture: This device is not waterproof. Keep it away from water, rain, and high humidity to prevent damage.
- Interference: Turn off the walkie-talkie in areas where radio devices are prohibited, such as hospitals, aircraft, or near medical equipment.
- Cleaning: Use a soft, damp cloth for cleaning. Do not use harsh chemicals or abrasive cleaners.
4. Setup
4.1 Battery Installation
- Locate the battery compartment cover on the back of the walkie-talkie.
- Slide the cover downwards or unclip it to open.
- Insert the rechargeable Lithium-Ion battery pack, ensuring the contacts align correctly.
- Replace the battery compartment cover and secure it.
4.2 Charging the Batteries
Before first use, fully charge the batteries.
- Connect the power adapter to the dual charging dock and plug it into a wall outlet.
- Place the walkie-talkie unit(s) into the charging dock. Ensure the charging contacts on the walkie-talkie align with those in the dock.
- The charging indicator light on the dock will illuminate (e.g., red for charging, green for fully charged).
- Charging typically takes several hours. Do not overcharge for extended periods.
4.3 Attaching the Belt Clip
Align the belt clip with the designated slots on the back of the walkie-talkie and slide it into place until it clicks securely.
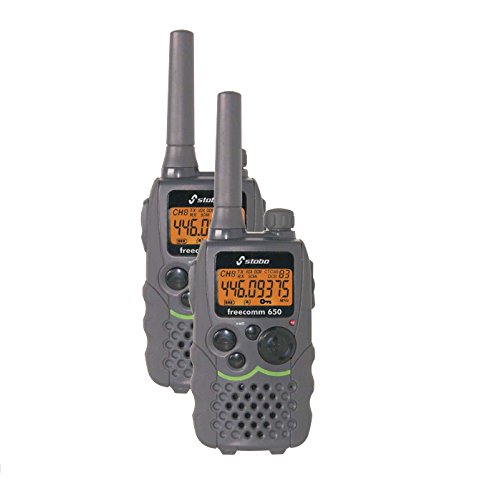
Figure 1: Stabo Freecom 650 Walkie-Talkie unit. This image shows the front view of a black walkie-talkie with an antenna, display, speaker, microphone, and control buttons.
5. Operating the Walkie-Talkie
5.1 Power On/Off
To turn the walkie-talkie ON, press and hold the Power button (usually marked with ON/OFF or a power symbol) until the display illuminates. To turn OFF, press and hold the same button until the display turns off.
5.2 Adjusting Volume
Use the UP and DOWN arrow buttons, or a dedicated volume knob, to adjust the listening volume. Start with a low volume and increase it to a comfortable level.
5.3 Selecting a Channel
The Stabo Freecom 650 features 8 channels. To select a channel:
- Press the MENU or CHANNEL button. The current channel number will flash on the display.
- Use the UP and DOWN arrow buttons to select your desired channel (1-8).
- Press the MENU or OK button again to confirm your selection. Both walkie-talkies must be on the same channel to communicate.
5.4 Transmitting and Receiving
To transmit (speak):
- Press and hold the PTT (Push-To-Talk) button, usually located on the side of the unit.
- Speak clearly into the microphone, holding the walkie-talkie approximately 5-10 cm from your mouth.
- Release the PTT button when you finish speaking to allow the other party to respond.
To receive (listen):
- Ensure the PTT button is not pressed.
- The walkie-talkie will automatically receive transmissions on the selected channel.
5.5 Scan Function
The scan function allows you to search for active channels. To activate:
- Press the SCAN button (if available) or access it through the menu.
- The walkie-talkie will cycle through channels until it detects a signal.
- It will pause on the active channel. To stop scanning, press the SCAN button again or PTT.
6. Maintenance
6.1 Cleaning
Wipe the walkie-talkie surfaces with a soft, slightly damp cloth. Do not use abrasive cleaners, solvents, or strong chemicals, as these can damage the casing or internal components.
6.2 Battery Care
- To prolong battery life, avoid fully discharging the battery frequently.
- If storing the walkie-talkie for an extended period, remove the battery pack.
- Store batteries in a cool, dry place.
6.3 Storage
When not in use, store the walkie-talkies in a dry, dust-free environment, away from direct sunlight and extreme temperatures.
7. Troubleshooting
| Problem | Possible Cause | Solution |
|---|---|---|
| No power | Battery not installed correctly or discharged. | Check battery installation. Charge the battery fully. |
| Cannot communicate with other units | Units are on different channels. Out of range. | Ensure both units are on the same channel. Move closer to the other unit. |
| Poor audio quality / Static | Weak signal. Interference. Low battery. | Move to an open area. Avoid obstacles. Charge battery. |
| Unit not charging | Charger not connected. Unit not seated correctly in dock. Faulty battery/charger. | Check power connection. Re-seat unit in dock. Try another outlet. Contact support if issue persists. |
8. Specifications
| Feature | Detail |
|---|---|
| Model Number | 20650 |
| Brand | Stabo |
| Dimensions (W x D x H) | 3 x 5.6 x 16.5 cm |
| Weight | 140 g |
| Number of Channels | 8 |
| Battery Type | Rechargeable Lithium-Ion |
| Manufacturer | STABO |
9. Warranty and Support
Stabo products are manufactured to high-quality standards. For information regarding warranty coverage, please refer to the warranty card included with your purchase or visit the official Stabo website. For technical support, troubleshooting assistance beyond this manual, or spare parts, please contact your retailer or the Stabo customer service department.
Please retain your proof of purchase for warranty claims.

