
1. Introduction and Overview
This manual provides essential information for the proper setup, operation, and maintenance of your ViewSonic VA2231WM-LED 22-inch widescreen LED monitor. Please read these instructions carefully before using your monitor.

Figure 1.1: Front view of the ViewSonic VA2231WM-LED monitor displaying an environmental message.
Key Features:
- 22-inch (21.5-inch viewable) Full HD 1080p widescreen display.
- Mercury-free LED backlight for energy efficiency.
- 10,000,000:1 Dynamic Contrast Ratio for enhanced image depth.
- Automatic Aspect Ratio Adjustment to prevent image stretching.
- Integrated stereo speakers for multimedia audio.
- DVI and VGA input options for versatile connectivity.
- VESA mountable (100mm x 100mm) for flexible installation.
- Eco-mode function for up to 35% energy savings.
- ENERGY STAR 5.0 and EPEAT Silver certified.
2. Setup Instructions
2.1 Unpacking the Monitor
Carefully remove the monitor and all components from the packaging. Ensure all items listed in the packing list are present. Retain the original packaging for future transport or service needs.

Figure 2.1: Side view of the monitor, showcasing its slim design.
2.2 Attaching the Stand
- Place the monitor face down on a soft, clean surface to prevent scratches.
- Align the stand base with the monitor's neck and secure it according to the diagram provided in the quick start guide (not included in this document).
- Ensure the stand is firmly attached before placing the monitor upright.
2.3 Connecting Cables
Connect the necessary cables to the corresponding ports on the back of the monitor and your computer.

Figure 2.2: Rear panel connections including power input, audio input, DVI, and VGA ports.
- Power Cable: Connect the power cable to the monitor's power input and then to a grounded electrical outlet.
- Video Cable (DVI or VGA):
- For digital signal, connect a DVI cable from your computer's DVI output to the monitor's DVI input.
- For analog signal, connect a VGA cable from your computer's VGA output to the monitor's VGA input.
- Audio Cable: If using the integrated speakers, connect an audio cable from your computer's audio output to the monitor's audio input.
2.4 VESA Mounting
The VA2231WM-LED monitor is VESA compliant (100mm x 100mm), allowing for alternative mounting solutions such as wall mounts or monitor arms.
- Ensure the monitor is powered off and disconnected from all cables.
- Carefully detach the original stand by unscrewing the four screws located on the back of the monitor.
- Attach your VESA-compatible mount using the appropriate screws (typically M4 x 10mm, not included).
- Follow the instructions provided with your VESA mounting kit for secure installation.
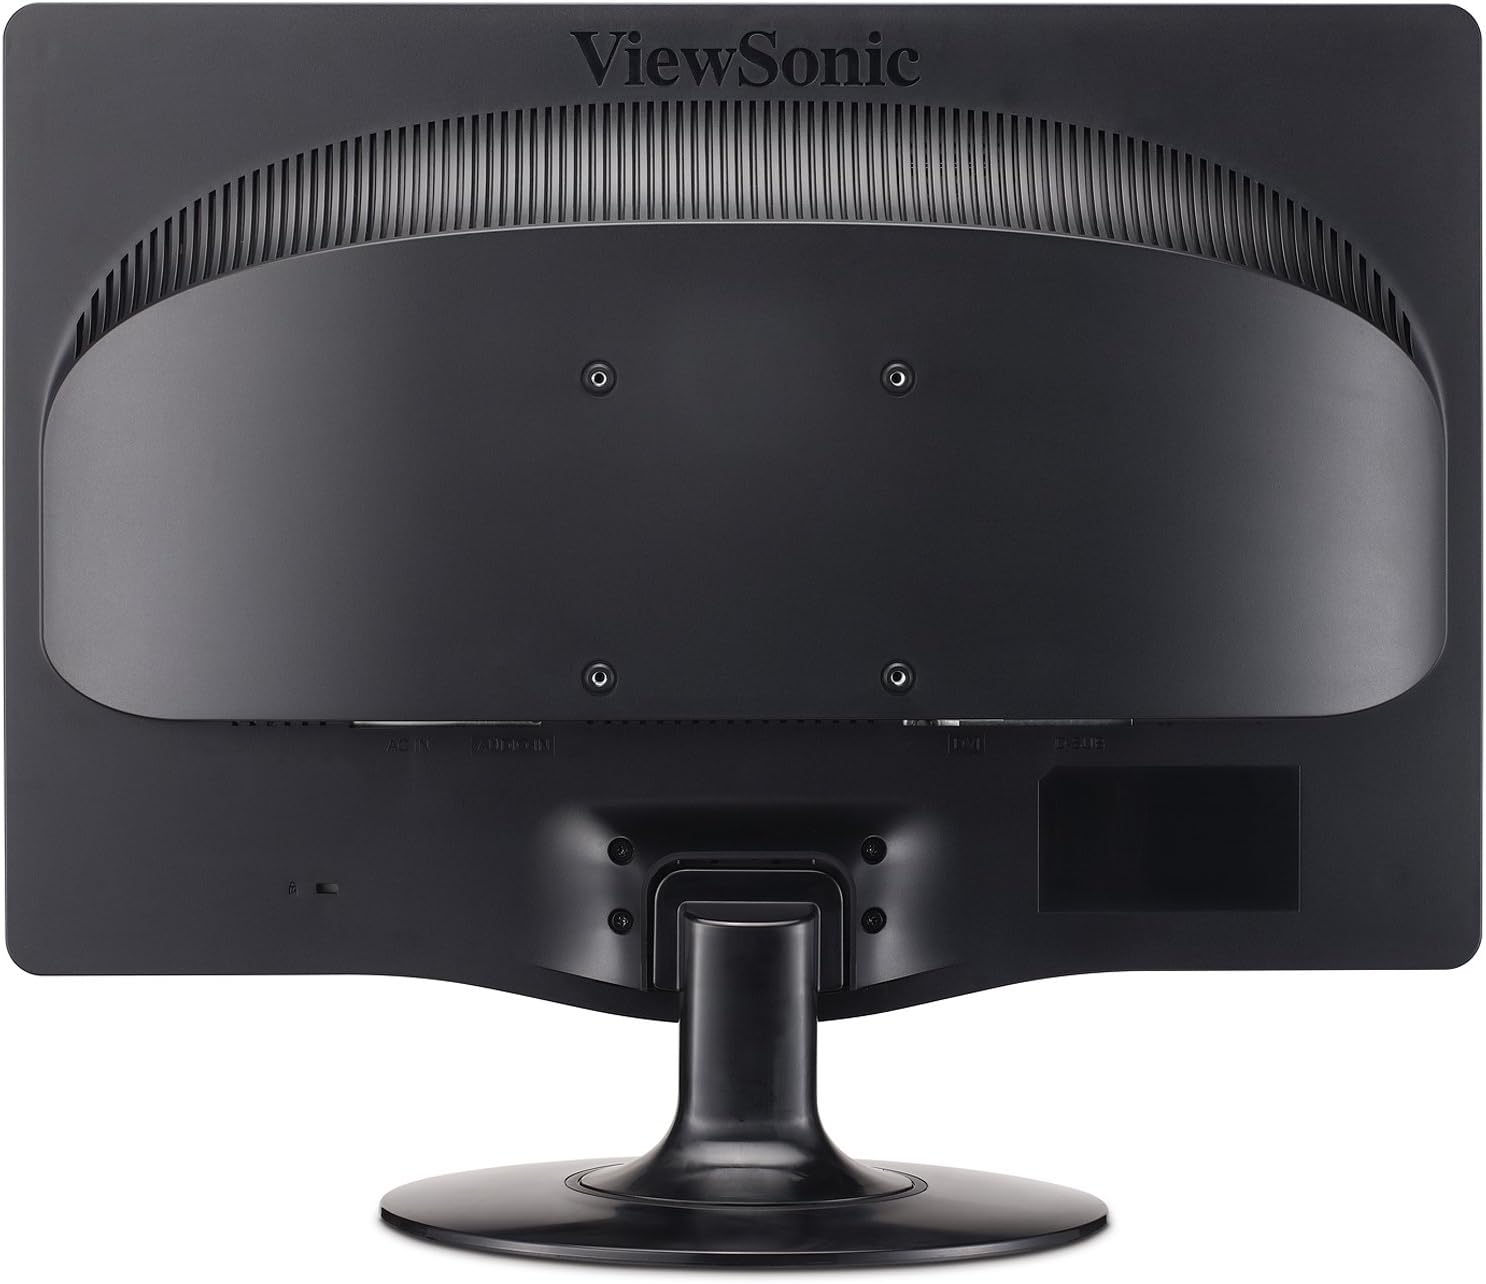
Figure 2.3: Rear view highlighting the 100mm x 100mm VESA mounting pattern.
3. Operating Instructions
3.1 Powering On/Off
- Press the power button located on the front bezel of the monitor to turn it on or off.
- The power indicator light will illuminate when the monitor is on.
3.2 On-Screen Display (OSD) Menu
The OSD menu allows you to adjust various display settings. Use the control buttons located on the front bezel to navigate and select options.
- Menu Button: Opens the OSD menu.
- Up/Down Arrows: Navigate through menu options.
- Select Button: Confirms a selection or enters a sub-menu.
- Exit Button: Exits the current menu or OSD.
3.3 Adjusting Display Settings
- Brightness/Contrast: Adjust these settings to optimize image visibility for your environment.
- Eco-mode: Select "Optimize" or "Conserve" to reduce power consumption and prolong lamp life. This can save up to 35% energy.
- Aspect Ratio: The monitor features automatic aspect ratio adjustment. For 4:3 input signals, the image will be centered with sidebars, preventing stretching.
- Input Select: Manually switch between DVI and VGA inputs if auto-detection does not select the correct source.
- Audio: Adjust the volume for the integrated stereo speakers.
4. Maintenance
4.1 Cleaning the Monitor
- Always power off the monitor and unplug the power cord before cleaning.
- Use a soft, lint-free cloth lightly dampened with water or a mild, non-abrasive screen cleaner.
- Do not spray cleaner directly onto the screen. Apply it to the cloth first.
- Avoid using benzene, thinner, ammonia-based cleaners, or abrasive cleaning agents, as these can damage the display surface.
4.2 General Care
- Keep the monitor away from direct sunlight, excessive heat, or humidity.
- Ensure adequate ventilation around the monitor to prevent overheating.
- Avoid placing heavy objects on the monitor or its cables.
- Do not attempt to disassemble the monitor; refer all servicing to qualified personnel.
5. Troubleshooting
If you encounter issues with your monitor, refer to the following common troubleshooting steps.
| Problem | Possible Cause | Solution |
|---|---|---|
| No Power | Power cable not connected; power outlet not active; monitor power button off. | Ensure power cable is securely connected. Check power outlet with another device. Press the monitor's power button. |
| No Signal | Video cable not connected; incorrect input source selected; computer not powered on. | Verify video cable (DVI/VGA) is securely connected to both monitor and computer. Use OSD to select correct input source. Ensure computer is powered on and outputting video. |
| Image is blurry or distorted | Incorrect resolution; loose video cable; OSD settings incorrect. | Set computer's display resolution to 1920x1080. Check video cable connection. Adjust OSD settings like 'Auto Adjust' (for VGA) or 'Phase/Clock'. |
| Dead Pixels | Manufacturing characteristic of LCD panels. | Refer to ViewSonic's pixel performance policy for warranty coverage regarding dead pixels. |
6. Specifications
| Feature | Detail |
|---|---|
| Model Number | VA2231WM-LED |
| Screen Size | 22 Inches (21.5" viewable) |
| Resolution | 1920 x 1080 (Full HD 1080p) |
| Aspect Ratio | 16:9 |
| Panel Type | LED Backlit LCD |
| Dynamic Contrast Ratio | 10,000,000:1 |
| Response Time | 5ms (typical) |
| Connectivity | 1x DVI, 1x VGA |
| Audio | Integrated Stereo Speakers, Audio In |
| VESA Mount Compatible | 100mm x 100mm |
| Dimensions (LxWxH) | 7.7 x 20.2 x 15.3 inches (with stand) |
| Weight | 8.6 pounds (with stand) |
| Power Consumption | Eco-mode for reduced consumption |
| Certifications | ENERGY STAR 5.0, EPEAT Silver |
7. Warranty and Support
7.1 Limited Warranty
The ViewSonic VA2231WM-LED monitor is backed by a 3-year limited warranty. This warranty covers defects in materials and workmanship under normal use. Please retain your proof of purchase for warranty claims.
7.2 Pixel Performance Policy
ViewSonic is committed to using high-grade panels and offers an industry-leading pixel performance policy. For detailed information regarding acceptable pixel anomalies and warranty coverage, please refer to the official ViewSonic website or contact customer support.
7.3 Customer Support
For technical assistance, warranty service, or further information, please visit the official ViewSonic website or contact their customer support department. Contact details can typically be found on the ViewSonic website or in the product's original documentation.


