Introduction
The Kaito Voyager Solo KA450 is a versatile emergency radio designed for both daily use and emergency preparedness. It features multiple power options, AM/FM/Shortwave radio reception, and NOAA weather alerts. This manual provides instructions for setup, operation, and maintenance to ensure optimal performance.
Package Contents
Verify that all items are present in the package:
- Kaito KA450 Emergency Radio
- AC Adapter with mini-USB male plug
- Earphones
- User Manual (this document)
- Bonus cell phone charging kit (USB cable and various tips)
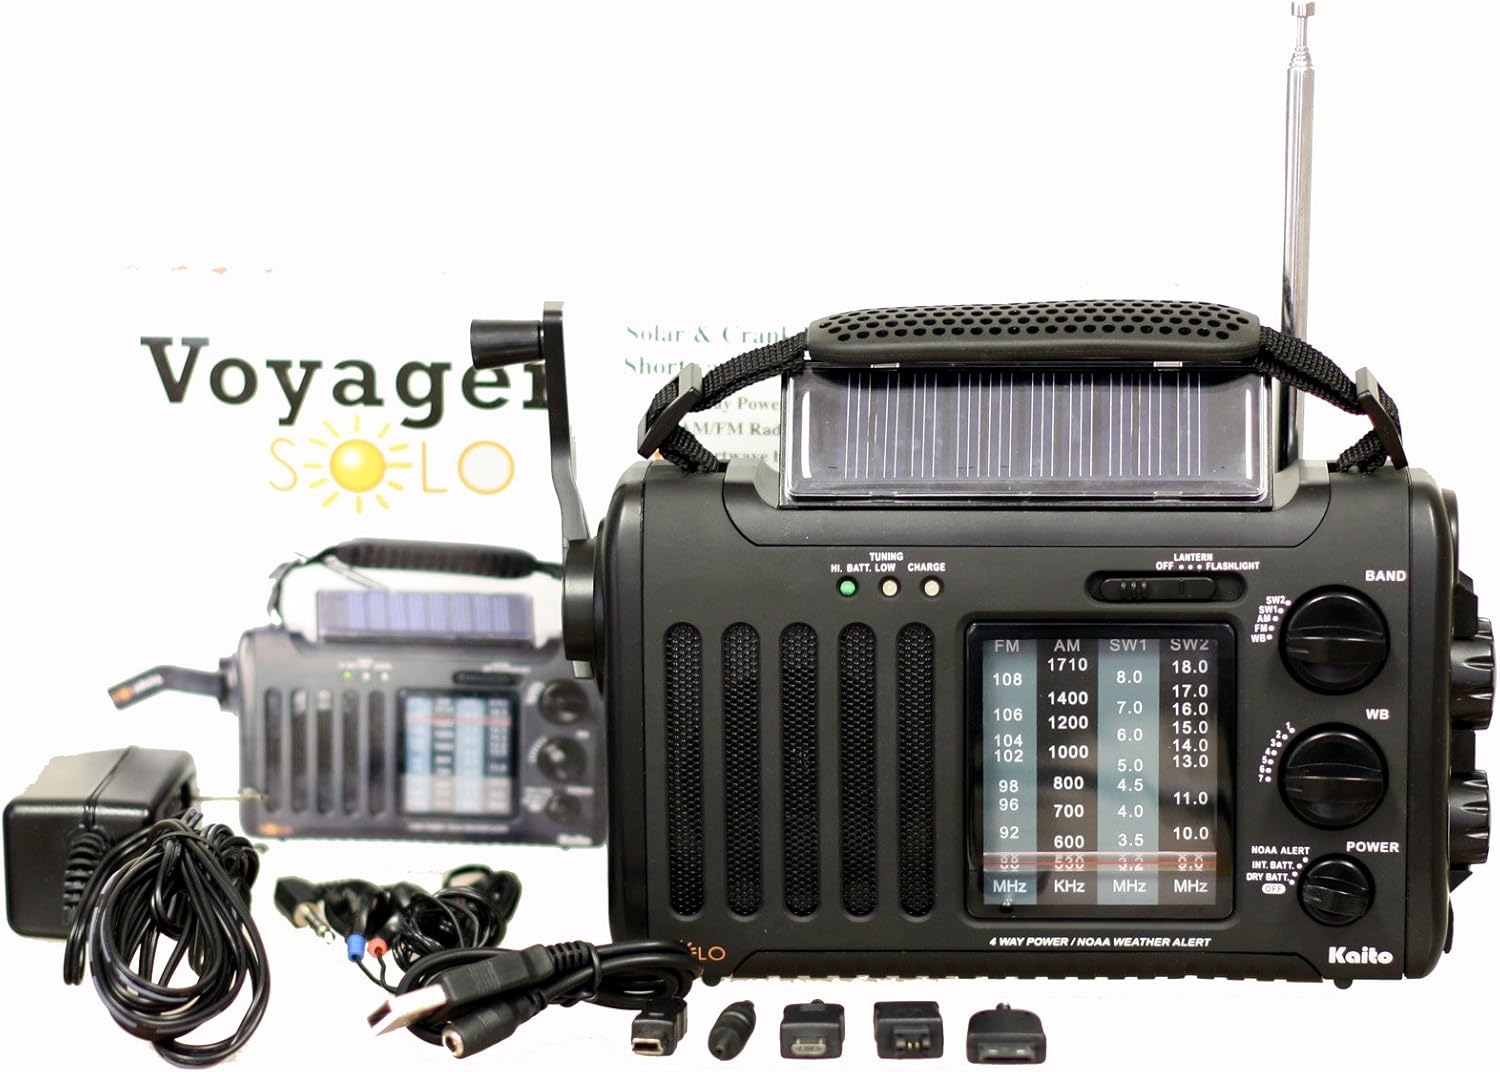
Image: The Kaito KA450 emergency radio displayed with its accompanying accessories, including the AC adapter, earphones, and various cell phone charging cables.
Setup and Powering the Radio
The KA450 offers four methods for power:
- AA Batteries: Insert three (3) AA batteries (not included) into the battery compartment located on the back of the radio. Ensure correct polarity.

Image: Rear view of the Kaito KA450 radio, highlighting the battery compartment cover and the telescopic antenna in its retracted position.
- AC/DC Adapter: Connect the included AC adapter to a standard wall outlet and plug the mini-USB end into the "DC IN" port on the side of the radio. This also charges the internal Ni-MH battery.
- Hand Crank Dynamo: Extend the hand crank located on the side of the radio. Rotate the crank clockwise or counter-clockwise for approximately 1-3 minutes to generate power for short-term use or to charge the internal battery.

Image: Top-down view of the Kaito KA450 radio, clearly showing the foldable hand crank and the integrated solar panel.
- Solar Panel: Position the radio with the solar panel facing direct sunlight. The adjustable flip-up solar panel ensures maximum exposure. This method charges the internal Ni-MH battery and can power the radio when no other batteries are installed.
The radio includes a built-in rechargeable Ni-MH battery (600mAh) which can be charged via the AC adapter, hand crank, or solar panel.
Operating Instructions
Radio Operation (AM/FM/SW)
- Power On/Off: Rotate the VOLUME knob clockwise to turn the radio on and adjust the sound level. Rotate counter-clockwise to turn off.
- Band Selection: Use the BAND switch to select between AM, FM, SW1, SW2, or WB (Weather Band).
- Tuning: Rotate the TUNING knob to find desired stations. Extend the telescopic antenna for better FM and Shortwave reception. For AM, rotate the radio for optimal signal.
- Headphone Jack: For private listening, plug 3.5mm earphones into the headset jack socket.

Image: Side profile of the Kaito KA450 radio, illustrating the tuning and volume control knobs, the integrated flashlight, and the DC IN power input port.
NOAA Weather Band and Alert Function
- Weather Band Selection: Set the BAND switch to "WB".
- Channel Tuning: Use the dedicated WB CHANNEL switch to select one of the 7 pre-programmed NOAA weather channels.
- Alert Mode: To activate the NOAA Alert feature, set the NOAA ALERT switch to "Alert". In this mode, the radio will automatically activate to broadcast hazardous weather conditions or warnings from the Emergency Alert System (EAS) via the National Weather Radio (NWR) network.
Flashlight and Reading Lamp
- Flashlight: The single LED flashlight is located on the side of the radio. Use the LIGHT switch to turn it on or off.
- Reading Lamp: The 5-LED reading lamp is located on the back of the radio. Use the LIGHT switch to turn it on or off.
Cell Phone Charging
- Connect your cell phone or other compatible device to the standard USB female output jack using the appropriate charging cable (included bonus kit).
- Power for charging is drawn from the radio's internal battery or generated via the hand crank/solar panel. Charging efficiency may vary depending on the device and power source.
Maintenance
- Cleaning: Wipe the radio with a soft, damp cloth. Do not use abrasive cleaners or solvents.
- Battery Care: If using AA batteries, remove them if the radio will not be used for an extended period to prevent leakage. Regularly charge the internal Ni-MH battery to maintain its capacity.
- Storage: Store the radio in a cool, dry place away from direct sunlight and extreme temperatures.
Troubleshooting
- No Power:
- Check if AA batteries are inserted correctly and have sufficient charge.
- Ensure the AC adapter is properly connected and the outlet is functional.
- Crank the dynamo for 1-3 minutes or expose the solar panel to direct sunlight to charge the internal battery.
- Poor Radio Reception:
- Extend the telescopic antenna fully for FM and Shortwave bands.
- For AM reception, try rotating the radio to find the best signal.
- Move away from electronic devices that may cause interference.
- Cell Phone Not Charging:
- Ensure the radio has sufficient power (internal battery charged, or actively cranking/solar charging).
- Verify the USB cable and phone adapter are correctly connected and compatible with your device.
- Note that charging speed and compatibility may vary.
Specifications
| Feature | Detail |
|---|---|
| Model | KA450 |
| Radio Bands | FM: 88 - 108 MHz AM (MW): 530 - 1710 KHz SW 1: 3.2 - 8.0 MHz SW 2: 9.0 - 18.0 MHz NOAA Weather: 1 - 7 Channels |
| Power Sources | 3 x AA Batteries (not included) AC/DC Adapter (included) Hand Crank Dynamo Solar Panel Built-in Rechargeable Ni-MH Battery (600mAh) |
| Internal Speaker | 0.5W |
| Headset Jack | 3.5 mm |
| USB Output | Standard USB female jack for charging external devices |
| Dimensions | 8 x 4.5 x 2.5 inches (20.3 x 11.4 x 6.35 cm) |
| Weight | 1 lb (0.45 kg) |
| Special Features | NOAA Weather Alert, 5-LED Reading Lamp, Single LED Flashlight |
Warranty and Support
For warranty information and technical support, please refer to the contact details provided with your purchase documentation or visit the official Kaito website. Keep your purchase receipt as proof of purchase.
Kaito Official Website: Visit the Kaito Store on Amazon