Introduction
This manual provides essential information for the safe and efficient operation of your Time DPA-195 portable media player. Please read it thoroughly before using the device and keep it for future reference.
Safety Information
- Do not expose the device to extreme temperatures, direct sunlight, or high humidity.
- Avoid dropping or subjecting the device to strong impacts.
- Do not attempt to disassemble or repair the device yourself. Refer all servicing to qualified personnel.
- Use only the recommended accessories and power adapters.
- Adjust volume to a moderate level to prevent hearing damage.
Package Contents
Verify that all items are present in the package:
- Time DPA-195 Portable Media Player
- USB Charging Cable
- Earphones
- User Manual (this document)
Product Overview
Familiarize yourself with the various parts of your DPA-195 player.
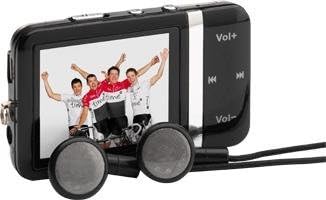
Image: The Time DPA-195 player, showing its compact black body, LCD screen displaying an image, and attached wired earphones. Buttons for volume and navigation are visible on the side.
Controls and Ports:
- 1. LCD Screen: Displays menus, playback information, and settings.
- 2. Vol+ Button: Increases volume.
- 3. Vol- Button: Decreases volume.
- 4. Play/Pause Button: Starts or pauses playback.
- 5. Next/Fast Forward Button: Skips to the next track or fast forwards.
- 6. Previous/Rewind Button: Skips to the previous track or rewinds.
- 7. Menu/Back Button: Navigates through menus or returns to the previous screen.
- 8. Power/Hold Switch: Turns the device on/off or locks/unlocks buttons.
- 9. Headphone Jack: Connects earphones.
- 10. USB Port: For charging and data transfer.
- 11. miniSD Card Slot: For expanding storage capacity.
Setup
1. Charging the Device
Before first use, fully charge the DPA-195 player.
- Connect the small end of the USB charging cable to the USB port on the player.
- Connect the large end of the USB cable to a powered USB port on a computer or a compatible USB wall adapter (not included).
- The screen will indicate charging status. A full charge typically takes approximately 2-3 hours.
- Disconnect the cable once charging is complete.
2. Inserting a miniSD Card (Optional)
The DPA-195 has 4096 MB of integrated memory. You can expand storage using a miniSD card.
- Locate the miniSD card slot on the device.
- Gently insert the miniSD card into the slot with the metal contacts facing down until it clicks into place.
- To remove, gently push the card in until it clicks, then release, and it will eject slightly.
Operating Instructions
1. Power On/Off
To power on the device, slide the Power/Hold switch to the 'On' position. To power off, slide it to 'Off'.
2. Navigating Menus
Use the navigation buttons (Next/Previous) to scroll through menu options. Press the Play/Pause button to select an option. Press the Menu/Back button to return to the previous screen.
3. MP3 Playback
- From the main menu, select "Music" or "MP3".
- Navigate to the desired folder or track.
- Press the Play/Pause button to start playback.
- Use the Next/Previous buttons to skip tracks.
- Press and hold Next/Previous to fast forward or rewind.
- Adjust volume using the Vol+ and Vol- buttons.
4. Radio Function
The DPA-195 includes an FM radio tuner.
- Connect the earphones, as they act as the antenna for the radio.
- From the main menu, select "Radio" or "FM".
- Use the navigation buttons to scan for stations or select a preset.
- Press Play/Pause to mute/unmute the radio.
5. Data Transfer
To transfer music or other files to your DPA-195:
- Connect the device to your computer using the USB cable.
- The device will appear as a removable disk drive on your computer.
- Drag and drop files into the appropriate folders on the device's internal memory or miniSD card.
- Safely eject the device from your computer before disconnecting the USB cable.
Maintenance
Cleaning
Wipe the device with a soft, dry, lint-free cloth. Do not use liquid cleaners or abrasive materials.
Storage
When not in use for extended periods, store the device in a cool, dry place away from direct sunlight and extreme temperatures. Ensure the battery is partially charged before storing.
Troubleshooting
| Problem | Possible Cause | Solution |
|---|---|---|
| Device does not power on. | Battery is depleted. | Charge the device fully. |
| No sound from earphones. | Volume is too low or muted; earphones not properly connected; faulty earphones. | Increase volume; check earphone connection; try different earphones. |
| Cannot transfer files. | USB cable issue; device not recognized by computer. | Try a different USB port or cable; ensure device is powered on and connected correctly. |
| Radio reception is poor. | Earphones not connected or acting as antenna; weak signal. | Ensure earphones are connected; try moving to an area with better signal. |
Specifications
| Feature | Detail |
|---|---|
| Model | DPA-195 |
| Brand | Time |
| Product Weight | 51 g |
| Flash Memory Type | miniSD Card |
| Memory Technology | Integrated Memory |
| Hard Drive Capacity | 4096 MB |
| Other Features | MP3, Radio |
| Display Technology | LCD |
| Screen Size | 2 Inches |
| Display Type | LCD |
| Batteries Included | No |
| Media Type Supported | AVI, WAV, WMA |
Warranty and Support
For warranty information and technical support, please refer to the documentation provided at the time of purchase or visit the official Time brand website. Keep your proof of purchase for warranty claims.
For further assistance, please contact Time customer service.


