1. Introduction
This manual provides detailed instructions for the installation, operation, maintenance, and troubleshooting of the Intermatic WG1573-10D Pool Timer Motor. This replacement motor is designed for use with various Intermatic timer series, including T100, T170, T180, T100R201, T100R301, WH30, and WH40, operating at 208-277V.
2. Safety Information
WARNING: Risk of electric shock. Always disconnect power at the circuit breaker or fuse box before attempting any installation, maintenance, or repair work on the timer or motor. Failure to do so can result in serious injury or death.
- Ensure all electrical connections comply with local and national electrical codes.
- This product should be installed by a qualified electrician or service technician.
- Do not operate the timer with damaged wiring or if the motor appears faulty.
- Keep children away from electrical equipment.
3. Product Overview
The Intermatic WG1573-10D is a durable replacement motor designed to restore functionality to compatible Intermatic pool and spa timers. It ensures accurate timekeeping for your automated systems.
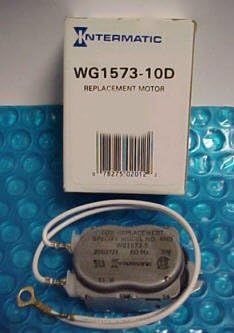
Figure 1: Intermatic WG1573-10D Pool Timer Motor and packaging.
4. Installation Instructions
Follow these steps carefully to replace your Intermatic pool timer motor:
- Disconnect Power: Locate the circuit breaker controlling your pool timer and switch it to the OFF position. Verify that power is completely disconnected using a voltage tester.
- Access the Timer Mechanism: Open the timer box and carefully remove any protective panels or wire guards to expose the timer mechanism and the existing motor.
- Identify Wiring: Note the current wiring configuration of the old motor. It is highly recommended to take a photograph or draw a diagram of the wire connections to ensure correct re-installation. The motor typically has two wires.
- Remove Old Motor:
- With the wires still connected to the terminals, carefully remove the screws (usually two) that secure the old motor to the timer board.
- Allow the old motor to hang by its wires temporarily.
- Install New Motor:
- Position the new WG1573-10D motor and secure it to the timer board using the screws removed in the previous step.
- One by one, disconnect a wire from the old motor's terminal, then connect the corresponding wire from the new motor to that same terminal. Ensure connections are tight and secure.
- Repeat for the second wire.
- Secure and Close: Once both wires are connected and the new motor is securely mounted, replace any protective panels or wire guards. Close the timer box cover.
- Restore Power: Return to the circuit breaker and switch the power back ON.
- Set Time: After power is restored, the motor should begin operating. Set the timer to the correct current time according to your timer's specific instructions.
5. Operating Instructions
The Intermatic WG1573-10D motor is a component of your existing timer mechanism. Its operation is integrated with the timer's overall function. Once installed, the motor continuously drives the timer's clock mechanism, allowing it to accurately track time and activate/deactivate connected equipment (e.g., pool pump) according to the set schedule.
Refer to your specific Intermatic timer model's manual for detailed instructions on setting ON/OFF times, adjusting the clock, and utilizing other timer features.
6. Maintenance
The Intermatic WG1573-10D motor is designed for long-term, maintenance-free operation. No lubrication or routine servicing is required for the motor itself.
- Periodically inspect the timer enclosure for signs of moisture, insect intrusion, or physical damage.
- Ensure all electrical connections remain tight and free from corrosion.
- Keep the timer area clean and free of debris.
7. Troubleshooting
If your timer is not functioning correctly after motor replacement, consider the following:
Motor Not Turning
If the timer's clock mechanism is not advancing, the motor may not be receiving power or may be faulty. To check if the motor is working:
- Disconnect Power: Ensure power is OFF at the circuit breaker.
- Access Motor: Open the timer box and locate the motor.
- Check Gears: Carefully insert a small, non-conductive object (like a toothpick) into the small hole near the motor's gears. If the motor is functioning, you should feel the gears turning.
- No Movement: If the gears are not turning, and you have verified power to the timer, the motor may be burnt out and require replacement.
Timer Not Activating/Deactivating Equipment
If the motor is turning but the connected equipment (e.g., pool pump) is not turning ON/OFF as scheduled:
- Check the timer's ON/OFF trippers or pins to ensure they are correctly set for your desired schedule.
- Verify that the manual override switch (if present) is in the correct position.
- Inspect the wiring connections from the timer to the connected equipment.
- The issue may lie with the timer mechanism itself or the connected equipment, not the motor.
8. Specifications
| Feature | Specification |
|---|---|
| Model Number | WG1573-10D |
| Brand | Intermatic |
| Voltage | 208-277 Volts (Tolerance of +/- 10%) |
| Frequency | 60 Hz |
| Product Dimensions | 2.1"D x 1.5"W x 3.1"H |
| Item Weight | 0.01 Ounces |
| Compatible Timers | T100, T170, T180, T100R201, T100R301, WH30, WH40 Series |
| Manufacturer | Intermatic |
| UPC | 789610254231, 789610231331 |
9. Warranty Information
Intermatic products are manufactured to high-quality standards. For specific warranty details regarding the WG1573-10D motor, please refer to the warranty statement included with your original product packaging or visit the official Intermatic website. Keep your proof of purchase for warranty claims.
10. Customer Support
If you require further assistance or have questions not covered in this manual, please contact Intermatic customer support:
- Website: www.intermatic.com
- Refer to the Intermatic website for contact numbers and support hours.


