1. Introduction
This manual provides essential instructions for the safe and efficient operation, installation, and maintenance of your CMA Dishmachines GL-X Underbar Glasswasher. Please read this manual thoroughly before operating the appliance and retain it for future reference.
The GL-X is an underbar, low-temperature chemical sanitizing glass washer designed for commercial use, capable of washing approximately 30 racks per hour. It features a built-in chemical dispenser, deliming system, and stainless steel construction for durability.
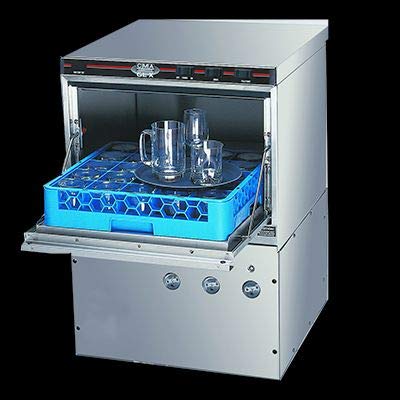
Image 1.1: The CMA Dishmachines GL-X Underbar Glasswasher, showing a blue rack with various glasses inside the open wash chamber.
2. Important Safety Instructions
Always follow basic safety precautions when using electrical appliances to reduce the risk of fire, electric shock, or injury to persons.
- Electrical Safety: Ensure the unit is connected to a properly grounded 115V/60Hz/1-ph power supply. Do not operate with a damaged cord or plug.
- Water Connections: All water connections must comply with local plumbing codes. Ensure proper water pressure and temperature.
- Chemical Handling: Use only approved commercial dishwashing chemicals. Wear appropriate personal protective equipment (PPE) when handling chemicals. Avoid contact with skin and eyes.
- Hot Surfaces: The interior of the machine and water can be hot. Exercise caution when opening the door and handling washed items.
- Supervision: This appliance is not intended for use by persons with reduced physical, sensory, or mental capabilities unless supervised or instructed concerning its use.
- Maintenance: Disconnect power before performing any maintenance or cleaning.
3. Unboxing and Installation
3.1 Unboxing
- Carefully remove the glass washer from its packaging.
- Inspect the unit for any shipping damage. Report any damage immediately to the carrier and your supplier.
- Verify all included accessories are present: (1) open rack and (1) peg rack.
3.2 Placement
The GL-X is designed for underbar installation. Ensure adequate clearance for ventilation and access for maintenance. The unit dimensions are approximately 24.75" W x 24" D x 40.13" H.
3.3 Electrical Connection
Connect the unit to a dedicated 115V/60Hz/1-ph electrical circuit. A qualified electrician should perform this connection to ensure compliance with all local and national electrical codes.
3.4 Water Supply Connection
Connect the glass washer to a potable water supply. Install a shut-off valve and a backflow prevention device as required by local codes. Ensure the water supply pressure is within the recommended range for optimal operation.
3.5 Drain Connection
The GL-X features a pumped drain. Connect the drain line to an appropriate floor sink or indirect drain connection, ensuring compliance with local plumbing codes. It is crucial to configure the drain line to handle the initial burst of water from the pump effectively, preventing splashing or overflow. Increasing the drain line diameter or using specific fittings may be necessary depending on your setup.
3.6 Chemical Dispenser Setup
The unit includes a built-in chemical dispenser. Connect the chemical supply lines to the appropriate containers of commercial detergent and sanitizing agent. Refer to the chemical manufacturer's instructions for proper dilution and handling. Ensure the dispenser is calibrated for correct chemical dosage.
4. Operating Instructions
4.1 Initial Startup
- Ensure all connections (electrical, water, drain, chemical) are secure.
- Turn on the water supply to the machine.
- Turn on the main power switch for the glass washer. The machine will begin to fill with water.
- Allow the machine to complete its initial fill and heat cycle (if applicable for the sustainer heater).
4.2 Loading Racks
- Scrape off any large food particles from glasses before loading.
- Place glasses upside down in the provided racks (open rack for various items, peg rack for specific glass types).
- Do not overload racks. Ensure water can freely circulate around all items.
- Slide the loaded rack into the wash chamber.
4.3 Starting a Wash Cycle
- Close the door securely. The door opening is 11-1/4" high.
- Press the "Start" button (or equivalent control, as per push-button controls).
- The machine will proceed through its wash and low-temperature chemical sanitizing cycle. Each cycle is designed for approximately 30 racks per hour, indicating a quick wash time.
4.4 Unloading
Once the cycle is complete, open the door and carefully remove the rack. Allow glasses to air dry completely before stacking or using.
5. Maintenance
Regular maintenance ensures optimal performance and extends the life of your GL-X glass washer.
5.1 Daily Cleaning
- At the end of each day, turn off the machine and disconnect power.
- Drain the machine completely.
- Remove and clean the upper and lower stainless steel wash arms, ensuring all nozzles are clear of debris.
- Wipe down the interior of the wash chamber with a damp cloth and mild detergent.
- Clean the exterior stainless steel surfaces.
5.2 Deliming System
The built-in deliming system helps prevent mineral buildup. Follow the manufacturer's instructions for activating and maintaining the deliming cycle. Regular deliming is crucial in areas with hard water.
5.3 Chemical Levels
Regularly check the levels of detergent and sanitizing chemicals. Replenish as needed to ensure effective washing and sanitizing.
6. Troubleshooting
Before contacting service, review these common issues and solutions.
| Problem | Possible Cause | Solution |
|---|---|---|
| Machine does not start | No power; door not closed; water supply off. | Check power connection; ensure door is latched; verify water supply is on. |
| Poor wash results (dirty glasses) | Clogged wash arms; insufficient chemicals; incorrect loading; low water temperature. | Clean wash arms; check chemical levels and dispenser calibration; ensure proper loading; verify sustainer heater is functioning. |
| Drainage issues / Water splashing | Improper drain line configuration; drain line blockage. | Ensure drain line is correctly installed and sized for the pumped drain. Clear any blockages. Consult a plumber if splashing persists. |
| Chemical dispenser not working | Empty chemical containers; clogged lines; dispenser malfunction. | Refill chemicals; check and clear chemical lines; contact service if dispenser is faulty. |
For issues not listed or if solutions do not resolve the problem, contact a qualified service technician.
7. Specifications
| Feature | Detail |
|---|---|
| Model | GL-X |
| Brand | CMA Dishmachines |
| Installation Type | Under Counter / Underbar |
| Capacity | Up to 30 racks/hour |
| Wash Type | Low Temperature Chemical Sanitizing |
| Voltage | 115V / 60Hz / 1-ph |
| Product Dimensions (W x D x H) | 24.75" x 24" x 40.13" |
| Item Weight | Approximately 0.01 ounces (Note: This weight seems incorrect based on typical appliance weights. Please refer to product packaging or official documentation for accurate weight.) |
| Door Opening Height | 11-1/4" |
| Wash Pump | 1 HP |
| Material | Stainless Steel construction |
| Special Features | Built-in chemical dispenser, deliming system, upper & lower stainless steel wash arms, built-in sustainer heater, pumped drain, Sound Reduction System. |
| Certifications | NSF, cULus |
8. Warranty and Support
For specific warranty details, please refer to the documentation provided with your purchase or contact CMA Dishmachines directly. Warranty terms typically cover manufacturing defects for a specified period.
For technical support, service, or to order replacement parts, please contact CMA Dishmachines customer service or your authorized dealer. Ensure you have your model number (GL-X) and serial number available when contacting support.


