
1. Introduction
This manual provides detailed instructions for the installation, operation, and maintenance of your Absolute DFL4008IRG 9.5-inch TFT-LCD Overhead Flip-Down Monitor with integrated DVD Player and Built-in IR Transmitter. Please read this manual thoroughly before using the product to ensure proper function and to prevent damage.
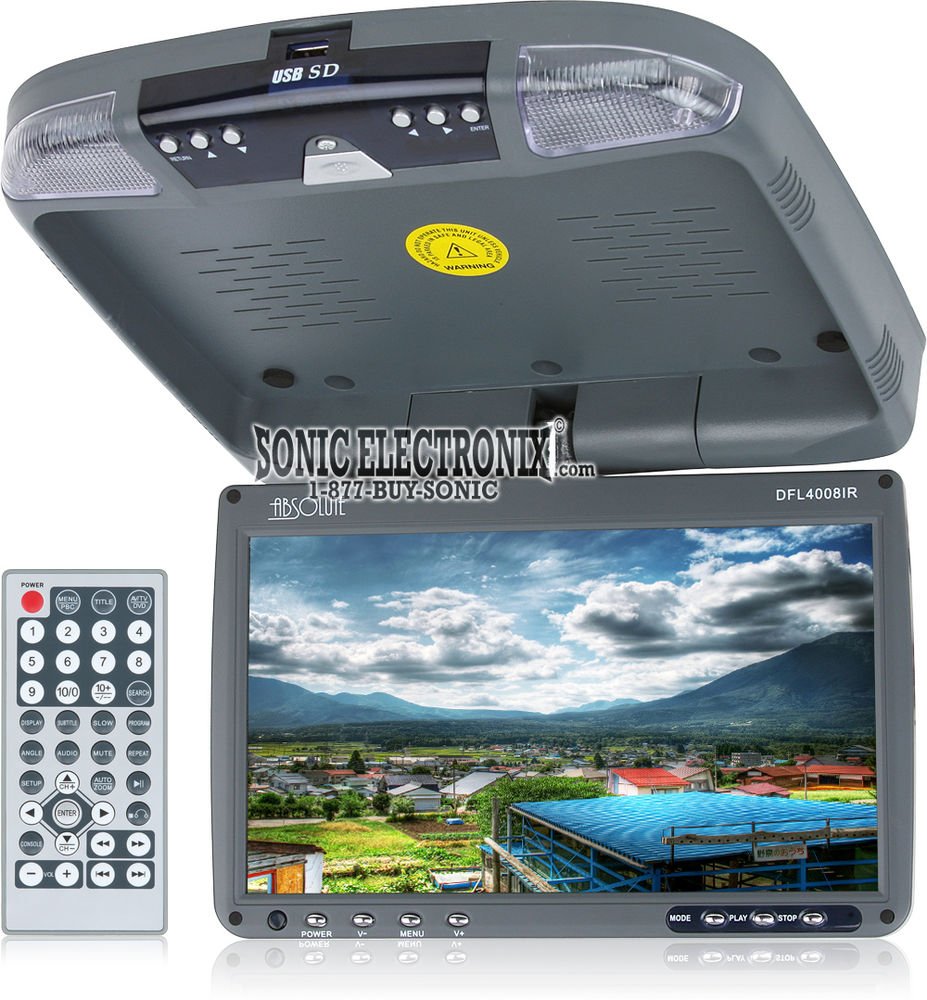
Figure 1: Absolute DFL4008IRG Overhead Monitor (Grey)
2. Product Features
The DFL4008IRG is designed to provide in-vehicle entertainment with its high-resolution display and integrated DVD player. Key features include:
- 9.5-inch TFT-LCD display for clear visuals.
- Integrated DVD player supports various media formats.
- Built-in IR (Infrared) transmitter for wireless headphone connectivity.
- Flip-down design for convenient storage when not in use.
- High native resolution of 1366x768 pixels.
- Adjustable display settings for optimal viewing.
3. Package Contents
Please verify that all items are present in the package before proceeding with installation:
- Absolute DFL4008IRG Overhead Monitor with DVD Player
- Mounting Plate/Bracket
- Remote Control
- Wiring Harness
- Mounting Hardware (screws, caps)
- User Manual (this document)
4. Setup & Installation
Important: Installation of car electronics can be complex. It is highly recommended that this product be installed by a qualified professional to ensure proper function and safety. Incorrect installation may void your warranty and cause damage to your vehicle or the product.
4.1 Safety Precautions
- Disconnect the vehicle's battery negative terminal before starting any electrical work.
- Ensure all wiring is properly insulated and secured to prevent shorts and interference.
- Do not install the unit where it obstructs the driver's view or interferes with vehicle safety features (e.g., airbags).
4.2 Mounting the Unit
- Determine the optimal mounting location on the vehicle's ceiling, ensuring it does not interfere with head clearance or structural components.
- Use the provided mounting plate as a template to mark drilling points.
- Drill pilot holes and secure the mounting plate to the vehicle's ceiling using appropriate hardware. Ensure the plate is firmly attached.
- Route the wiring harness through the ceiling cavity to the power source and other connections.
- Attach the DFL4008IRG unit to the mounting plate, ensuring all locking mechanisms are engaged.
4.3 Wiring Connections
Refer to the wiring diagram provided with your unit for specific connections. General connections include:
- Red Wire: +12V Switched Power (ACC)
- Yellow Wire: +12V Constant Power (BATT)
- Black Wire: Ground (GND)
- Video Input: Connect to external video sources if desired.
- Audio Output: Connect to vehicle's audio system or use built-in IR transmitter for wireless headphones.
After all connections are made, reconnect the vehicle's battery and test the unit.
5. Operating Instructions
5.1 Power On/Off
- To power on the unit, ensure the vehicle's ignition is on (ACC or ON position).
- Press the POWER button on the unit or remote control.
- To power off, press the POWER button again.
5.2 DVD Playback
- Gently flip down the monitor.
- Insert a DVD or CD into the disc slot with the label side facing up. The unit should automatically begin playback.
- Use the remote control or front panel buttons for playback controls: PLAY/PAUSE, STOP, SKIP, FAST FORWARD/REWIND.
- To eject the disc, press the EJECT button.
5.3 IR Transmitter (Wireless Headphones)
The built-in IR transmitter allows passengers to listen to audio wirelessly using compatible IR headphones (sold separately).
- Ensure your IR headphones are powered on and set to the correct channel (usually Channel A or B, if available).
- The DFL4008IRG will automatically transmit audio when playing a DVD or receiving an audio input.
- Adjust headphone volume directly on the headphones.
5.4 Display Adjustments
Access the OSD (On-Screen Display) menu using the MENU button on the unit or remote to adjust picture settings.
- Brightness: Adjusts the overall luminance of the screen.
- Contrast: Controls the difference between light and dark areas.
- Color/Saturation: Adjusts the intensity of colors.
- Tint/Hue: Fine-tunes the color balance (primarily for NTSC signals).
Use the arrow buttons to navigate and the ENTER button to confirm selections.
6. Maintenance
6.1 Cleaning the Unit
- Use a soft, dry cloth to wipe the exterior of the unit.
- For the LCD screen, use a soft, lint-free cloth specifically designed for electronics screens. Dampen the cloth slightly with water or a screen cleaner if necessary, but never spray cleaner directly onto the screen.
- Avoid using abrasive cleaners, solvents, or harsh chemicals, as these can damage the finish or screen.
6.2 Disc Care
- Handle discs by their edges to avoid fingerprints on the playing surface.
- Keep discs clean and free from scratches. Use a soft cloth to wipe discs from the center outwards.
- Store discs in their cases when not in use to prevent damage.
7. Troubleshooting
Before contacting support, please refer to the following common issues and solutions:
| Problem | Possible Cause | Solution |
|---|---|---|
| No power to the unit. | Incorrect wiring; Blown fuse; Vehicle ignition off. | Check power and ground connections. Verify fuse. Ensure vehicle ignition is on. |
| No picture on screen. | Video input not selected; Loose video cable; Disc error. | Select correct video source. Check video cable connections. Try a different disc. |
| DVD not playing or skipping. | Dirty or scratched disc; Incorrect disc format; Disc inserted incorrectly. | Clean the disc. Ensure disc is compatible (CD, DVD). Reinsert disc correctly. |
| IR headphones not working. | Headphones off; Low headphone battery; Out of range; Incorrect channel. | Turn on headphones. Replace batteries. Ensure line of sight to IR transmitter. Check headphone channel. |
| Poor picture quality/color. | Display settings incorrect; Poor video source. | Adjust Brightness, Contrast, Color, and Tint in the OSD menu. Ensure video source is high quality. |
8. Specifications
| Model Number | DFL4008IRG |
| Brand | Absolute USA |
| Screen Size | 9.5 Inches |
| Display Type | TFT-LCD |
| Native Resolution | 1366x768 |
| Media Type Supported | CD, DVD |
| Connectivity Technology | IR (Infrared) |
| Color | Grey |
| UPC | 847169002823 |
9. Warranty and Support
For warranty information and technical support, please contact Absolute USA directly. Refer to the product packaging or the official Absolute USA website for the most current contact details and warranty terms.
Website: www.absoluteusa.com (Note: This is a placeholder URL, please verify the actual manufacturer website.)
When contacting support, please have your model number (DFL4008IRG) and purchase information readily available.