
Introduction
Thank you for choosing the Canarm ICW284A03ORB10 Port 3-Light Ceiling/Wall Fixture. This manual provides essential information for the safe installation, operation, and maintenance of your new lighting fixture. Please read these instructions thoroughly before beginning installation and retain them for future reference.
The Canarm Port 3-Light directional spotlight from the Port collection combines functionality and style. It features an oil rubbed bronze finish paired with painted glass, creating warm and inviting accent lighting. This fixture is designed for dual mounting, allowing installation on either a wall or a ceiling.
Safety Information
- WARNING: To avoid electric shock, always disconnect power at the main circuit breaker or fuse box before installation, servicing, or changing bulbs.
- All electrical connections must be in accordance with local codes, ordinances, or national electrical codes. If you are unfamiliar with proper electrical wiring, consult a qualified electrician.
- Do not exceed the maximum wattage specified for the bulbs. This fixture uses 3 x 50W GU10 bulbs (not included).
- Ensure the mounting surface is structurally sound and can support the weight of the fixture.
- Do not install this fixture in wet locations. It is designed for indoor use only.
- Allow bulbs to cool completely before attempting to change them.
Package Contents
Carefully unpack your fixture and check that all parts are included. If any parts are missing or damaged, do not attempt to assemble or install the fixture. Contact customer service for assistance.
- 1 x Canarm ICW284A03ORB10 Port 3-Light Fixture
- Mounting Hardware (screws, wire nuts, mounting bracket)
- Instruction Manual
Note: GU10 bulbs are not included and must be purchased separately.
Specifications
| Feature | Specification |
|---|---|
| Brand | Canarm |
| Model Number | ICW284A03ORB10 |
| Product Dimensions (L x W x H) | 22.9 cm x 22.9 cm x 16.5 cm (9 in x 9 in x 6.5 in) |
| Material | Alloy Steel |
| Finish Type | Oil Rubbed Bronze (ORB) |
| Shade Material | Glass |
| Number of Light Sources | 3 |
| Bulb Type | GU10 (50W Max per bulb, not included) |
| Mounting Type | Wall Mount / Ceiling Mount (Dual Mount) |
| Fixture Type | Non-removable |
| UPC | 062345259697 |
Setup and Installation
Before you begin, ensure you have all necessary tools (screwdriver, wire strippers, electrical tape) and that the power supply is turned off at the circuit breaker.
- Prepare the Mounting Surface: Determine whether you will mount the fixture on a wall or ceiling. Ensure the electrical box is securely installed and accessible.
- Attach Mounting Bracket: Secure the mounting bracket to the electrical box using the provided screws. Ensure the bracket is firmly attached.
- Make Electrical Connections:
- Connect the bare copper ground wire from the fixture to the ground wire from the electrical box (usually bare copper or green) using a wire nut.
- Connect the white wire from the fixture to the white (neutral) wire from the electrical box using a wire nut.
- Connect the black wire from the fixture to the black (hot) wire from the electrical box using a wire nut.
- Ensure all connections are secure and no bare wire is exposed.
- Mount the Fixture: Carefully align the fixture with the mounting bracket and secure it with the provided screws.
- Install Bulbs: Insert three GU10 bulbs (not included) into the sockets. Ensure they are seated correctly.
- Restore Power: Turn the power back on at the main circuit breaker.
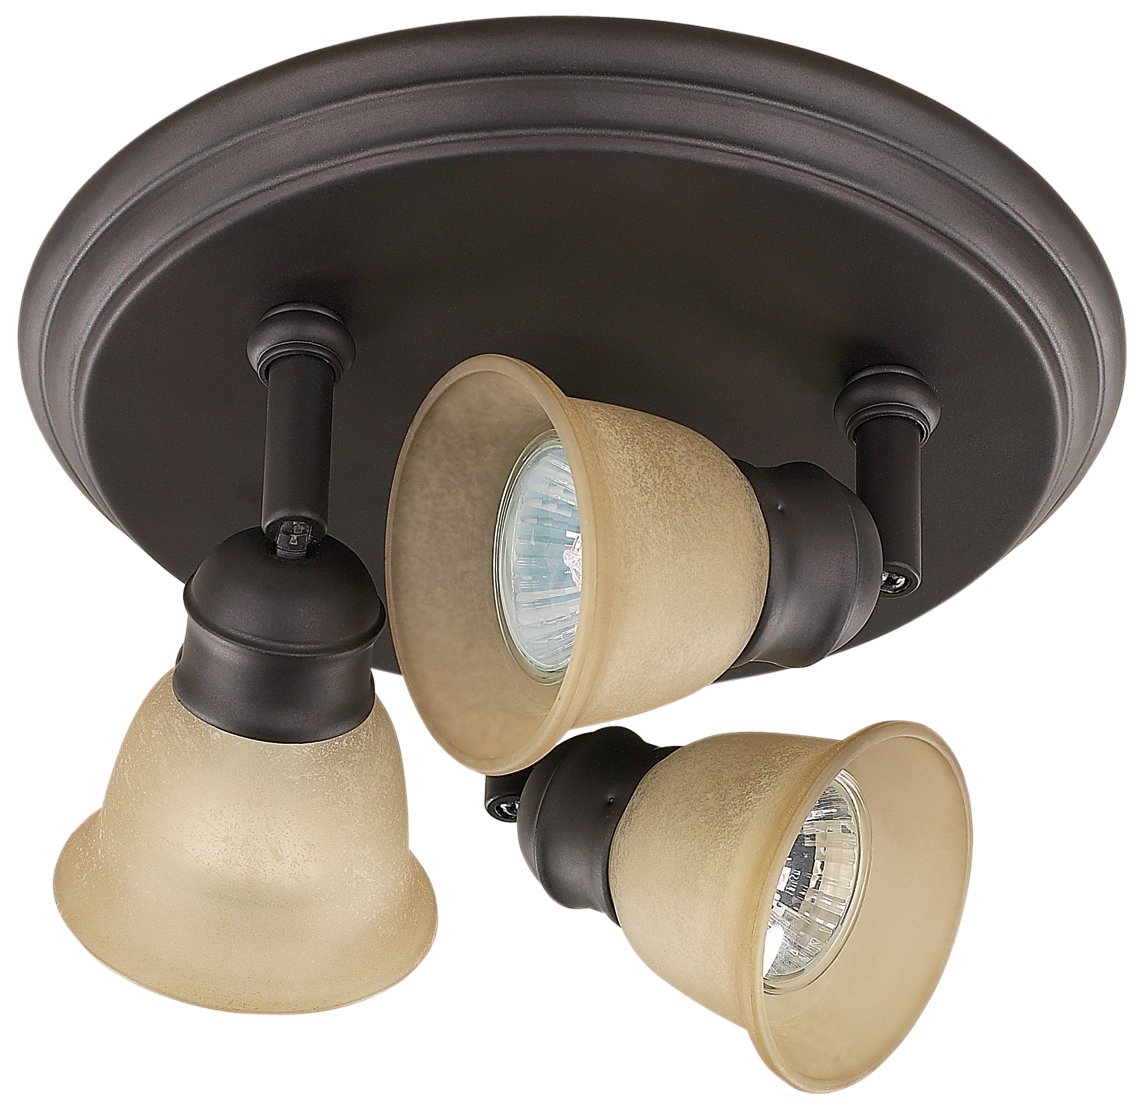
Image: The Canarm ICW284A03ORB10 Port 3-Light Fixture, featuring an oil rubbed bronze finish and three adjustable spotlights with painted glass shades, shown installed.
Operating Instructions
The Canarm ICW284A03ORB10 fixture is designed for simple operation.
- Turning On/Off: Operate the fixture using a standard wall switch connected to the electrical circuit.
- Adjusting Spotlights: Each of the three spotlights can be individually adjusted to direct light to your desired area. Gently pivot and rotate the spotlight heads to achieve the optimal lighting angle.
Maintenance
Regular maintenance will help preserve the appearance and functionality of your fixture.
- Cleaning: To clean the fixture, ensure the power is off and the fixture is cool. Wipe with a soft, dry cloth. Do not use abrasive cleaners, solvents, or polishes as they may damage the finish or glass.
- Bulb Replacement:
- Turn off the power at the circuit breaker.
- Allow the old bulb to cool completely before touching it.
- Carefully remove the old GU10 bulb by pushing it in and twisting counter-clockwise.
- Insert a new GU10 bulb by pushing it into the socket and twisting clockwise until secure.
- Restore power and test the new bulb.
Troubleshooting
If you experience issues with your fixture, refer to the following common problems and solutions:
| Problem | Possible Cause | Solution |
|---|---|---|
| Fixture does not light up | No power to the fixture Loose wiring connection Faulty bulb | Check circuit breaker and wall switch Turn off power, check wiring connections Replace bulb(s) |
| Lights flicker | Loose bulb Incorrect bulb type Loose wiring | Ensure bulbs are securely seated Verify bulbs are GU10 type and correct wattage Turn off power, check wiring connections |
| Bulbs burn out quickly | Incorrect bulb wattage Poor quality bulbs Voltage fluctuations | Use 50W GU10 bulbs or less Use high-quality bulbs Consult an electrician if voltage issues are suspected |
If these steps do not resolve the issue, please contact a qualified electrician or Canarm customer support.
Warranty and Support
Canarm products are manufactured to high standards and are backed by a commitment to quality. For specific warranty information, please refer to the documentation included with your purchase or visit the official Canarm website.
For technical assistance, replacement parts, or any questions regarding your Canarm ICW284A03ORB10 fixture, please contact Canarm customer support through their official channels.


