Introduction
This manual provides instructions for the safe and effective use of your Med-Fit 1 Dual Channel TENS Machine. Please read all instructions carefully before operating the device and retain this manual for future reference.
The Med-Fit 1 TENS machine is designed to provide temporary relief from pain associated with sore and aching muscles in the shoulder, waist, back, neck, upper extremities (arm), and lower extremities (leg) due to strain from exercise or normal household and work activities.
Package Contents
Upon opening the package, verify that all components are present:
- Med-Fit 1 Dual Channel TENS Machine
- Self-adhesive electrode pads (multiple pairs)
- Lead wires (2 sets)
- 2 AA batteries (included)
- Instruction Manual
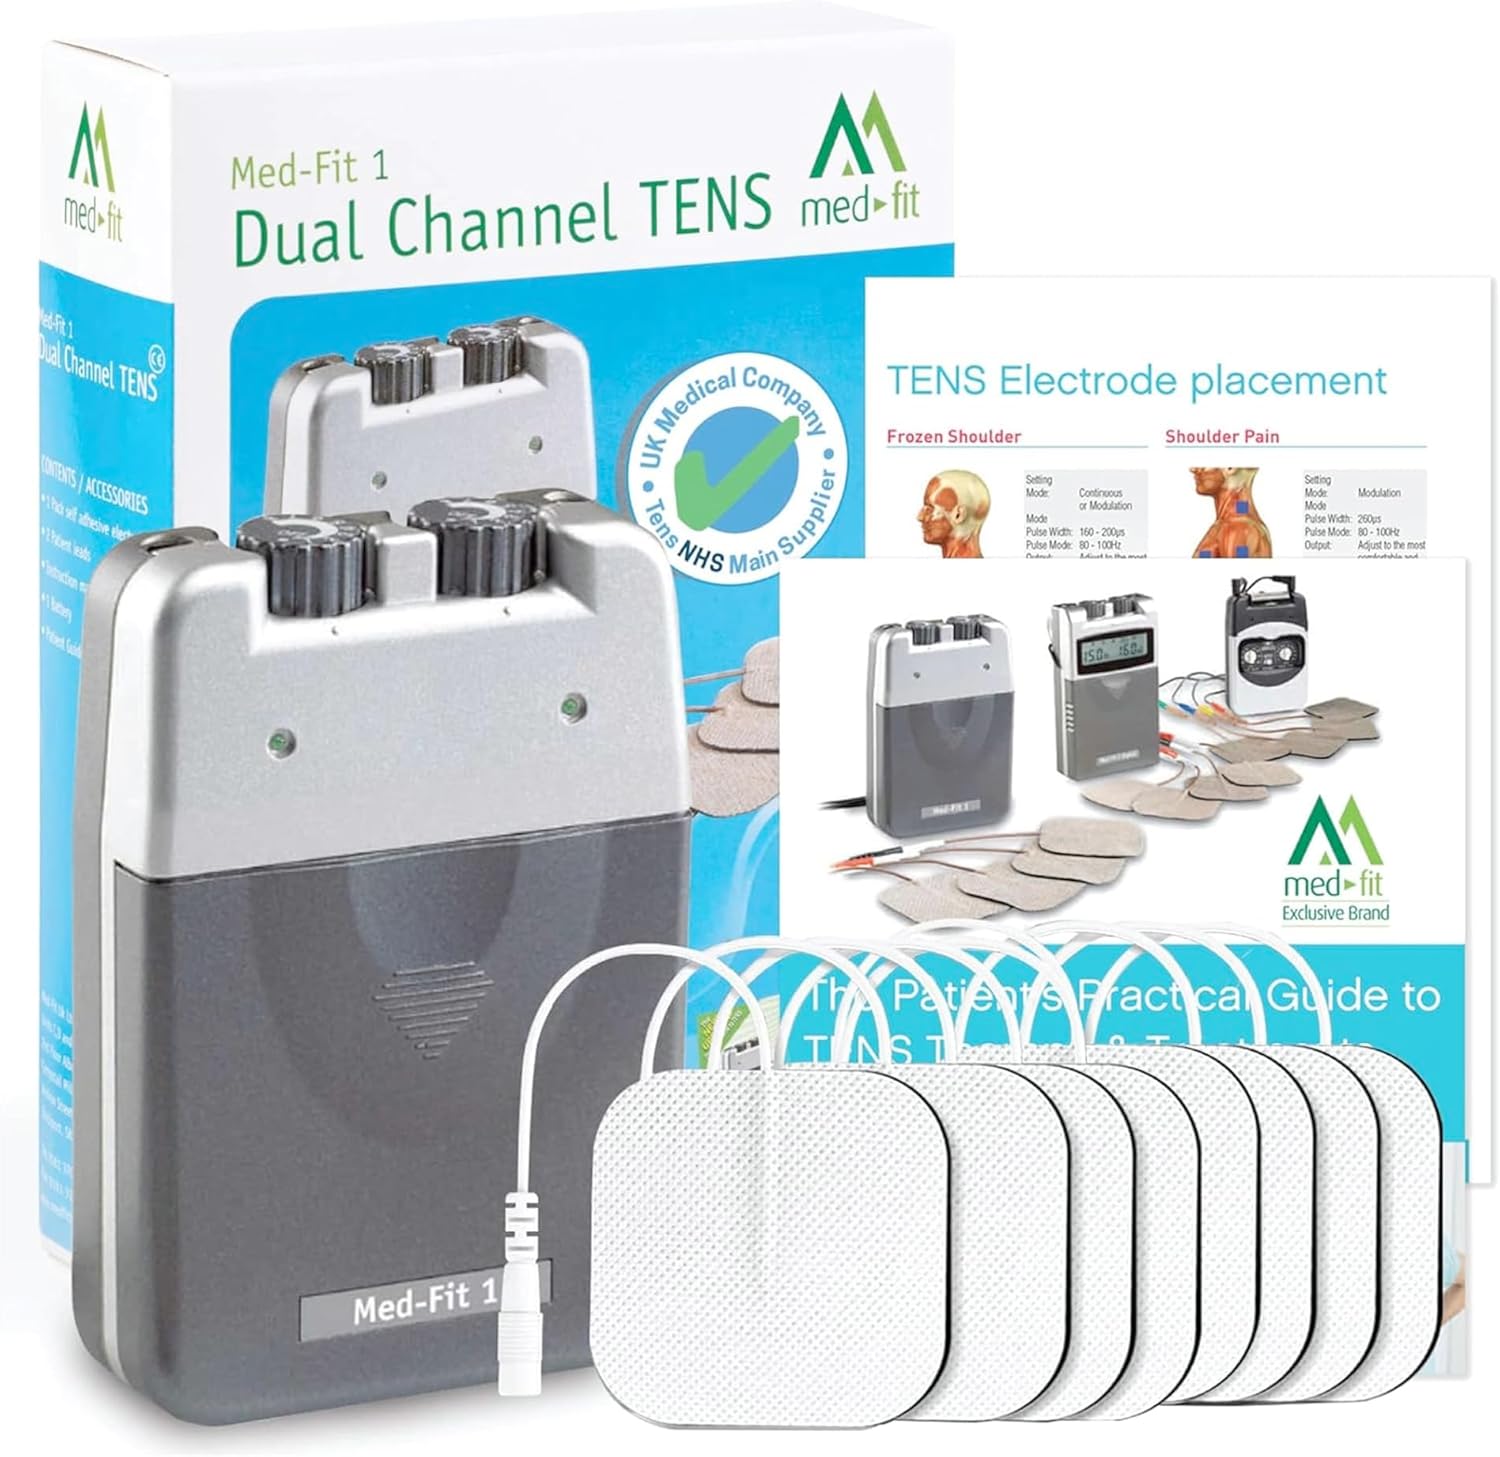
Image: Med-Fit 1 TENS machine with its retail packaging, electrode pads, and lead wires. This image illustrates the complete set of items typically found in the product package.
Device Features
The Med-Fit 1 TENS machine is a dual-channel device with adjustable settings for pulse width, pulse rate, and intensity. It offers multiple modes for pain relief.

Image: Diagram highlighting the key components of the Med-Fit 1 TENS machine, including lead connectors, intensity controls, mode selector, indicator lights, pulse width dial, and pulse rate dial.
- Lead Connector: Ports for connecting electrode lead wires.
- Intensity Control: Rotary dials to adjust the stimulation intensity for each channel.
- Mode Selector: Switch to select between different treatment modes (Constant, Modulation, Burst).
- Indicator Lights: Visual indicators for device operation.
- Pulse Width Dial: Adjusts the duration of each electrical pulse.
- Pulse Rate Dial: Adjusts the number of electrical pulses per second.
- Sturdy Clip: Located on the back for attaching the device to clothing.
Setup and Operation
1. Battery Installation
The device operates on 2 AA batteries. Ensure the batteries are correctly installed before use. Open the battery compartment on the back of the device, insert the 2 AA batteries, and close the compartment securely.
2. Connecting Electrodes
- Connect the lead wires to the electrode pads. The electrode pads feature 2mm pin connectors.
- Plug the lead wires into the output jacks on the top of the TENS unit.

Image: A close-up view of the self-adhesive electrode pads, showing the 2mm pin connectors and the multi-layer construction including hypoallergenic gel and conductive carbon.
3. Electrode Placement
Clean and dry the skin area where electrodes will be placed. Apply the self-adhesive electrode pads directly to the skin around the painful area. Ensure good contact for effective stimulation. Refer to the included electrode placement guide for common pain areas.
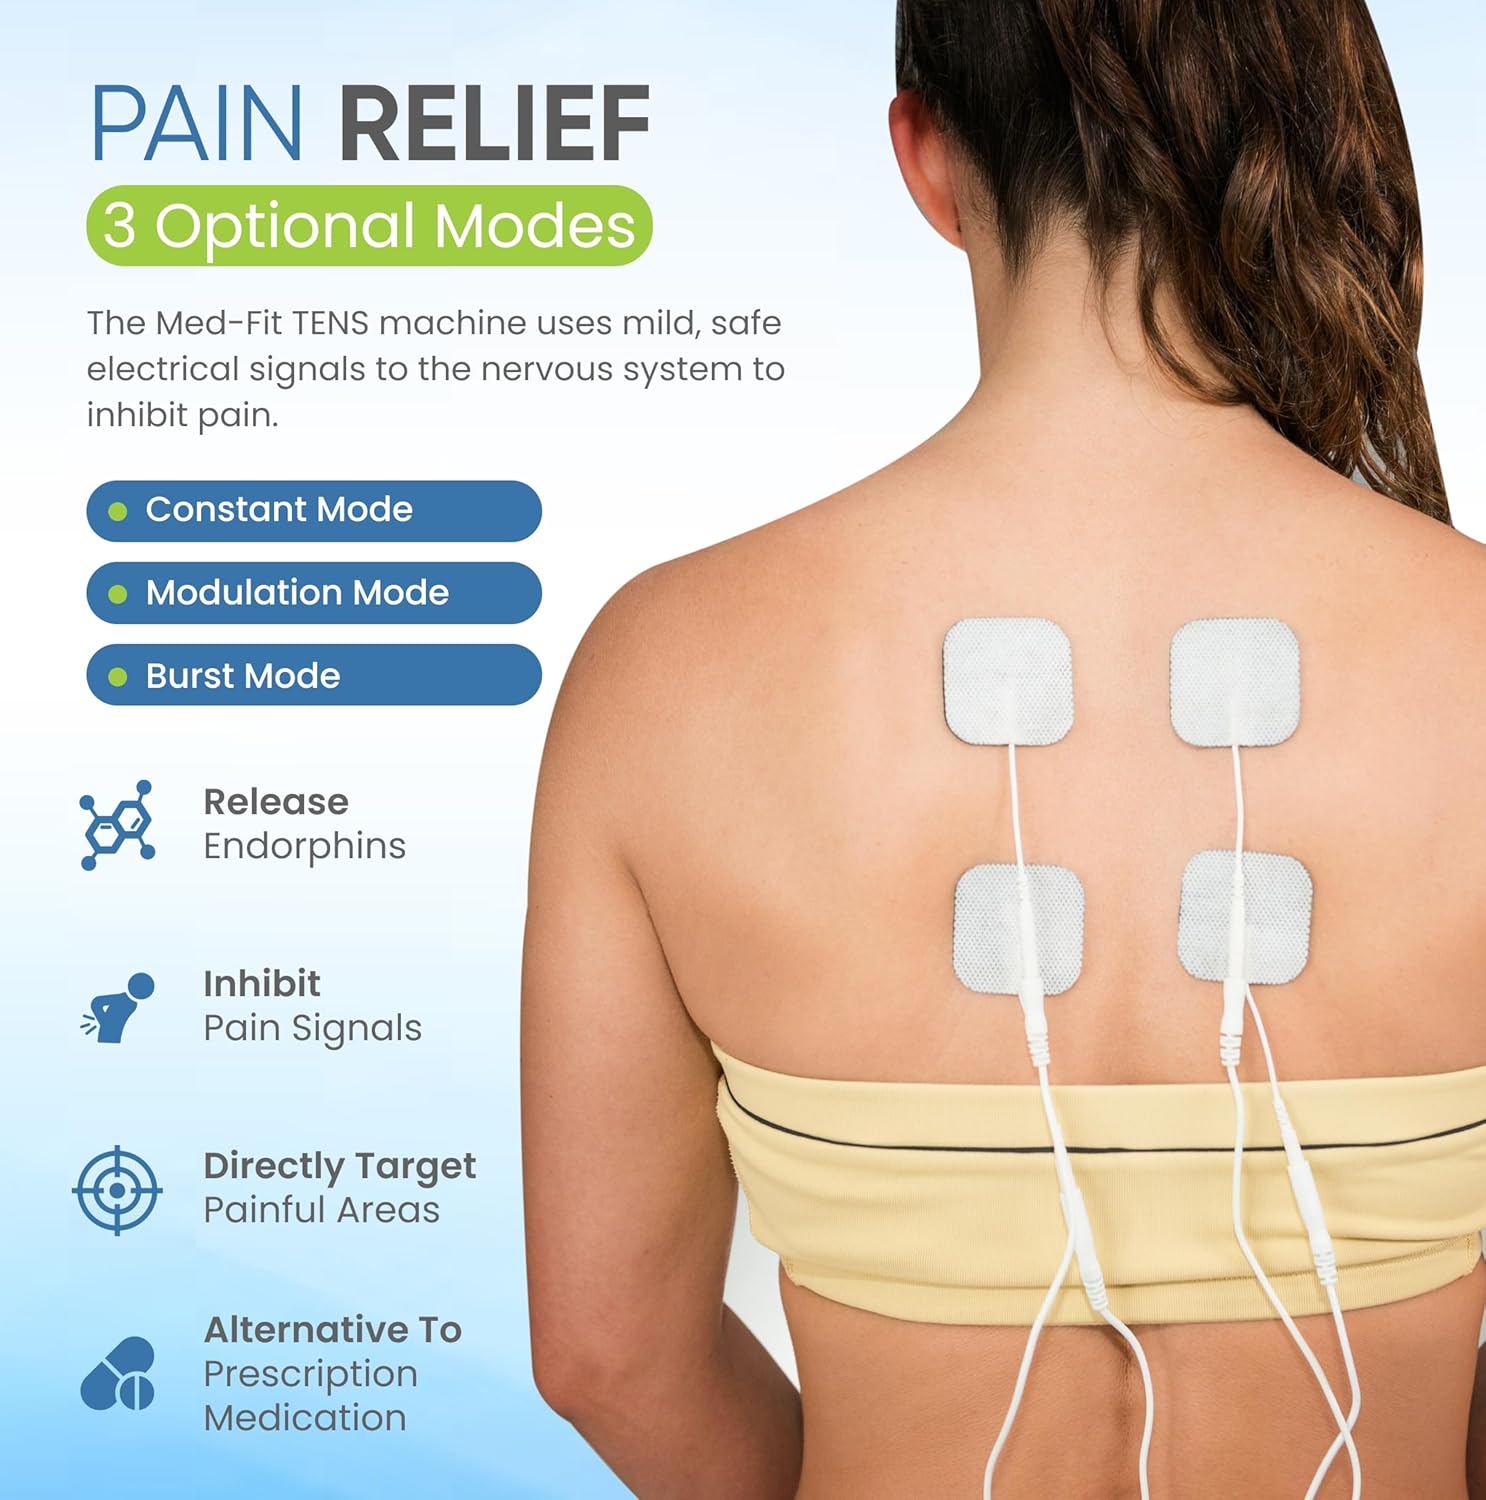
Image: A person's back with four electrode pads strategically placed to target pain. This demonstrates a typical setup for back pain relief using the TENS machine.

Image: A collage showing different electrode placements on various body parts, including the thigh, knee, and calf, illustrating how the TENS machine can be used for pain relief in multiple areas.
4. Selecting a Mode
The Med-Fit 1 offers three primary modes for pain relief:
- Constant Mode: Provides continuous electrical stimulation.
- Modulation Mode: Varies the pulse width and/or pulse rate to prevent adaptation.
- Burst Mode: Delivers short bursts of high-frequency stimulation.
Use the mode selector switch to choose the desired treatment mode. Consult a healthcare professional for guidance on the most suitable mode for your condition.
5. Adjusting Settings
Once the electrodes are in place and a mode is selected, slowly turn the intensity control dials clockwise to increase the stimulation. Adjust the pulse width and pulse rate dials as needed. Begin with low intensity and gradually increase until a comfortable, tingling sensation is felt. Avoid increasing intensity to a level that causes discomfort or muscle contraction.
Typical treatment sessions last 15-30 minutes, but duration may vary based on individual needs and professional advice.
Maintenance and Care
- Cleaning the Device: Wipe the TENS unit with a soft, damp cloth. Do not immerse the device in water or use abrasive cleaners.
- Electrode Care: After each use, place the self-adhesive electrodes back on their protective liner. Store them in a sealed bag to prolong their lifespan. Replace electrodes when they lose their adhesiveness or become dry.
- Storage: Store the device and accessories in a cool, dry place, away from direct sunlight and extreme temperatures.
- Battery Replacement: Replace the 2 AA batteries when the device's performance diminishes or indicator lights dim.
Troubleshooting
| Problem | Possible Cause | Solution |
|---|---|---|
| No sensation or weak stimulation |
|
|
| Skin irritation under electrodes |
|
|
| Device does not turn on |
|
|
Safety Information and Warnings
Important: Consult your doctor before using this device, especially if you have pre-existing medical conditions.
- Do not use if you have a pacemaker, implanted defibrillator, or other implanted metallic or electronic device.
- Do not use if you are pregnant.
- Do not use on areas of skin that are broken, irritated, or numb.
- Do not use over the carotid sinus nerves (front of the neck), on the head, or over the eyes.
- Keep out of reach of children.
- Discontinue use if you experience any adverse reactions and consult a healthcare professional.
- TENS is not a cure for pain, but a method for managing pain.

Image: A healthcare professional giving a thumbs-up gesture next to the Med-Fit 1 TENS machine and electrode pads, indicating professional recommendation. Note: Not suitable for use in pregnancy.
Specifications
| Brand | Med-Fit |
| Model Number | MED-FIT 1 |
| Dimensions (L x W x H) | 4 x 2 x 10 cm |
| Weight | 300 grams |
| Power Source | 2 AA Batteries (included) |
| Channels | Dual Channel |
| Manufacturer | HealthCentre |
Warranty and Support
For warranty information and customer support, please refer to the contact details provided with your purchase or visit the official Med-Fit website. Keep your proof of purchase for warranty claims.


