Introduction
This manual provides essential instructions for the safe and efficient operation, maintenance, and troubleshooting of your SINGER Tradition 2259 Portable Sewing Machine. Please read this manual thoroughly before using the machine to ensure proper function and to prevent damage.
Important Safety Instructions
When using an electrical appliance, basic safety precautions should always be followed, including the following:
- Always unplug the sewing machine from the electrical outlet immediately after using and before cleaning, removing covers, or making any user servicing adjustments.
- Do not allow to be used as a toy. Close attention is necessary when this appliance is used by or near children.
- Use this appliance only for its intended use as described in this manual. Use only attachments recommended by the manufacturer as contained in this manual.
- Never operate this appliance if it has a damaged cord or plug, if it is not working properly, if it has been dropped or damaged, or dropped into water.
- Never drop or insert any object into any opening.
- Do not use outdoors.
- Do not operate where aerosol (spray) products are being used or where oxygen is being administered.
- To disconnect, turn all controls to the off position, then remove plug from outlet.
- Keep fingers away from all moving parts. Special care is required around the sewing machine needle.
- Always use the proper needle plate. The wrong plate can cause the needle to break.
- Do not use bent needles.
- Do not pull or push fabric while stitching. This may deflect the needle causing it to break.
- Wear safety glasses.
Setup
Unpacking and Initial Inspection
Carefully remove the sewing machine from its packaging. Inspect the machine for any visible damage. Ensure all accessories listed in the packaging are present.
Power Connection
Connect the power cord to the machine and then to a suitable electrical outlet. Ensure the voltage matches your local power supply.
Threading the Machine
Follow the numbered guides on the machine for correct upper thread path. For bobbin winding and insertion, refer to the detailed steps below.
Video: This video demonstrates the process of threading the SINGER Tradition sewing machine, including winding and inserting the bobbin. It also highlights the stitch length and width adjustment dials.
Attaching the Free Arm
The accessory storage compartment can be removed to reveal the free arm, which is useful for sewing cuffs, collars, and other small, circular items. To remove, slide the compartment away from the machine. To reattach, align and slide it back into place until it clicks securely.
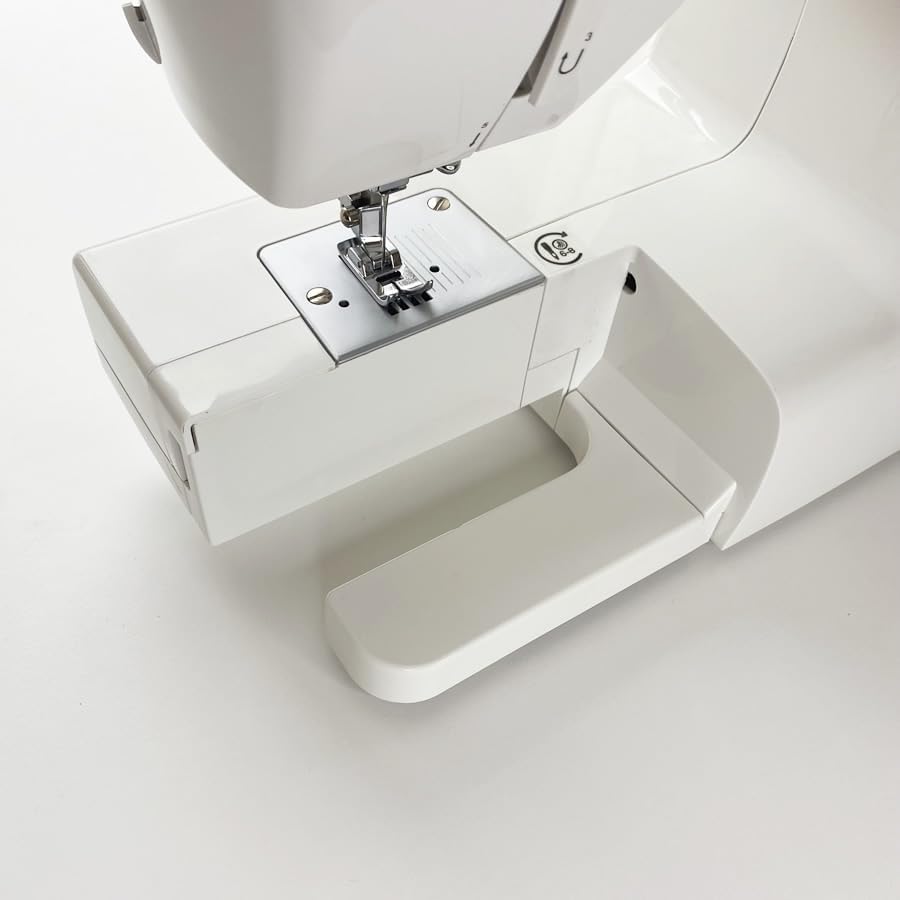
Image: The SINGER Tradition 2259 sewing machine with the free arm accessory compartment detached, revealing the narrow free arm for sewing cylindrical items like sleeves and pant hems.
Operating Instructions
Stitch Selection
Turn the stitch selector dial to choose from the 19 built-in stitches. Each stitch type is indicated on the dial.
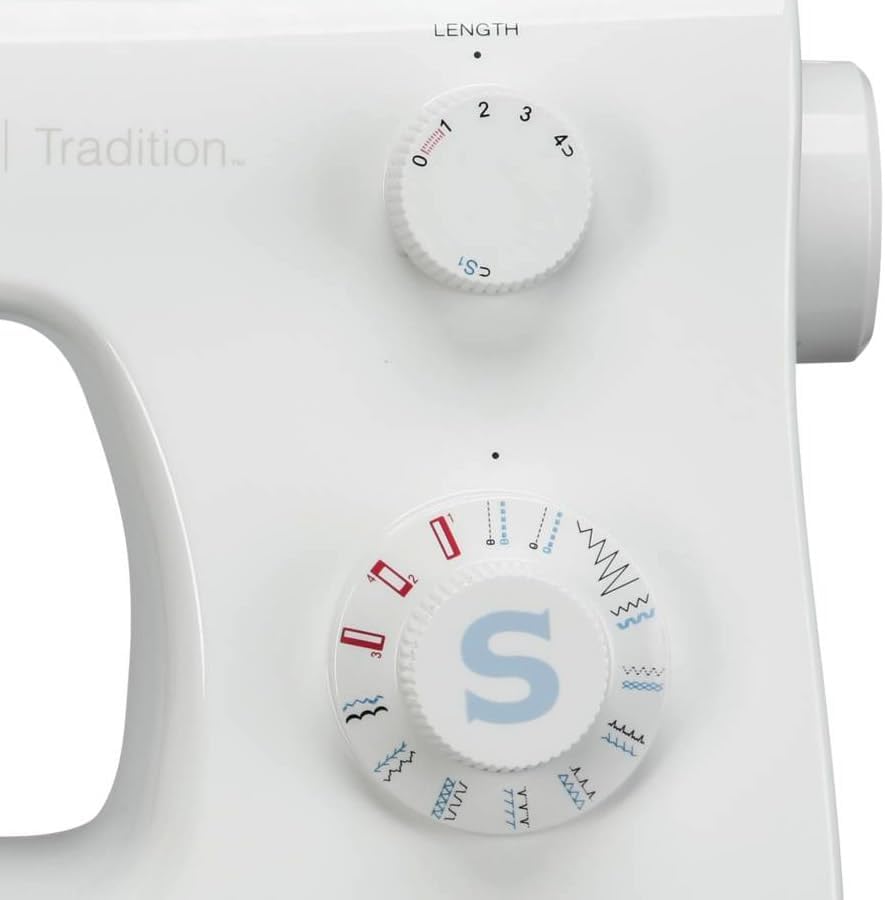
Image: A close-up view of the stitch selection dial on the SINGER Tradition 2259, displaying different stitch patterns and the SINGER logo.
Adjusting Stitch Length and Width
Use the length dial to adjust the stitch length and the width dial to adjust the stitch width according to your project requirements. Refer to the stitch chart in the full manual for recommended settings.
Video: This video illustrates how to adjust the stitch length and width on the SINGER Tradition sewing machine, demonstrating the effect on the sewn fabric.

Image: A top-down view of the SINGER Tradition 2259 sewing machine, highlighting the dials for tension, stitch width, and stitch length.
Reverse Stitching
To reinforce stitches, press and hold the reverse stitch lever. The machine will sew in reverse as long as the lever is held down.
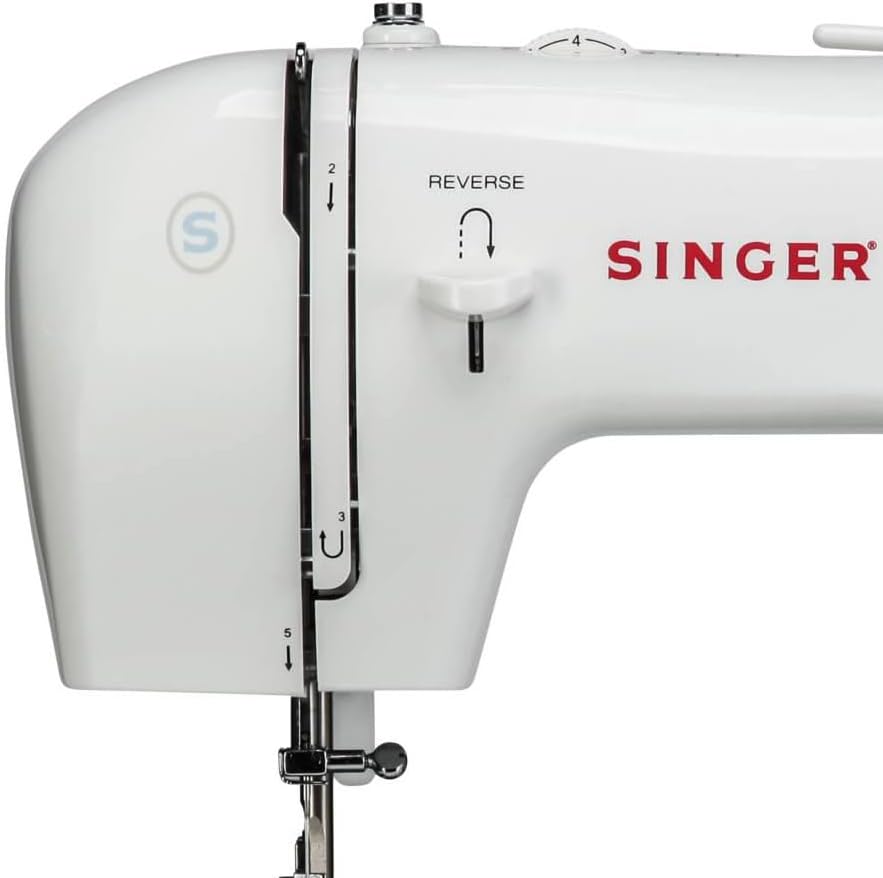
Image: A side view of the SINGER Tradition 2259 sewing machine, illustrating the reverse stitch lever and the upper threading path.
Using the Presser Foot Lifter
The high presser foot lifter allows for easy positioning of multiple layers of thick fabric. Raise the presser foot to its highest position for maximum clearance.
Maintenance
Cleaning the Machine
Regularly clean lint and dust from the bobbin area and feed dogs using the provided lint brush. Ensure the machine is unplugged before cleaning.
Needle Replacement
Replace needles frequently, especially when they become dull or bent, to prevent skipped stitches and fabric damage. Use SINGER brand needles for optimal performance.
Lubrication
Refer to the complete instruction manual for specific lubrication points and recommended lubricants. Over-lubrication can cause issues.
Troubleshooting
| Problem | Possible Cause | Solution |
|---|---|---|
| Skipped Stitches | Incorrect needle, bent needle, improper threading. | Replace needle with correct type/size, re-thread machine correctly. |
| Thread Breaking | Incorrect tension, poor quality thread, needle incorrectly inserted. | Adjust tension, use good quality thread, re-insert needle correctly. |
| Fabric Puckering | Incorrect tension, wrong stitch length for fabric. | Adjust tension, select appropriate stitch length. |
For more detailed troubleshooting, please consult the full instruction manual or contact SINGER customer support.
Specifications
- Model: 2259
- Product Dimensions: 15 x 6.25 x 12 inches
- Item Weight: 13.6 pounds
- Built-in Stitches: 19
- Buttonhole Type: 4-step
- Frame: Heavy-duty metal
- Power Source: Electric
- Color: White
- Material: Metal
Included Accessories
The SINGER Tradition 2259 comes with a variety of accessories to support your sewing projects:
- All-Purpose Foot
- Buttonhole Foot
- Button Sewing Foot
- Zipper Foot
- Thread Spool Caps (2)
- Screwdriver
- Edge / Quilting Guide
- Bobbins (Class 15)
- Needles
- Seam Ripper/Lint Brush
- Foot Pedal
- Power Cord
- Instruction Manual

Image: The SINGER Tradition 2259 sewing machine displayed with its included accessories, such as presser feet, bobbins, and needles, ready for use.
Warranty Information
The SINGER Tradition 2259 sewing machine includes a 25-year limited warranty. This warranty covers:
- 25 years: Sewing machine head
- 2 years: Motor and electronic components
- 90 days: Belts, bulbs, and attachments
Please retain your proof of purchase for warranty claims. For full terms and conditions, refer to the complete warranty document included with your product.
Customer Support
For further assistance, technical support, or to purchase replacement parts, please visit the official SINGER website or contact their customer service department. Contact information can be found in the full instruction manual.


