
Burndy YS34-L
Contents
Burndy YS34-L Hylink Splice Instruction Manual
Model: YS34-L
1. Product Overview
The Burndy YS34-L Hylink Splice is a high-quality copper compression connector designed for creating reliable and durable electrical connections. This standard barrel splice is specifically engineered for use with 500 kcmil AWG conductors and is suitable for systems ranging from 600 Volts up to 35 kV. Its compact design makes it ideal for applications where space is limited, while still providing ample barrel length for proper crimping.
Key features include:
- Standard barrel length for versatile applications.
- Four (4) center conductor stops to ensure precise and proper conductor insertion.
- UL listed and CSA certified, ensuring compliance with safety and performance standards.
- Constructed from copper for excellent conductivity.
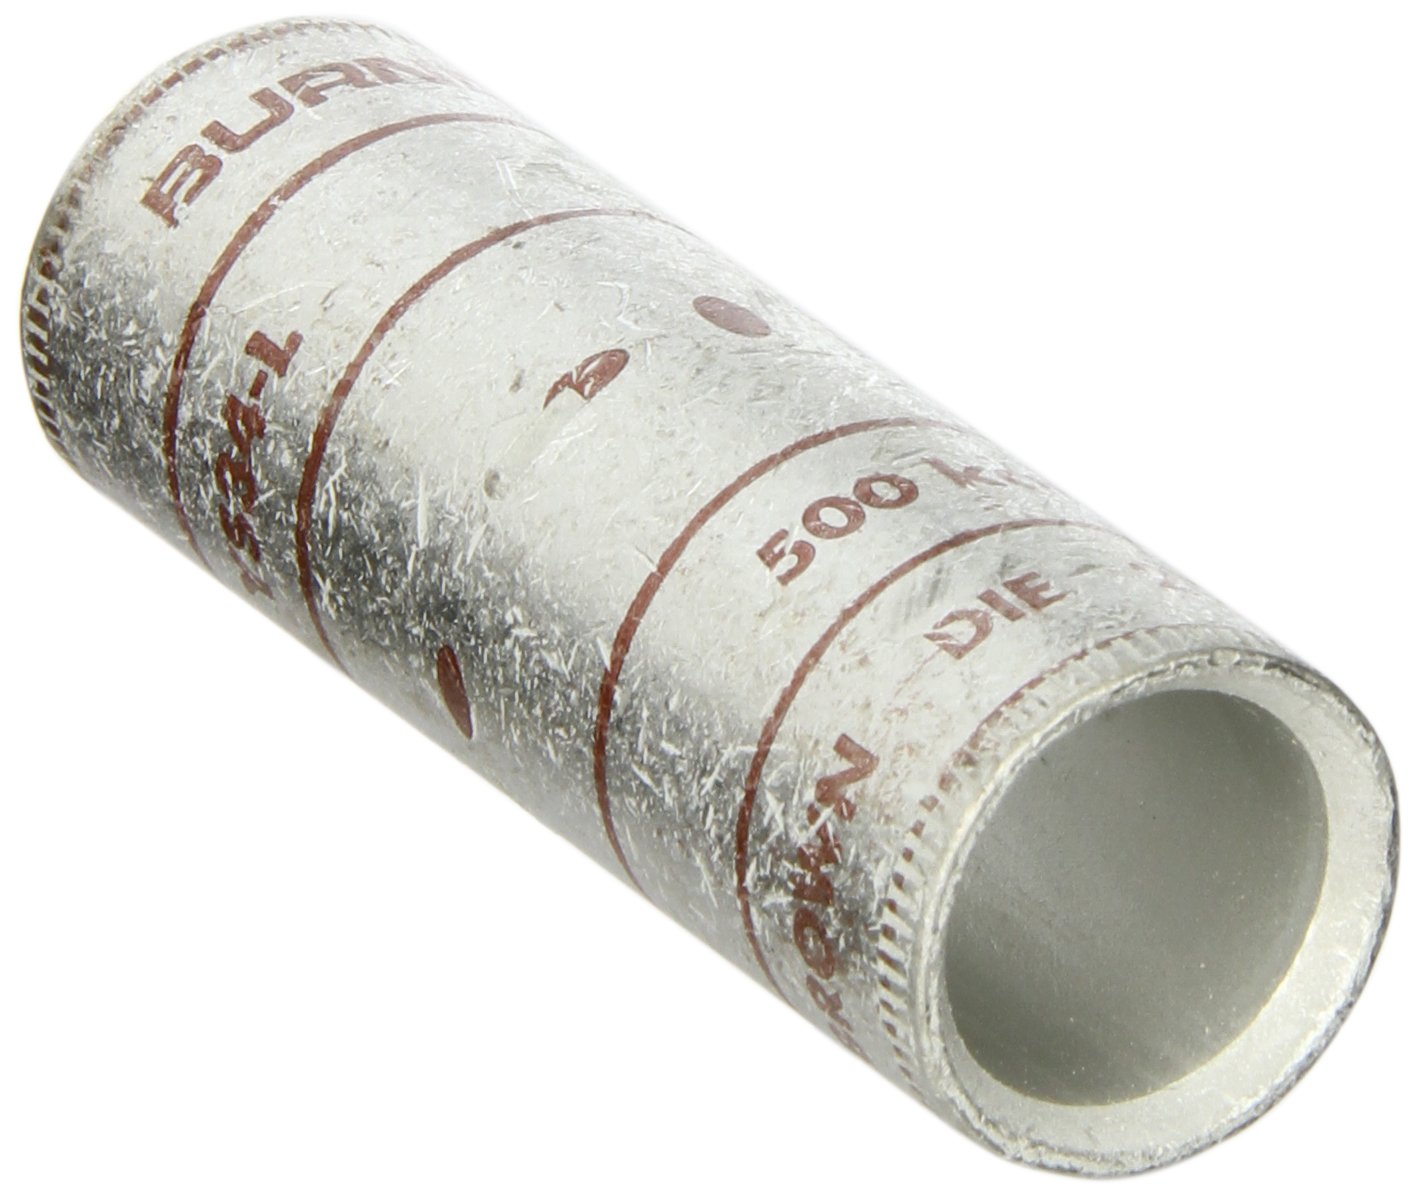
Figure 1: Burndy YS34-L Hylink Splice. This image displays the cylindrical copper compression splice with visible markings for conductor size and brand.
2. Safety Information
Always adhere to local electrical codes and safety regulations when installing electrical connectors. Failure to do so may result in serious injury or property damage.
- Ensure power is disconnected and locked out before beginning any work on electrical systems.
- Wear appropriate personal protective equipment (PPE), including safety glasses, gloves, and insulated tools.
- Use only the correct crimping tool and die set recommended by Burndy for 500 kcmil copper connectors.
- Inspect the splice and conductors for any damage before installation.
3. Installation (Setup & Operating)
Proper installation is crucial for the performance and longevity of the Burndy YS34-L Hylink Splice.
3.1 Required Tools and Materials
- Burndy YS34-L Hylink Splice
- 500 kcmil AWG Copper Conductors
- Appropriate Crimping Tool (e.g., hydraulic or mechanical crimper)
- Correct Crimping Die Set for 500 kcmil copper connectors
- Wire Stripper/Cutter
- Wire Brush (for cleaning conductors, if necessary)
3.2 Installation Steps
- Prepare Conductors: Carefully strip 1-7/16 inches (approximately 36.5 mm) of insulation from the ends of both 500 kcmil copper conductors to be spliced. Ensure the conductor strands are clean and free of burrs or oxidation.
- Insert First Conductor: Insert one stripped conductor into one end of the YS34-L splice until it firmly contacts the center conductor stop. The center stop ensures proper insertion depth and equal distribution of the splice barrel.
- Crimp First End: Position the appropriate crimping die over the barrel of the splice, aligning it with the designated crimp marks (if present) or following the manufacturer's crimping sequence. Perform the required number of crimps according to the crimping tool and die instructions. Ensure each crimp is complete and secure.
- Insert Second Conductor: Insert the second stripped conductor into the opposite end of the YS34-L splice until it also firmly contacts the center conductor stop.
- Crimp Second End: Repeat the crimping process for the second end of the splice, ensuring all crimps are properly made and the connection is secure.
- Inspect Connection: After crimping, visually inspect the entire splice for proper crimp formation, absence of cracks, and secure conductor retention. The crimped connection should be uniform and tight.
4. Maintenance
The Burndy YS34-L Hylink Splice is designed to provide a permanent, maintenance-free electrical connection once properly installed. No routine maintenance is required for the splice itself.
However, as part of a comprehensive electrical system maintenance program, it is recommended to periodically inspect the connection point for any signs of:
- Corrosion or oxidation
- Physical damage or deformation
- Overheating (discoloration of insulation or conductor)
- Loose connections (though unlikely with proper crimping)
Any issues identified should be addressed by a qualified electrician.
5. Troubleshooting
While the Burndy YS34-L Hylink Splice is a straightforward component, issues can arise from improper installation. Here are some common problems and their solutions:
| Problem | Possible Cause | Solution |
|---|---|---|
| Conductor will not fully insert into splice. | Incorrect conductor size; burrs on conductor strands; conductor not straightened. | Verify conductor is 500 kcmil AWG. Remove any burrs. Straighten conductor end. |
| Crimp appears loose or incomplete. | Incorrect crimping tool or die; insufficient crimping force; improper crimping sequence. | Ensure correct Burndy crimping tool and die for 500 kcmil copper are used. Apply full crimping force. Follow tool's crimping instructions. Replace splice if crimp is compromised. |
| Splice shows signs of overheating after installation. | Poor electrical connection due to improper crimp; incorrect conductor preparation (e.g., oxidation). | Disconnect power immediately. Inspect and re-crimp with a new splice if necessary, ensuring proper conductor cleaning and crimping technique. Consult a qualified electrician. |
6. Specifications
Detailed specifications for the Burndy YS34-L Hylink Splice:
| Specification | Value |
|---|---|
| Model Number | YS34-L |
| Conductor Size | 500 kcmil AWG |
| Length | 3.15 inches |
| Voltage Rating | 600 Volts to 35 kV |
| Temperature Rating | 90 degrees C |
| Material | Copper |
| Insulation Material | Non-Insulated |
| Connector Type | Crimp |
| Wire Strip Length | 1-7/16 inches |
| Certifications | UL listed, CSA certified |
| Color | Brown (marking) |
| Package Dimensions | 5 x 5 x 1 inches |
| Item Weight | 4.96 ounces |
7. Warranty and Support
Specific warranty details for the Burndy YS34-L Hylink Splice are not provided within this instruction manual. For information regarding product warranty, technical support, or further assistance, please contact Burndy directly through their official website or customer service channels.
It is recommended to retain your purchase receipt for any warranty claims.
Documents and downloads
Ask a question about this manual
Ask about setup, troubleshooting, compatibility, parts, safety, or missing instructions. Manuals+ will review the question and use this page’s manual context to help answer it.