1. Introduction
Welcome to the user manual for your HP EliteBook 2560p laptop. This document provides essential information for setting up, operating, maintaining, and troubleshooting your device. Please read this manual thoroughly to ensure proper use and to maximize the lifespan of your laptop.
2. Safety Information
To prevent injury, damage to the product, or loss of data, observe the following safety precautions:
- Use only the power adapter supplied with your laptop.
- Do not expose the laptop to extreme temperatures, humidity, or direct sunlight.
- Avoid placing heavy objects on the laptop.
- Keep liquids away from the device.
- Do not attempt to disassemble or repair the laptop yourself. Refer to qualified service personnel.
- Ensure proper ventilation to prevent overheating.
3. Package Contents
Verify that all items are present in your package:
- HP EliteBook 2560p Laptop
- AC Power Adapter and Power Cord
- Battery Pack
- Documentation (this manual, warranty information)
4. Product Overview
Familiarize yourself with the components of your HP EliteBook 2560p.
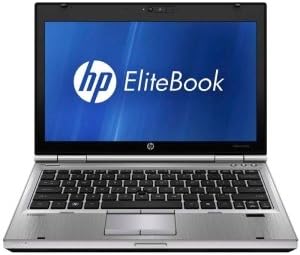
Figure 4.1: Front view of the HP EliteBook 2560p laptop. This image shows the laptop open, revealing the 12.5-inch display, keyboard, and touchpad. The screen displays the "HP EliteBook" logo.
4.1. Front and Top Components
- 12.5-inch HD Anti-Glare LED Display: For visual output.
- Keyboard: Standard QWERTY layout for text input.
- Touchpad: For cursor control and navigation.
- Webcam: Integrated for video conferencing and imaging.
- Fingerprint Reader (FPR): For enhanced security.
4.2. Side and Rear Components
- USB 2.0 Ports: For connecting peripheral devices.
- DVD+/-RW Optical Drive: For reading and writing CDs/DVDs.
- Power Connector: For connecting the AC adapter.
- Ethernet Port: For wired network connection.
- Display Ports: For connecting external monitors.
- Audio Jacks: For headphones and microphone.
5. Setup
5.1. Connecting the Power Adapter
- Connect the AC power cord to the AC adapter.
- Plug the AC adapter into a grounded electrical outlet.
- Connect the DC output plug of the AC adapter to the power connector on your laptop.
- Allow the battery to charge fully before initial use, or use the laptop while connected to power.
5.2. Initial Boot-Up and Operating System Setup
- Open the laptop lid.
- Press the power button, typically located above the keyboard.
- Follow the on-screen instructions to complete the Windows 7 Professional setup, including language selection, user account creation, and network configuration.
6. Operating Instructions
6.1. Powering On and Off
- To Power On: Press the power button.
- To Shut Down: Click the Start button, then select "Shut Down."
- To Restart: Click the Start button, then select "Restart."
- To Sleep: Close the lid or click the Start button and select "Sleep."
6.2. Using the Touchpad
The touchpad allows you to control the cursor on the screen.
- Tap: Single tap to click, double tap to double-click.
- Drag: Tap and hold, then drag your finger across the touchpad.
- Scroll: Use two fingers to scroll vertically or horizontally.
6.3. Connecting to a Wireless Network (Wi-Fi)
- Click the network icon in the system tray (bottom-right corner of the screen).
- Select your desired Wi-Fi network from the list.
- Click "Connect" and enter the network security key (password) if prompted.
6.4. Using the Optical Drive
The integrated DVD+/-RW drive allows you to read and write CDs and DVDs.
- Press the eject button on the drive to open the tray.
- Place a disc gently onto the tray, label side up.
- Push the tray back into the laptop until it clicks shut.
7. Maintenance
7.1. Cleaning Your Laptop
- Always power off and unplug the laptop before cleaning.
- Use a soft, lint-free cloth slightly dampened with water or a specialized screen cleaner for the display.
- For the keyboard and chassis, use a soft cloth. Avoid harsh chemicals.
- Use compressed air to clear dust from vents and keyboard crevices.
7.2. Battery Care
- Avoid fully discharging the battery frequently.
- Store the laptop in a cool, dry place if not used for extended periods.
- If the battery is removable, ensure it is securely seated.
7.3. Software Updates
Regularly check for and install operating system updates (Windows Update) and driver updates from the HP support website to ensure optimal performance and security.
8. Troubleshooting
| Problem | Possible Solution |
|---|---|
| Laptop does not power on. | Ensure the AC adapter is securely connected and the power outlet is functional. Check battery charge. |
| No Wi-Fi connection. | Verify Wi-Fi is enabled (check physical switch or function key). Restart router and laptop. Re-enter Wi-Fi password. |
| Screen is blank. | Connect an external monitor to check if the display is faulty. Adjust brightness settings. Restart the laptop. |
| System is slow or unresponsive. | Close unnecessary applications. Check for malware. Ensure sufficient free disk space. Restart the laptop. |
For more complex issues, refer to the HP support website or contact customer service.
9. Specifications
| Feature | Detail |
|---|---|
| Model | HP EliteBook 2560p (LJ467UT#ABA) |
| Processor | Intel Core i5-2520M |
| Display | 12.5-inch HD Anti-Glare LED (1366 x 768 pixels) |
| RAM | 4 GB DDR3 (1333 MHz) |
| Storage | 320 GB HDD |
| Optical Drive | DVD+/-RW |
| Graphics | Integrated Intel Graphics |
| Wireless | 802.11a/b/g/n, Bluetooth |
| Ports | USB 2.0 (x1), DisplayPort, VGA, Ethernet, Audio Jacks |
| Operating System | Windows 7 Professional 64-bit |
| Webcam | Integrated Webcam |
| Security | Fingerprint Reader |
| Battery Life | Up to 8.5 hours (average) |
| Dimensions (LxWxH) | 16.5 x 13.5 x 4.5 inches |
| Weight | 6.8 pounds |
10. Warranty and Support
For information regarding your product's warranty, please refer to the warranty document included with your purchase or visit the official HP support website.
HP provides various support resources, including online documentation, driver downloads, and customer service contact options.
- HP Support Website: www.hp.com/support
- Contact Support: Refer to the HP website for regional contact numbers and chat options.