
Nostalgia PCM805RETRORED
Nostalgia Cotton Candy Machine - Retro Red (Model PCM805RETRORED) Instruction Manual
Your guide to operating and maintaining your Nostalgia Cotton Candy Machine.
1. Introduction
This manual provides essential instructions for the safe and efficient operation of your Nostalgia Retro Red Cotton Candy Machine, Model PCM805RETRORED. Please read all instructions carefully before first use to ensure proper function and longevity of the appliance.

Image: The Nostalgia Retro Red Cotton Candy Machine, showcasing its classic design and components.
2. Important Safeguards
When using electrical appliances, basic safety precautions should always be followed, including:
- Read all instructions before operating the appliance.
- Do not touch hot surfaces. Use handles or knobs.
- To protect against electrical shock, do not immerse cord, plug, or any part of the unit in water or other liquids.
- Close supervision is necessary when any appliance is used by or near children.
- Unplug from outlet when not in use and before cleaning. Allow to cool before putting on or taking off parts.
- Do not operate any appliance with a damaged cord or plug, or after the appliance malfunctions or has been damaged in any manner.
- The use of accessory attachments not recommended by the appliance manufacturer may cause injuries.
- Do not use outdoors.
- Do not let the cord hang over the edge of a table or counter, or touch hot surfaces.
- Do not place on or near a hot gas or electric burner, or in a heated oven.
- Extreme caution must be used when moving an appliance containing hot oil or other hot liquids.
- Do not use the appliance for other than intended use.
3. Parts and Assembly
Before assembly, ensure all parts are present and undamaged. The unit includes the following components:
- Main Unit (Base with Motor)
- Extractor Head
- Clear Rim Guard
- Bowl
- 2 Reusable Cones
- 1 Sugar Scoop
Assembly Steps:
- Place the main unit on a stable, level surface.
- Attach the bowl securely to the main unit.
- Place the extractor head onto the center spindle of the main unit. Ensure it is seated correctly.
- Position the clear rim guard over the bowl, ensuring it fits snugly.

Image: The cotton candy machine with its included accessories: two reusable cones and a sugar scoop.
4. How to Operate
Follow these steps to create cotton candy:
- Preparation: Ensure the unit is clean and properly assembled. Place the unit on a stable, heat-resistant surface.
- Pre-heating: Plug in the machine and turn it on. Allow the unit to warm up for approximately 10 minutes. This is crucial for optimal performance.
- Adding Sugar: Once pre-heated, turn the unit off. Using the included sugar scoop, add one scoop of flossing sugar or two crushed hard candies directly into the center extractor head. Do not overfill.
- Making Cotton Candy: Turn the unit back on. The extractor head will begin to spin, and sugar strands will start to form.
- Collecting Cotton Candy: Hold a reusable cone (or paper cone/chopstick) horizontally over the clear rim guard, just above the spinning sugar. Rotate the cone slowly to catch the cotton candy strands as they emerge. Continue rotating and gathering until the desired amount is collected.
- Repeat: For additional servings, turn the unit off, add more sugar, and repeat the process.
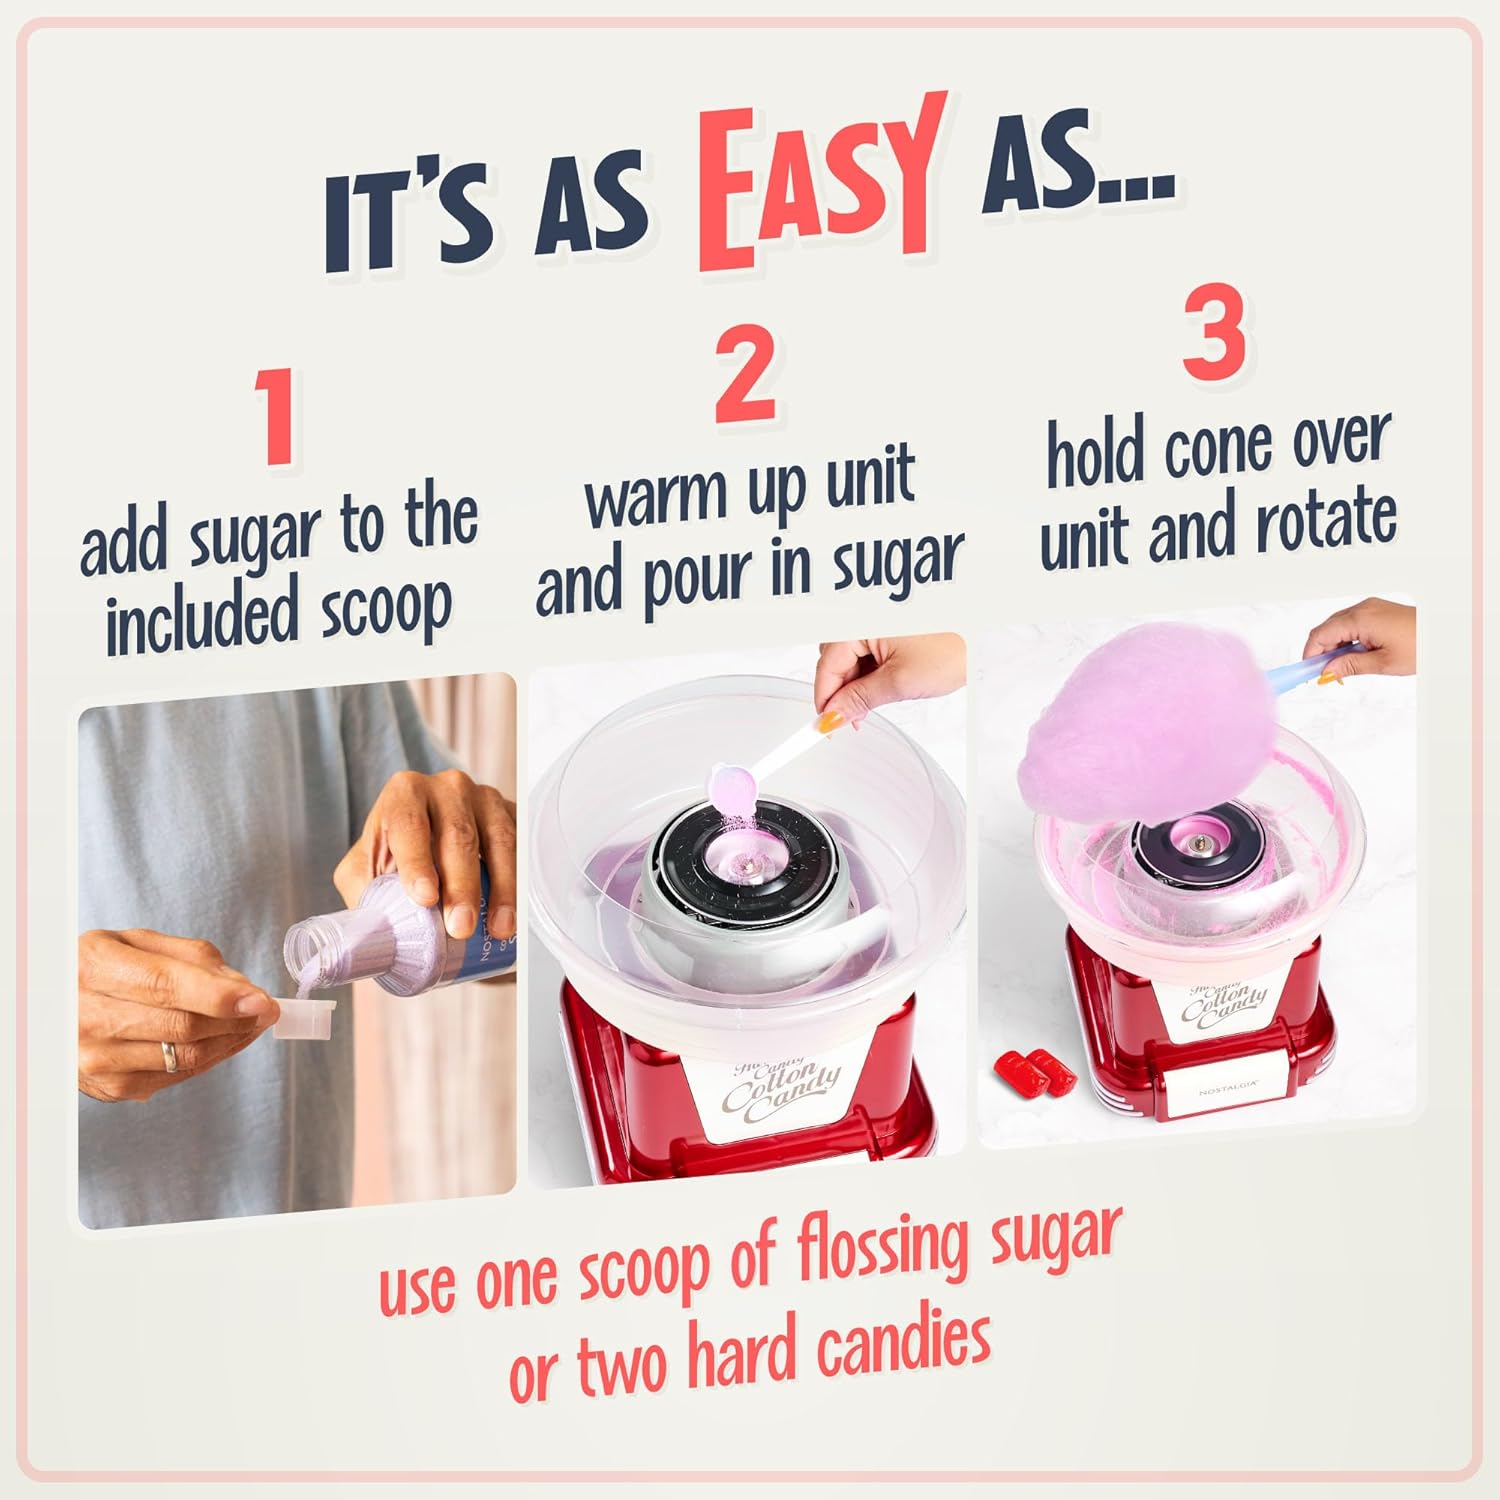
Image: Visual guide demonstrating the three main steps for making cotton candy: adding sugar, warming the unit, and collecting the floss.
Sugar and Candy Options:
This machine is versatile and can use various types of sugar:
- Flossing Sugar: Specifically designed for cotton candy machines, providing the best results.
- Hard Candies: Most hard candies can be used. Crush larger candies into smaller pieces for better spinning. Avoid chewy or gummy candies.
- Sugar-Free Candies: Some sugar-free hard candies can also be used, following the same crushing guidelines.

Image: Different types of sugar and candy suitable for use with the machine, including flossing sugar, hard candies, and sugar-free options.
5. Cleaning and Maintenance
Regular cleaning ensures the longevity and hygienic operation of your cotton candy machine.
- Unplug and Cool: Always unplug the unit from the power outlet and allow it to cool completely before cleaning.
- Disassembly: Carefully remove the clear rim guard, bowl, and extractor head from the main unit.
- Cleaning Components: The clear rim guard, bowl, and reusable cones can be washed in warm, soapy water. Rinse thoroughly and dry. For stubborn sugar residue, soaking in hot water can help dissolve it.
- Extractor Head: The extractor head can be soaked in hot water to dissolve hardened sugar. It may take 10-15 minutes to fully dissolve all residue. Ensure all sugar is removed from the internal components.
- Main Unit: Wipe the exterior of the main unit with a damp cloth. Do not immerse the main unit in water or any other liquid.
- Storage: Once all parts are clean and dry, reassemble the unit or store components in a safe, dry place.
6. Troubleshooting
If you encounter issues with your cotton candy machine, refer to the following common problems and solutions:
| Problem | Possible Cause | Solution |
|---|---|---|
| No cotton candy produced or very little. | Unit not sufficiently pre-heated. Insufficient sugar. Hard candy not crushed enough. | Ensure unit pre-heats for the full 10 minutes. Add the recommended amount of sugar. Crush hard candies into smaller pieces before adding. |
| Cotton candy is brittle or doesn't stick to cones. | Humidity in the air. Incorrect cone material. | Operate in a low-humidity environment. Try using paper cones or lightly moisten reusable cones with a tiny amount of water or syrup to help the floss adhere. |
| Sugar sprays out or collects on the bowl walls. | Normal operation (some residue is expected). Overfilling the extractor head. | This is common; some sugar will collect. Ensure you are not adding more than one scoop of flossing sugar or two hard candies at a time. Consider operating outdoors if concerned about stickiness. |
| Extractor head vibrates or spins unevenly. | Unevenly distributed sugar or candy. | Ensure sugar or crushed candy is evenly placed in the extractor head. If using hard candy, crush it finely to avoid large pieces causing imbalance. |
7. Specifications
- Model Number: PCM805RETRORED
- Product Dimensions: 11 x 11 x 12 inches
- Item Weight: 3.54 pounds
- Manufacturer: Emgee (Nostalgia)
- Power: Standard household electrical outlet (details not specified, assume 120V AC)

Image: The Nostalgia Cotton Candy Machine with its height and width dimensions indicated.
8. Warranty and Support
For warranty information or technical support, please refer to the product packaging or contact Nostalgia customer service directly. Keep your purchase receipt as proof of purchase for any warranty claims.
Nostalgia Customer Service:
- Visit the official Nostalgia website for contact details and support resources.
- Refer to the contact information provided in the original product packaging.
Ask a question about this manual
Ask about setup, troubleshooting, compatibility, parts, safety, or missing instructions. Manuals+ will review the question and use this page’s manual context to help answer it.