Introduction
This manual provides detailed instructions for the installation, operation, and maintenance of your Cooler Master Silencio 550 PC case. Designed for quiet operation, the Silencio 550 offers a spacious interior for ATX and Micro-ATX motherboards, efficient cooling, and sound-dampening features. Please read this manual thoroughly before beginning the installation process.

Figure 1: Front-side view of the Cooler Master Silencio 550 PC Case.
Safety Information
Always observe the following safety precautions:
- Disconnect the power supply from the wall outlet before installing or removing any components.
- Wear an anti-static wrist strap to prevent electrostatic discharge (ESD) damage to components.
- Handle components carefully to avoid physical damage.
- Ensure proper ventilation around the PC case to prevent overheating.
- Keep the case away from liquids and excessive humidity.
Package Contents
Verify that all items are present in the package:
- Cooler Master Silencio 550 PC Case
- Accessory Box (screws, cable ties, standoffs, etc.)
- User Manual (this document)
Features
The Cooler Master Silencio 550 is engineered for a quiet computing experience without compromising performance. Key features include:
- Sound Dampening: High-density foam lining on the side panels and front door significantly reduces noise from internal components.
- Optimized Airflow: Designed for efficient cooling with pre-installed 120mm fans and support for additional fans.
- Front I/O Panel: Conveniently located USB 3.0, USB 2.0, audio ports, and an SD card reader behind a sleek front door.
- Hot-Swap X-Dock: A 3.5"/2.5" hot-swap bay for quick and easy drive access.
- Tool-less Design: Simplifies installation of optical drives and hard drives.
- Cable Management: Ample space behind the motherboard tray for clean cable routing.

Figure 2: Interior view of a side panel showing the sound dampening foam.
Setup and Installation
Follow these steps to install your PC components into the Silencio 550 case:
- Prepare the Case: Place the case on a flat, stable surface. Remove the side panels by unscrewing the thumbscrews at the rear and sliding them backward.
- Install Motherboard: Install the necessary motherboard standoffs into the motherboard tray. Carefully align your ATX or Micro-ATX motherboard with the standoffs and secure it with screws. Ensure the I/O shield is properly seated in the rear opening.
- Install Power Supply (PSU): Position the PSU at the bottom rear of the case, aligning it with the mounting holes. Secure it with screws from the rear.
- Install Storage Drives:
- 3.5" HDDs: Use the provided rails to mount 3.5" hard drives into the drive cages. Slide the drives into the bays until they click into place.
- 2.5" SSDs/HDDs: Use the included 2.5" adapter bracket to mount SSDs or 2.5" HDDs into a 3.5" bay.
- Optical Drives (5.25"): Remove the desired 5.25" bay cover from the front. Slide the optical drive into the bay from the front and secure it using the tool-less locking mechanism.
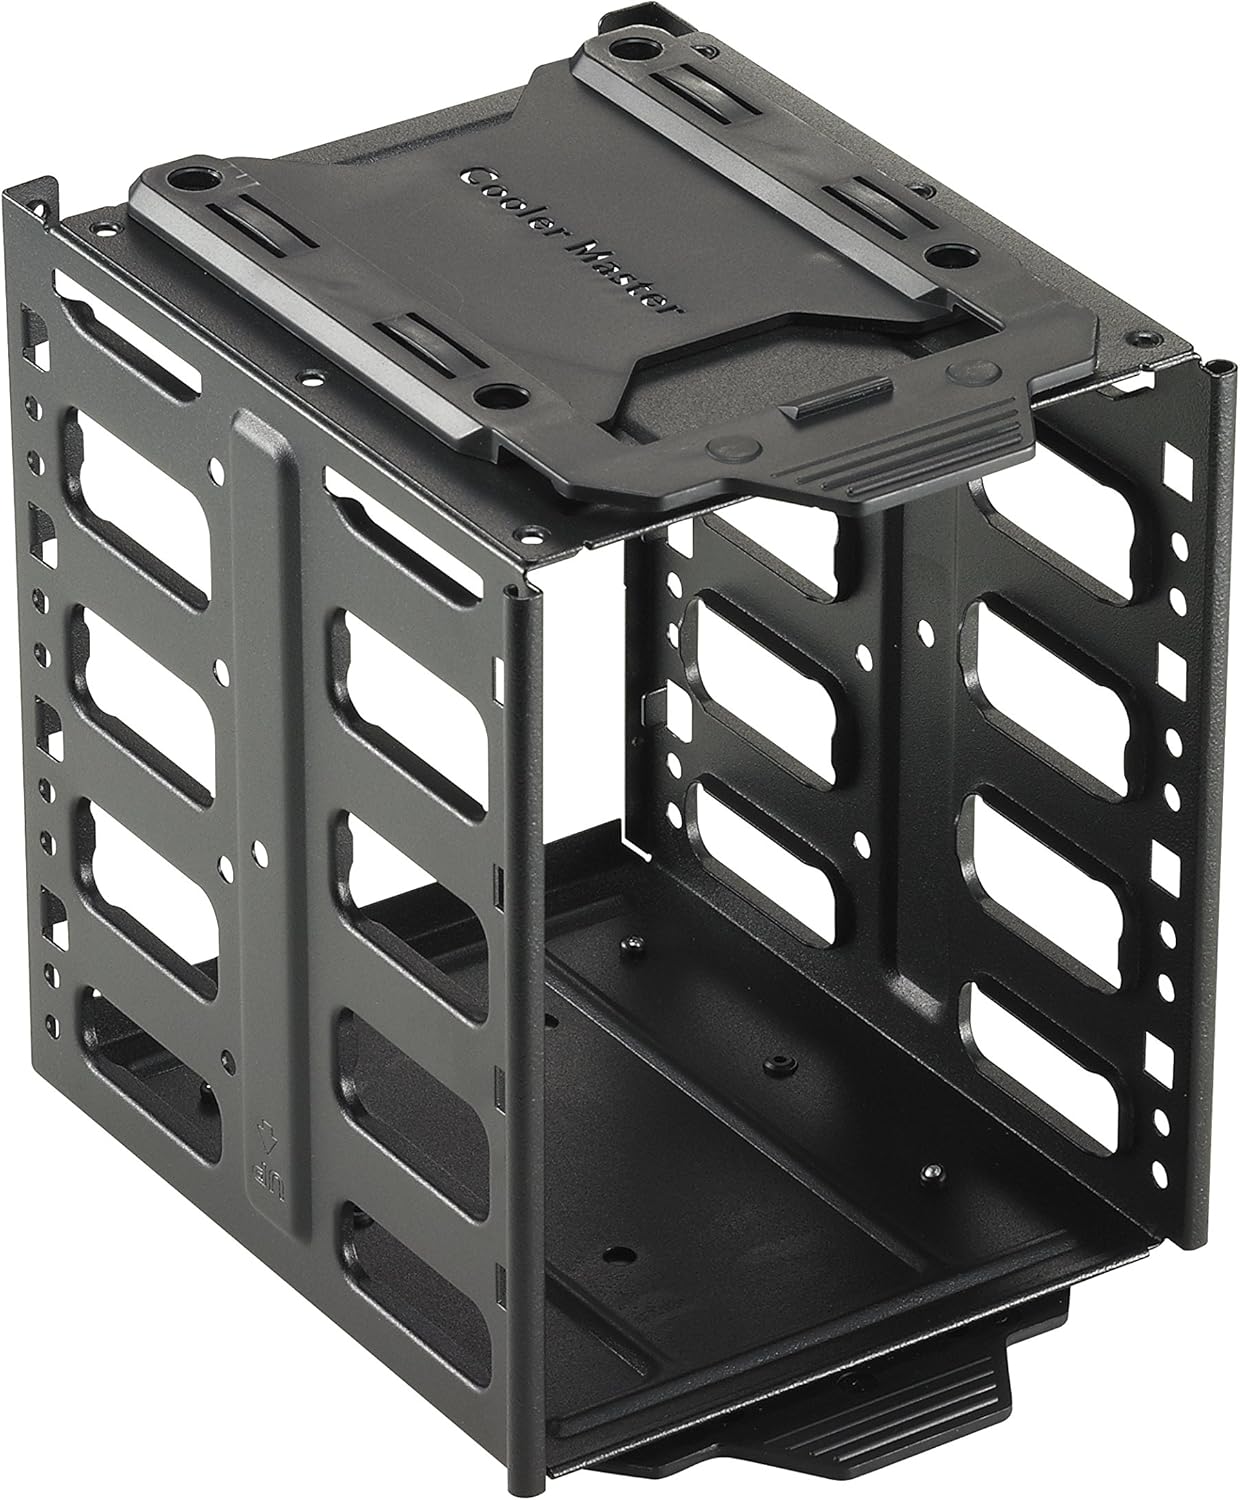
Figure 3: Removable HDD cage for drive installation.
- Install Expansion Cards: Remove the necessary PCI slot covers at the rear of the case. Insert your graphics card or other expansion cards into the motherboard's PCI-E/PCI slots and secure them with screws.
- Cable Management: Route all power cables, SATA cables, and front panel cables through the cutouts in the motherboard tray. Utilize the space behind the tray to organize and hide cables, ensuring optimal airflow. Connect all necessary cables to your components and motherboard.
- Final Assembly: Once all components are installed and cables are managed, reattach the side panels.

Figure 4: Internal view of the case with typical PC components installed.

Figure 5: Rear view of the case, highlighting the I/O panel cutout and rear fan.
Operating the Case
The Silencio 550 is designed for straightforward operation:
- Power On/Off: Use the power button located on the top front panel to turn your system on or off.
- Front Panel Access: The front door can be opened to reveal the 5.25" drive bays, the hot-swap X-dock, and the front I/O ports (USB 3.0, USB 2.0, Audio In/Out, SD Card Reader).
- Hot-Swap X-Dock: To use the hot-swap bay, simply slide a compatible 3.5" or 2.5" SATA drive into the slot. Ensure your motherboard and operating system support hot-swapping for safe removal.

Figure 6: Front panel with the door open, revealing the hot-swap X-dock and optical drive bays.
Maintenance
Regular maintenance helps ensure optimal performance and longevity of your PC case:
- Dust Filters: The Silencio 550 includes removable dust filters on the front and bottom (for the PSU intake). Periodically remove and clean these filters to maintain good airflow and prevent dust buildup inside the case.
- Cleaning: Use a soft, dry cloth to wipe down the exterior of the case. For stubborn marks, a slightly damp cloth can be used, followed by a dry one. Avoid abrasive cleaners or solvents.
- Internal Cleaning: With the system powered off and unplugged, use compressed air to gently clear dust from internal components and fans.
Troubleshooting
If you encounter issues with your PC build, consider the following common troubleshooting steps:
- No Power: Ensure all power cables (PSU to wall, PSU to motherboard, CPU, GPU) are securely connected. Check the power button connection to the motherboard.
- Excessive Noise: Verify that all fans (CPU, GPU, case fans) are properly mounted and free from obstructions. Check for loose cables or components that might be vibrating. The Silencio 550's sound dampening should minimize fan noise.
- Overheating: Ensure proper airflow by checking fan orientation and cleaning dust filters. Verify CPU cooler and GPU cooler are functioning correctly.
- Front Panel Ports Not Working: Check that the front panel cables (USB, audio) are correctly connected to the motherboard headers.
For more complex issues, consult the manuals for your individual PC components (motherboard, CPU, GPU, etc.) or seek professional assistance.
Specifications
| Feature | Specification |
|---|---|
| Model Name | Silencio 550 |
| Model Number | RC-550-KKN1 |
| Case Type | Mid Tower |
| Dimensions (L x W x H) | 21 x 50.5 x 45.15 cm (approx. 8.27 x 19.88 x 17.78 inches) |
| Weight | 9.2 kg (approx. 20.28 lbs) |
| Color | Black |
| Materials | Steel, Plastic, Sound Dampening Foam |
| Motherboard Compatibility | ATX, Micro-ATX |
| 5.25" Drive Bays | 3 (external) |
| 3.5" Drive Bays | 7 (internal) |
| 2.5" Drive Bays | 2 (via 3.5" adapter, included) |
| Expansion Slots | 7 |
| I/O Panel | 1x USB 3.0, 1x USB 2.0, Audio In/Out, SD Card Reader |
| Cooling Method | Air |
| Pre-installed Fans | 1x 120mm Front, 1x 120mm Rear |
| PSU Mounting Type | Bottom Mount |
Warranty and Support
For warranty information, technical support, and additional resources, please visit the official Cooler Master website or contact their customer service department. Keep your proof of purchase for warranty claims.


