1. Introduction
This manual provides essential information for the proper use and maintenance of your PRECISION Professional Tattoo Needle Bars with Round Tip. Please read these instructions carefully before use to ensure safety and optimal performance. These needle bars are designed for professional tattoo artists to custom assemble tattoo needles.
2. Product Overview
The PRECISION Professional Tattoo Needle Bars are crafted from stainless steel, measuring 4 ¾ inches in length. They feature a round tip and a loop end with a diameter of 2mm-2.5mm, designed for attaching to a tattoo machine's nipple. These bars are intended for custom assembly of tattoo needles, allowing artists to create specific needle configurations for various tattooing tasks such as color packing, shading, or fine lines.
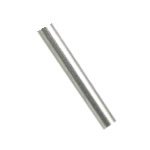
Image 1: A single PRECISION Professional Tattoo Needle Bar, showing its stainless steel construction and round tip.
Key Features:
- Quantity: 100 bars per pack.
- Bar Size: 4 ¾ inches (approximately 12.06 cm) long.
- Bar Loop Size: 2mm-2.5mm diameter for secure attachment.
- Material: Stainless steel construction for durability and hygiene.
- Tip Type: Round tip end.
3. Setup and Assembly
These needle bars are components for custom tattoo needle assembly. They are not pre-assembled needles. The process involves attaching individual tattoo needles to the bar in a desired configuration.
Required Tools and Materials (Not Included):
- Sterile tattoo needles (loose)
- Soldering iron and solder (lead-free, tattoo-grade)
- Magnifying lamp or loupe
- Sterile gloves and clean workspace
- Appropriate sterilization equipment (autoclave)
Assembly Steps:
- Preparation: Ensure your workspace is clean and sterile. Wear sterile gloves.
- Needle Selection: Select the desired number and type of loose tattoo needles for your configuration (e.g., liners, shaders).
- Arrangement: Carefully arrange the selected needles onto the round tip of the needle bar, ensuring even spacing and alignment according to your desired pattern.
- Soldering: Using a soldering iron and tattoo-grade solder, carefully solder the needles to the bar. Ensure strong, smooth joints without excess solder that could impede needle movement or hygiene.
- Inspection: Visually inspect the assembled needle for any defects, loose needles, or sharp edges. Ensure the needles are perfectly aligned and securely attached.
- Sterilization: After assembly, the entire needle bar with attached needles MUST be thoroughly cleaned and sterilized using an appropriate method (e.g., autoclave) before any use on skin. Follow strict sterilization protocols.
4. Operating Instructions
Once assembled and sterilized, the custom tattoo needle bar is ready for use with a compatible tattoo machine.
Usage:
- Machine Compatibility: Insert the loop end of the assembled needle bar into the nipple of your tattoo machine's armature bar. Ensure a snug and secure fit.
- Tube Selection: Use a sterile tattoo tube that matches the size and configuration of your custom-assembled needle.
- Depth Adjustment: Adjust the needle depth according to your tattooing technique and client's skin.
- Single Use: Custom-assembled tattoo needles, like all tattoo needles, are strictly for single-use only. Dispose of safely after each client.
5. Maintenance and Care
Proper handling and storage are crucial for maintaining the integrity of the needle bars before assembly.
Before Assembly:
- Storage: Store needle bars in their original packaging in a clean, dry environment, away from direct sunlight and extreme temperatures.
- Handling: Handle bars with clean, gloved hands to prevent contamination.
- Inspection: Before assembly, inspect each bar for any signs of damage, bending, or corrosion. Do not use damaged bars.
After Assembly (Pre-Sterilization):
- Cleaning: Thoroughly clean the assembled needle bar to remove any soldering residue or contaminants before sterilization. Use appropriate cleaning solutions designed for tattoo equipment.
- Sterilization: Sterilize immediately after cleaning. Follow manufacturer guidelines for your sterilization equipment (e.g., autoclave cycles, chemical sterilants).
6. Troubleshooting
This section addresses common issues related to the needle bars themselves, prior to or during the assembly process.
Issue: Needles not attaching securely to the bar.
- Possible Cause: Insufficient heat from soldering iron, incorrect solder type, or improper technique.
- Solution: Ensure soldering iron is at the correct temperature. Use high-quality, lead-free tattoo-grade solder. Practice soldering technique to achieve strong, clean joints.
Issue: Needle bar appears bent or damaged.
- Possible Cause: Mishandling during storage or assembly.
- Solution: Do not attempt to straighten bent bars as this can weaken the material. Discard and use a new, undamaged bar.
Issue: Loop end does not fit tattoo machine nipple.
- Possible Cause: Incompatible machine or nipple size.
- Solution: Verify the diameter of your machine's nipple. The needle bar loop is 2mm-2.5mm. If incompatible, consider using a different machine or an adapter if available.
7. Specifications
| Attribute | Detail |
|---|---|
| Product Name | Professional Tattoo Needle Bars with Round Tip |
| Brand | PRECISION |
| Model (ASIN) | B004VKBPDG |
| Quantity | 100 bars |
| Bar Length | 4 ¾ inches (approx. 12.06 cm) |
| Loop Diameter | 2mm - 2.5mm |
| Material | Stainless Steel |
| Tip Type | Round Tip |
| UPC | 644287729874 |
8. Warranty and Support
As these are components for custom assembly, specific warranty information for the assembled product is dependent on the artist's workmanship and the components used. For issues related to manufacturing defects of the PRECISION Professional Tattoo Needle Bars themselves, please contact your retailer or the manufacturer directly with your purchase details.
For further support or inquiries, please refer to the contact information provided by your supplier.


